Matsunosuke's Story: Chapter 1
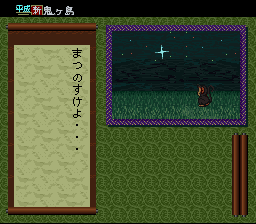
In a dream, Matsunosuke is visited by Hinoesama. He is told of an evil dragon, the Avatar of Darkness, which feeds on the souls of human beings and transforms them into Oni.
Many years ago, the dragon was sealed in a box and kept in the care of Princess Oto of the Ryukujin people. Over the years she entrusted care of the box to a dog, a monkey and a pheasant, whose descendents became guardians of the box. But a foolish man broke the seal on the box and freed the dragon. Matsunosuke is the ancestor of the monkey who helped Princess Oto, and he must join the group of heroes who are fighting to stop the end of the world.
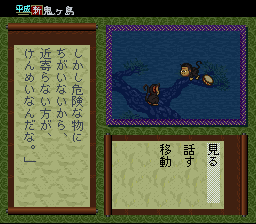
Matsunosuke wakes up. He is in his cave. If he wants to leave on this very important journey he will have to get permission from the Boss.
- 旅に出る (Leave on a Journey)
- 移動 (Move) Left
- 歩く (Walk) All the way left to the Spa
- 話す (Talk) ボス (Boss)
- 話す (Talk) ボス (Boss)
- 話す (Talk) ボス (Boss)
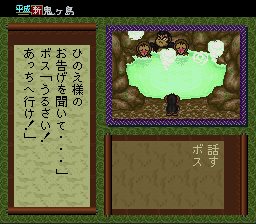
The boss has decided they will continue to guard the Water Shrine in the valley temple. Nobody may leave.
- 移動 (Move) Right
- 歩く (Walk) right to Monkey Room 2 (second cave)
- 話す (Talk) ボスの事 (About the Boss)
- 話す (Talk) 宮水の事 (About the Water Shrine)
The boss has been in a bad mood lately because the Elder is sick. The water at the shrine is said to heal all ills. Matsunosuke decides to go into the shrine and fetch some water to heal the Elder.
- 移動 (Move) Down
- 歩く (Walk) in front of Kakinosuke (climb the cliff, monkey on the far right)
- 話す (Talk)
Kakinosuke wants to come with you when you go on your journey. You agree to bring him along.
- 歩く (Walk) in front of Kunugimaru (next monkey on the left)
- お見舞い (Enquiry)
- 約束する (Promise)
- 歩く (Walk) up to the 3 little monkeys (to the left)
- 怒る (Angry) or あそぶ (Play)
- 歩く (Walk) to the cave entrance (continue left)
- 移動 (Move) Up
- 歩く (Walk) in front of the right stone statue
- 見る (Look)
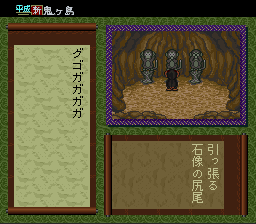
- 引っ張る (Pull) 石像の尻尾 (Statue's Tail)
- 歩く (Walk) in front of the left stone statue
- 引っ張る (Pull) 石像の尻尾 (Statue's Tail)
- 歩く (Walk) in front of the middle stone statue
- 引っ張る (Pull) 石像の尻尾 (Statue's Tail)
- 歩く (Walk) left, up, right, up to Mural Room 1
- 歩く (Walk) in front of the mural
- 見る (Look)
- 入れる (Put) 手 (Hand)
After solving the first riddle of the shrine, putting your hand in the second mural doesn't work. There must be another way through.
- 歩く (Walk) down, left into the pit
- 温泉に入る (Get in Spring)
- 出ない (Get out)
- 移動 (Move) Right
- 歩く (Walk) to Monkey Room 1 (first cave)
- 移動 (Move) Down
- 歩く (Walk) in front of Takemaru (dancing monkey to the right)
- 話す (Talk)
- うん (Yeah)
- うん (Yeah)
- 歩く (Walk) to the Monkey Valley Gate (to the right)
- 見る (Look) くりのすけ (Kurinosuke)
- 移動 (Move) Left
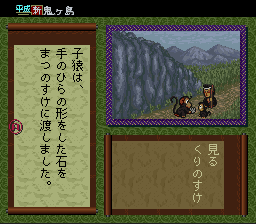
After chasing the little monkey through the village, Matsunosuke gets the Hand Stone, which will unlock the second door in the shrine.
- 歩く (Walk) up and left to the cave entrance
- 移動 (Move) Up
- 歩く (Walk) left, up, right, up to Mural Room 1 and stand in front of the Mural
- 入れる (Put) 石 (Stone)
- 歩く (Walk) right, up, left, up to Mural Room 2 (avoid the dark spots on the ground - these are traps)
- 歩く (Walk) in front of the Mural
- 見る (Look)
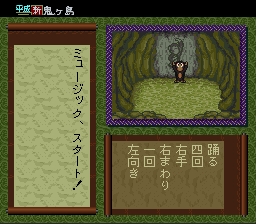
To open the final door, Matsunosuke will have to do the dance he learned from Takemaru.
- 踊る (Dance)
- 四回 (4 Times)
- 右手 (Right Hand)
- 右まわり (Turn Right)
- 一回 (1 Time)
- 左向き (Left Direction)
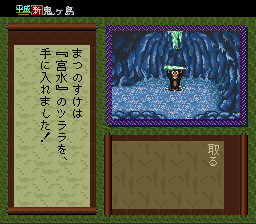
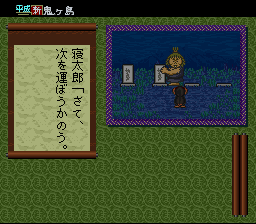
The final door opens and Matsunosuke reaches the water shrine. However, how will he transport the water back to the Elder?
- 歩く (Walk) 宮水の泉 (Water Shrine)
- 歩く (Walk) Move in front of the Water Shrine
- 取る (Take)
- 手ですくう (Hand Scoop)
- 考える (Think)
- 口にふくむ (Use Mouth)
- 歩く (Walk)
- 考える (Think)
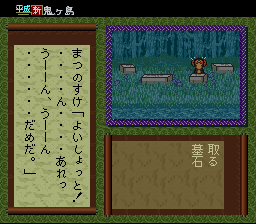
Matsunosuke can't work it out and loses his temper, knocking over the water shrine and spilling it. Now what can he do?
- 歩く (Walk) left, down, right to the room in front of the Water Shrine
- 歩く (Walk) on top of the trap (dark patch on floor)
- 歩く (Walk) in front of the icicle
- 見る (Look)
- 取る (Take)
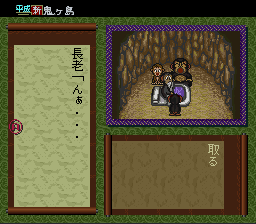
The frozen shrine water in the ice cave is perfect. He takes it back to the Elder and gives him some of the water. The Elder sits bolt upright in no time at all. For saving the Elder, the Boss gives Matsunosuke special permission to go on his journey.
Matsunosuke's Story: Chapter 2

Matsunosuke and Kakinosuke are off travelling to find the heroes who will stop the Avatar of Darkness. They are still on the path from the valley, however, when Kakinosuke decides he wants to eat.
- 話す (Talk) かきのすけ (Kakinosuke)
- 話す (Talk) かきのすけ (Kakinosuke)
- 話す (Talk) かきのすけ (Kakinosuke)
- 賛成 (Agree)
- 見る (Look) まわり (Surroundings)
- 話す (Talk) かきのすけ (Kakinosuke)
The two sit down to eat. Matsunosuke finishes his lunch faster, and decides he is going to investigate the nearby village.
- 話す (Talk) かきのすけ (Kakinosuke)
- 移動 (Move) Right
- 移動 (Move) Right
- 移動 (Move) Right
- 移動 (Move) Right
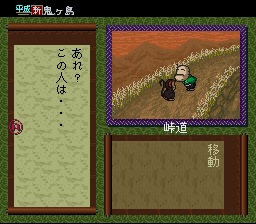
- 見る (Look) 街道 (Main Road)
The village is deserted, except for one house with a thunderous snoring coming from inside. Gravestones have been knocked over in the graveyard, and on the other side of the village is the main road. The village would be a good shortcut on their journey.
- 移動 (Move) Left
- 移動 (Move) Left
- 移動 (Move) Left
- 移動 (Move) Left
- 話す (Talk) かきのすけ (Kakinosuke)
- 話す (Talk) かきのすけ (Kakinosuke)
- 話す (Talk) かきのすけ (Kakinosuke)
- 話す (Talk) かきのすけ (Kakinosuke)
- 見る (Look) まわり (Surroundings)

Matsunosuke reports back to Kakinosuke, but he wants to rest a little longer. When they both wake up again it is the middle of the night. Regardless, they decide to press on through the village to the main road.
- 移動 (Move) Right
- 移動 (Move) Right
- 移動 (Move) Right
- 話す (Talk) かきのすけ (Kakinosuke)
- 聞く (Listen)
- 話す (Talk) かきのすけ (Kakinosuke)
- 聞く (Listen)
- 移動 (Move) Up
- 行ってみる (Do It)
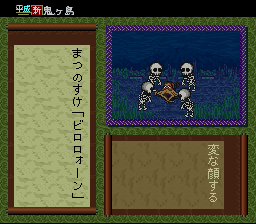
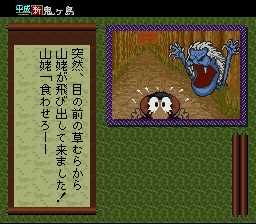
The pair hear a strange conversation on the other side of the grass. They burst through and see four skeletons. Kakinosuke escapes as fast as he can, while Matsunosuke is trapped by the advancing skeletons.
- 移動 (Move) Down
- 話す (Talk) 骸骨 (Skeleton)
- 変な顔する (Silly Face)
- 踊る (Dance)
- いいよ (I Do)
The skeletons are amused by Matsunosuki's antics. They tell him they were Elders of the village, and when their time came to move on to the afterlife the Oni attacked the village, knocked over their graves and scared away any villagers that could help. Now they are trapped on Earth until somebody puts their graves back.
Matsunosuke agrees to help, but he's not sure he can do it alone. He tells them he heard a villager snoring. The skeletons laugh and say that'll be Netaro, who sleeps so heavily only thunder will wake him. The village had a special Thunder Drum made for that very purpose, but it went missing in the Oni attack.
- 話す (Talk) 骸骨 (Skeleton)
- 話す (Talk) 骸骨 (Skeleton)
- 移動 (Move) Down
- 移動 (Move) Left
- 取る (Take) 墓石 (Gravestone)
- 移動 (Move) Left
- 移動 (Move) Left
- 移動 (Move) Left
- 見る (Look) 松の木 (Pine Tree)
- 移動 (Move) Up
Kakinosuke escaped up the tree, terrified. When Matsunosuke tries to talk him round, Kakinosuke loses his grip and slides onto a strange object behind him that shocks him awake.
- 見る (Look) まわり (Surroundings)
- 話す (Talk) かきのすけ (Kakinosuke)
- 話す (Talk) かきのすけ (Kakinosuke)
- 見る (Look) 何か (Something)
- 話す (Talk) かきのすけ (Kakinosuke)
- たたく (Beat) 太鼓? (Drum?)
- 移動 (Move) Right
- 移動 (Move) Right
- 話す (Talk) 寝太郎 (Netaro)
The Thunder Drum works! Although it destroys the tree and shocks the two monkeys, Netaro is awake. He agrees to help replace the gravestones for the skeletons, but he doesn't know which one goes where. Matsunosuke has to solve the skeletons' riddle to work out where to put them back.
- Press X Button > Press L Button
- Press L Button > Press Y Button
- Press R Button > Press X Button
The graves are returned and each skeleton has some advice to pass on before they move into the afterlife.
- 話す (Talk) 骸骨一 (Skeleton 1)
- もういい (OK)
- 話す (Talk) 骸骨二 (Skeleton 2)
- もういい (OK)
- 話す (Talk) 骸骨三 (Skeleton 3)
- もういい (OK)
- 話す (Talk) 骸骨四 (Skeleton 4)
- もういい (OK)
- 話す (Talk) かきのすけ (Kakinosuke)
The first tells you that you will meet people in the Mysterious Forest. The second says you can reach the forest by crossing the mountains, but beware of the Mountain Witch - and also that "Ceiling Steam" will be important somehow. The third skeleton has heard talk of a "Disk System version". The fourth skeleton tells you not to forget the language of flowers if you are to win Ume's heart.

They depart, and Kakinosuke appears. He found his destination and now he is ready to leave. Matsunosuke decides he will press on towards the mountains and the Mysterious Forest.
Matsunosuke's Story: Chapter 3
Matsunosuke is continuing his journey alone now, but he is still far from the Mysterious Forest.
- 移動 (Move) Right
- 移動 (Move) Right
- 移動 (Move) Right
- 見る (Look) まわり (Surroundings)
- 移動 (Move) Right
Matsunosuke approaches an old man who was waving at him from a hill. It's Mr. Ittai! He asks him how to get to the Mysterious Forest so he can continue his adventure.
- 話す (Talk) いったい (Ittai)
- 話す (Talk) いったい (Ittai)
- 話す (Talk) いったい (Ittai)
Mr. Ittai gives Matsunosuke a coin charm. All he has to do is concentrate and he will see the way he has to go.
- 使う (Use) お札 (Coin) 念じる (Think About) 奇怪々森 (Mysterious Forest)
- 使う (Use) お札 (Coin) 念じる (Think About) 奇怪々森 (Mysterious Forest)
- 念じる (Think About)
- 声に注意 (Warning)
- 声の方へ (Direction)
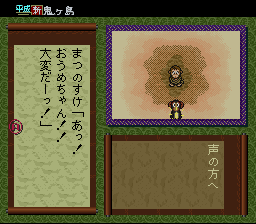
Matsunosuke tries to concentrate on the forest, but he is distracted by a call for help from the mountains. He sees Ome, his beloved, being held in the Lair of the Mountain Witch. He decides he must rescue her before he can join the quest Hinoe sent him on.
- 話す (Talk) いったい (Ittai)
- 山姥の家へ (Lair of the Mountain Witch)
- うん (Yeah)
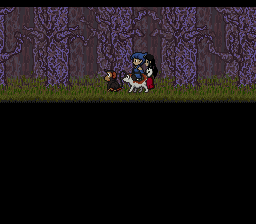
Mr. Ittai's charm sends Matsunosuke charging towards the mountains. When he eventually arrives he is at the top of a cliff near a line of Guardian Deity statues.
- 歩く (Walk) up two screens and the mountain witch will appear. Matsunosuke will automatically escape down one screen, but you have to find a way to hide from the witch.
- Hold down the B Button to run over the muddy puddle and get covered in mud.
- 歩く (Walk) down one screen and right one screen and stand at the end of the line of statues. Don't press any buttons until the witch leaves.
The muddy Matsunosuke blends into the statues. The witch appears and curses that she lost him, returning back the way she came.
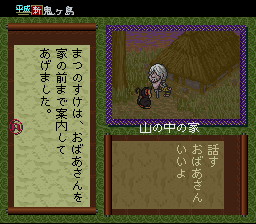
Matsunosuke shakes himself off when the coast is clear and heads back along the path. He comes across a little old lady along the way who needs help getting back to her house.
- 歩く (Walk) back left and up two screens to where the witch appeared.
- 見る (Look) おばあさん (Old Lady)
- 話す (Talk) おばあさん (Old Lady)
- 話す (Talk) おばあさん (Old Lady)
- いいよ (It is Good)
- 見る (Look) おばあさん (Old Lady)
- 見る (Look) まわり (Surroundings)
- 移動 (Move)
- 話す (Talk)
- 話す (Talk)
Matsunosuke tries to decline the old lady's offer of coming in to her house as he has to keep looking for Ume. But it's getting dark and she eventually talks him in.
- 見る (Look) おばあさん (Old Lady)
- 見る (Look) まわり (Surroundings)
- 見る (Look) ナベ (Pan)
- 話す (Talk)
- 話す (Talk)
- 話す (Talk)
- 話す (Talk)
Inside the pan is only water. When Matsunosuke asks what's behind the doors, the old lady says one is a bedroom and the other is a store room for food. The old lady's complexion has changed, but she insists it is simply the lighting. Matsunosuke is invited to sleep the night in the room on the left.
When Matsunosuke wakes up he hears some strange noises. When he asks what it is, the old lady responds that she's just preparing breakfast.
- 聞く (Listen)
- 話す (Talk)
- 聞く (Listen)
- 話す (Talk)
- 起きる (Get Up)
- 歩く (Walk) in front of the sliding door and press A
- 開ける (Open)
- 開ける (Open)
- ける (Kick) 引き戸 (Sliding Door)
- ける! (Kick!)
Matsunosuke decides to get up, but the door is locked fast. He kicks it and a small bit of plaster crumbles off the walls.
- 歩く (Walk) in front of the small hole that appears in the wall
- 見る (Look)
- ほじくる (Dig) カベ (Wall)
- 止めない (Stop)
- 歩く (Walk) back to the (now large) hole in the wall
- ほじくる (Dig) カベ (Wall)
- 止めない (Stop)
- 見る (Look)
- 登る (Climb)
By scraping the plaster off carefully, Matsunosuke avoids drawing the old lady to his room and reveals some beams that will allow him to climb onto the ceiling.
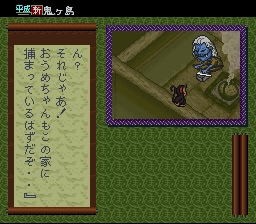
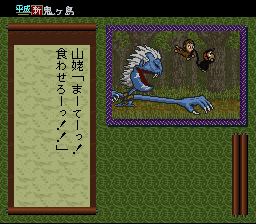
He hears the strange noises again and looks down to see the old woman is actually the Mountain Witch, boiling water to cook the monkey! He moves on a little further and sees Ome tied up in the next room. If he tries to rescue Ome now then he will be trapped in the room with her, so he has no choice but to disable the witch somehow.
- 歩く (Walk) to the steam, behind the witch. Matsunosuke will stop a couple of times, but then you can walk behind it.
- Facing the direction of the beam (as opposed to into the room) 見る (Look) to find a rope tied to the beam. You may have to 歩く (Walk) a couple of times to find the right spot behind the steam.
- 見る (Look) ナワ (Rope)
- ほどく (Untie) ナワ (Rope)
- おりる (Descend) into the witch's room
The witch is now blinded by the boiling water, running back and forth across the room. She is hitting the door on the left.
- 歩く (Walk) in front of the Door Bar on the left door
- はずす (Remove)
- 歩く (Walk) in front of the Sliding Door
- 開ける (Open)
- When the witch runs left into the open room, 閉める (Close) to trap her.
- 歩く (Walk) in front of Door Bar on the left door
- かける (Put Back)
With the witch trapped behind the locked door, Matsunosuke heads to the other room to rescue Ome.
- 歩く (Walk) in front of the Door Bar on the right door
- はずす (Remove)
- 歩く (Walk) in front of the right door
- 開ける (Open)
- 歩く (Walk) through the right door
The two monkeys escape, but the witch also breaks out of the room and gives chase. Ome tells Matsunosuke about timed action scenes and the two escape to the south.
- 話す (Talk)
- 話す (Talk)
- 移動 (Move) Down
- 話す (Talk)
- 話す (Talk)
The witch is behind them and their only option is to jump down the cliff using the small ledges.
- 見る (Look) 下 (Down)
- Action Scene: The screen scrolls down the cliff and up again, and you have to memorise the sequence and press the correct button for each direction before the timer runs out.
Solution: When prompted, Press L, R, L, R, L, L, L
They descend the cliff, but the witch jumps down next to them and attacks.
- Action Scene: The Mountain Witch is chasing behind the monkeys. When either Up or Down is displayed on the screen, press that direction on the Control Pad quickly to dodge her attacks. The pattern here is random.
The witch hits a tree branch and the monkeys reach the top of an even bigger cliff.
- 見る (Look) 下 (Down)
- Action Scene: The same as the first timed cliff jumping action scene, only there are more steps to memorise.
Solution: When prompted, Press L, R, L, L, L, R, L, R, R, R, R, R
They descend the second cliff, but again the witch is right behind them.
- Action Scene: The same as the first witch chasing scene, only this time she will attack you 9 times. After the first few attacks she will speed up her lunges and so you have to press the direction faster.
The monkeys escape again, but they reach a river. If they can't find a way to escape they will surely be eaten. Matsunosuke remembers Mr. Ittai's coin charm.
- 見る (Look) まわり (Surroundings)
- 話す (Talk) おうめ (Ome)
- 使う (Use) お札 (Coin)
- 念じる (Think About)
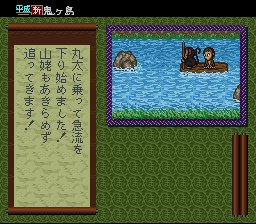
The coin charm makes a log appear in the river. They jump on board just in time, as the witch bursts from the undergrowth behind them.
- Action Scene: There are three stretches of river strewn with rocks. You have to avoid all of the rocks in order to escape the Mountain Witch for good. They either appear Top, Middle or Bottom.
Solution: The rocks appear (first stretch) Bottom, Top / (second stretch) Top, Middle, Bottom, Top / (final stretch) Bottom, Top, Middle, Bottom, Top & Middle together
The witch crashes into the rocks and the monkeys escape her for good. Matsunosuke returns Ome to the monkey valley.
- 見る (Look) おうめ (Ome)
- 話す (Talk) おうめ (Ome)
- 歩く (Walk) in front of Kurinosuke (monkey on the left)
- 話す (Talk)
- もう行くよ (Already Gone)
Ome had been sent to assist Matsunosuke, but had been captured by the witch and used as a lure to bring Matsunosuke. He remembered the skeleton's words and gave Ome the right flowers, and he gets his kiss. The other monkeys tell him that a shortcut to the Mysterious Forest has been found, and that strange people have been seen entering. Matsunosuke knows what he has to do and he runs off to join Donbe, Hikari and Ringo on their mission to Onigashima.
End of Matsunosuke's Story
Continue to Heisei: New Onigashima Walkthrough (Part 3)