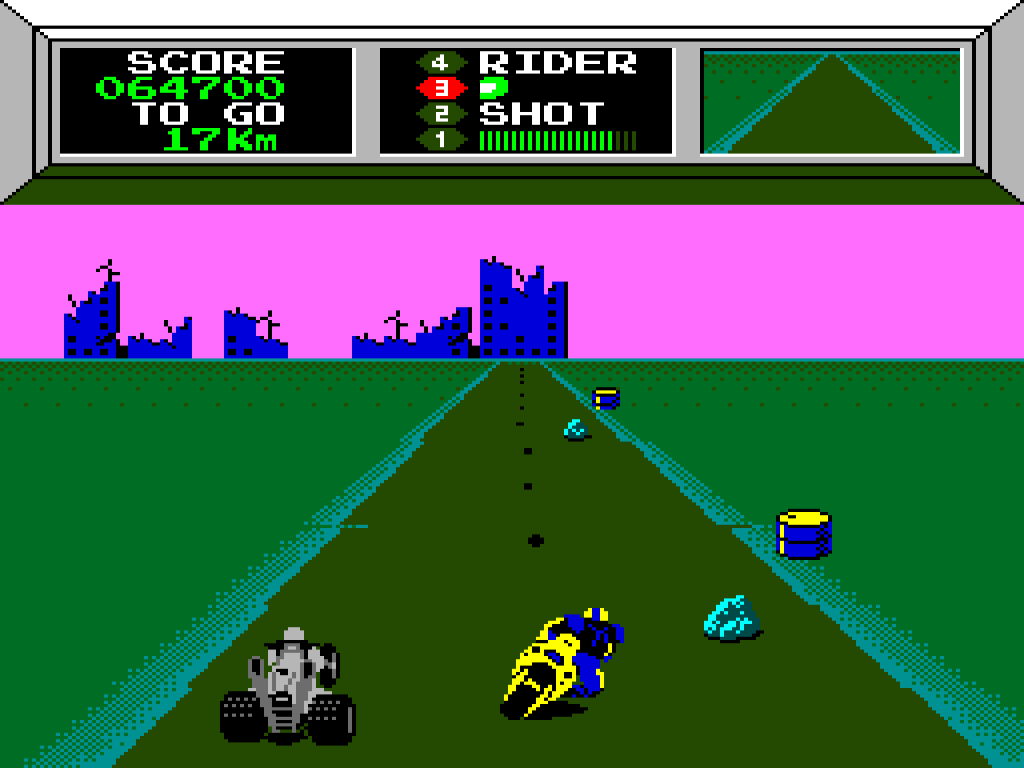
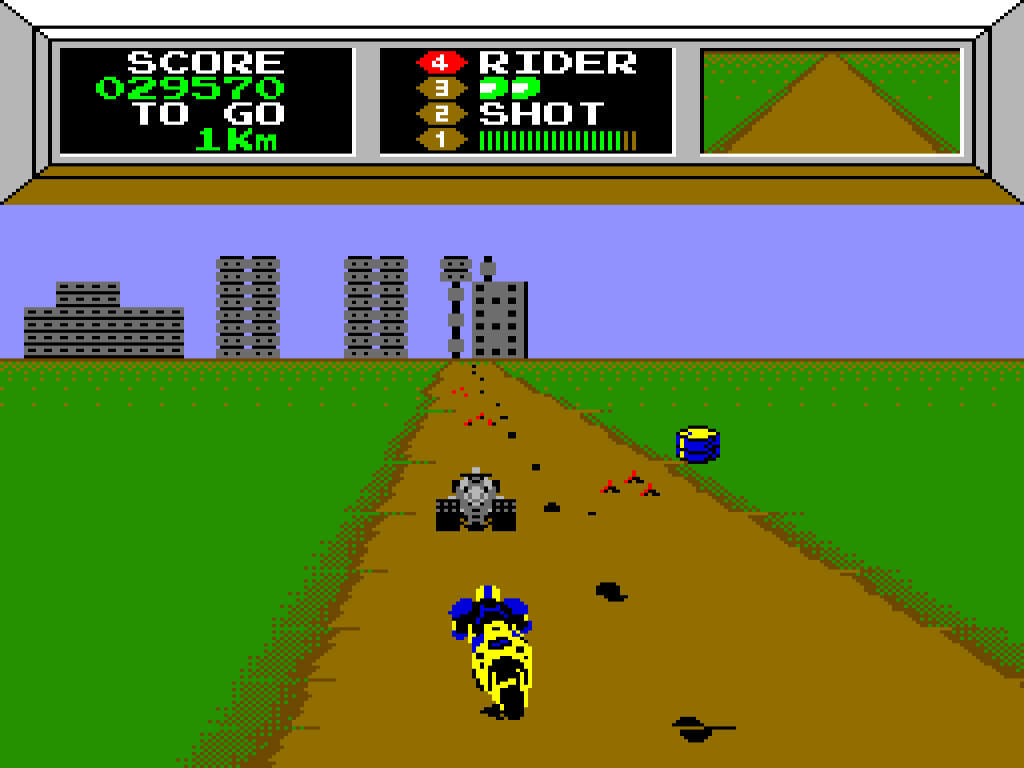
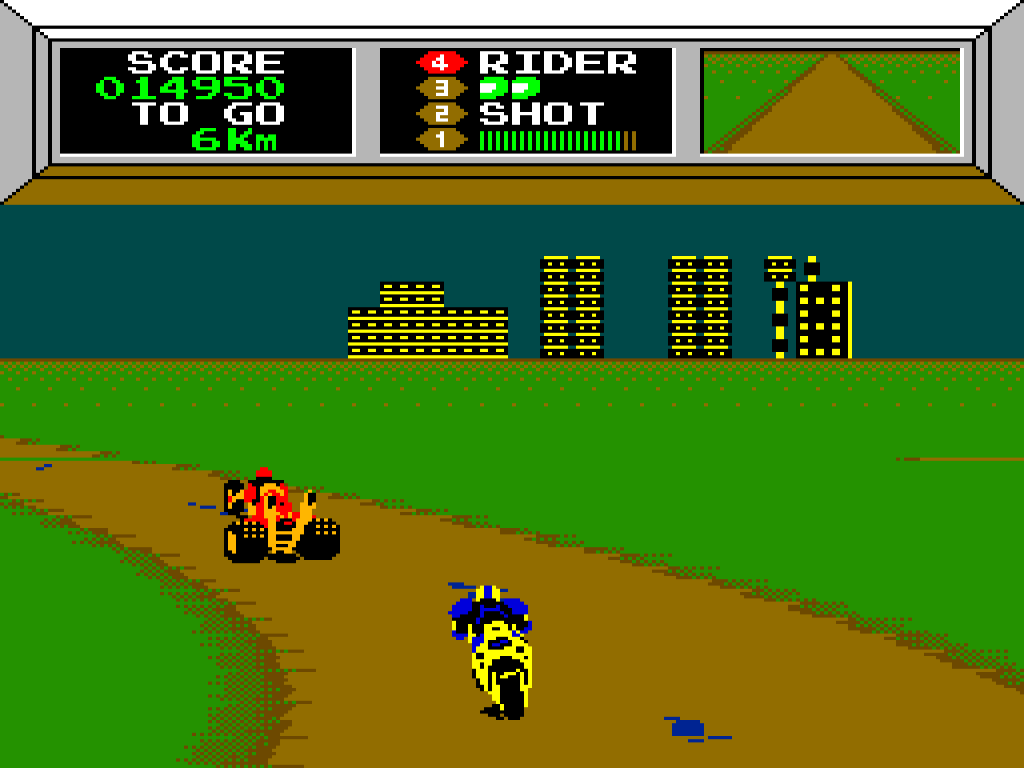
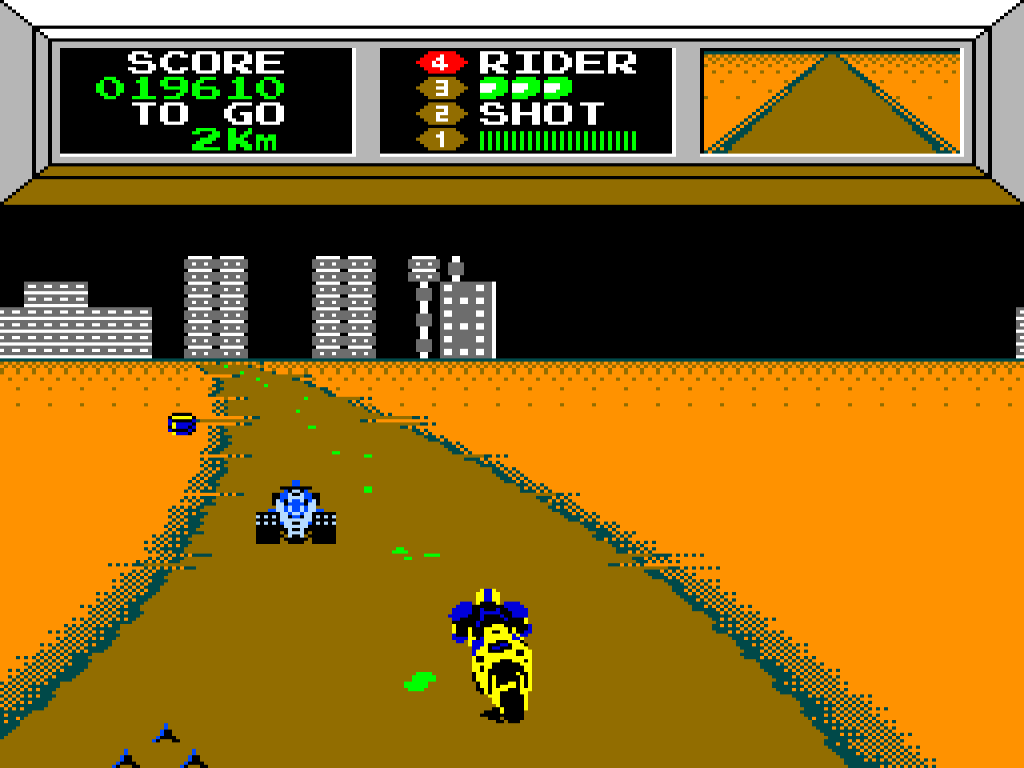
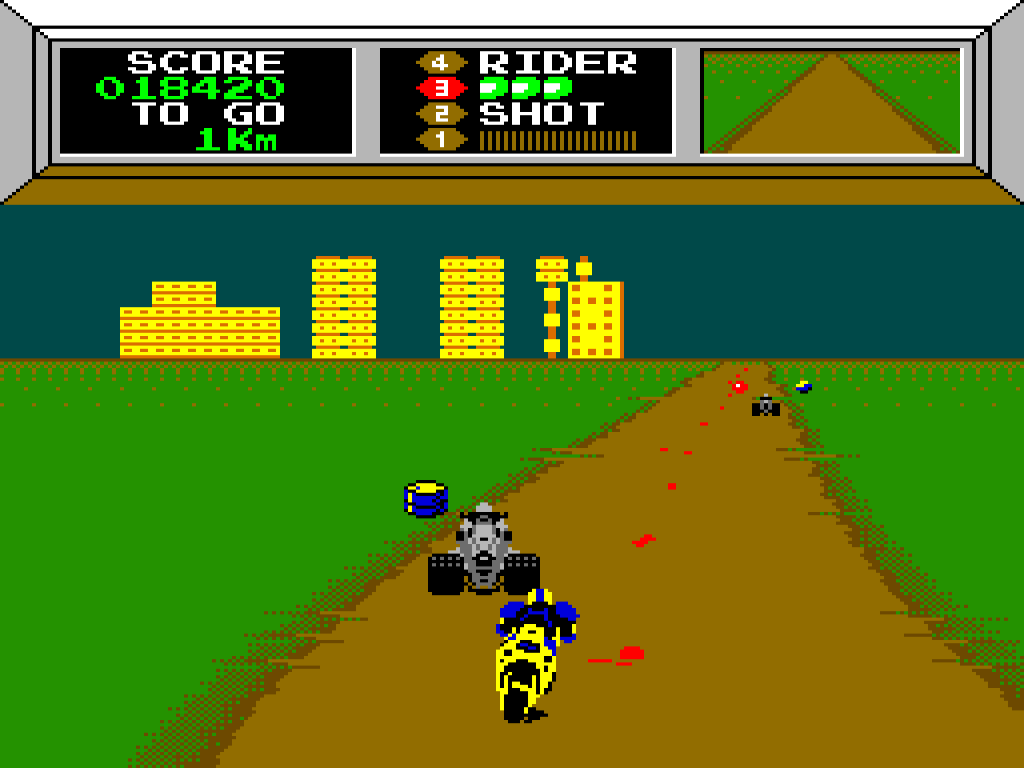
VS. Mach Rider – Fighting Course Version
Objective

Clear ten courses that have been overrun by enemy invaders while you travel from city to city in search of survivors.
Each course has a choice of two routes. After you have cleared 10 courses, the story starts over with a new set of 10 courses. There are 40 routes in total.
The story and course maps are identical to the NES version.
Differences from the NES Version
Gameplay Mechanics
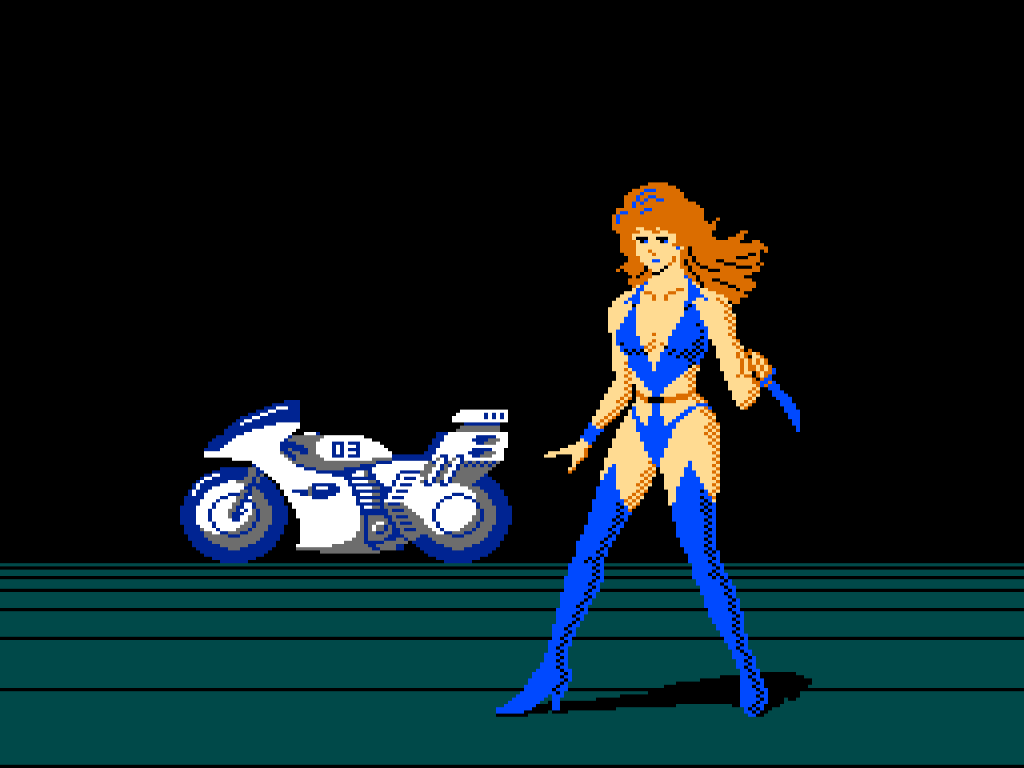
- At the end of each course, you unlock part of a secret picture. Clear 10 courses to reveal the whole picture and Mach Rider's true identity!
- If you lose all your lives and get a Game Over, drop in another coin to continue from where you lost your last life.
- You always earn an extra life after every third stage.
- There is no score tally screen. Points for destroying enemies and obstacles are awarded as you go.
- No method for unlocking power-ups has yet been found. However Mach Rider's changing colour scheme on the title screen and Game Over screen would suggest powering up is still possible.
Enemies & Obstacles
- Bumping Invaders too many times, or crashing into the back of an Invader, can cause you to explode.
- You encounter tougher Invaders much earlier.
- Black Invaders take 10 shots and will sneak up on you if you drive in 3rd gear.
- Oil slicks and Purple Invaders do not appear at all.
- If you stop in one place for too long, Bomber Balls appear and crash into you, even if you stop off-road.
- Icy slip zones appear much earlier.
- There are more courses that are all slip zone.
Techniques
- Prioritise survival over speed. There's no time limit and no opponent to beat.
- There can only be two Invaders on screen at a time. If you encounter a Black Invader, drop to third gear and maintain a safe distance. If you see an Invader in your rear view, speed up temporarily until there are two ahead of you again. This way you can cruise safely to goal without getting into a tussle or draining your shots.
- Most road obstacles are clustered down the left and right sides of the road. Stick to the centre line.
- When you hit an icy slip zone, drop to 3rd gear to maintain grip on the road.
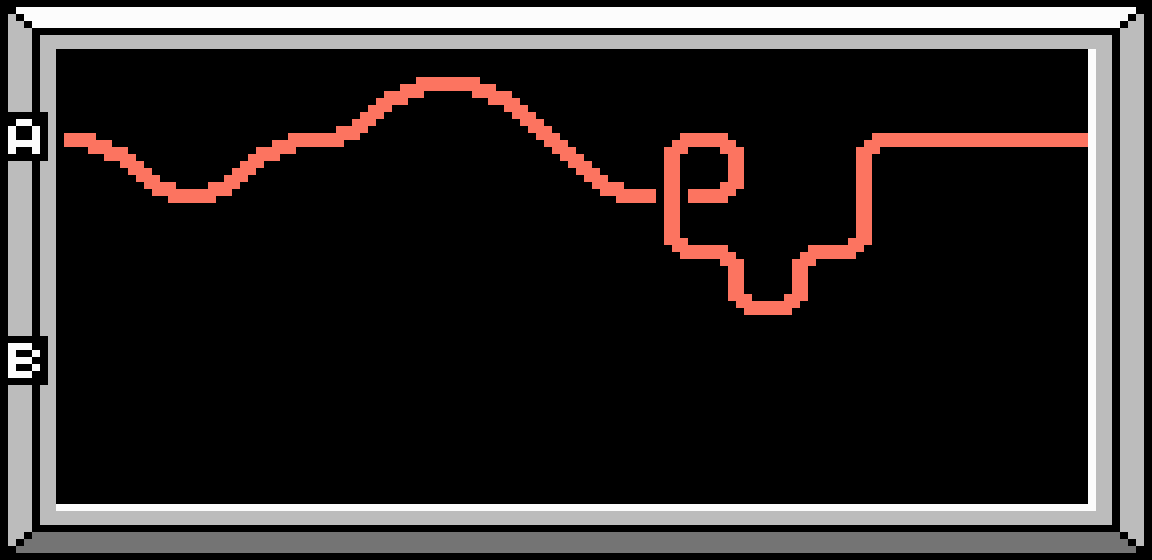
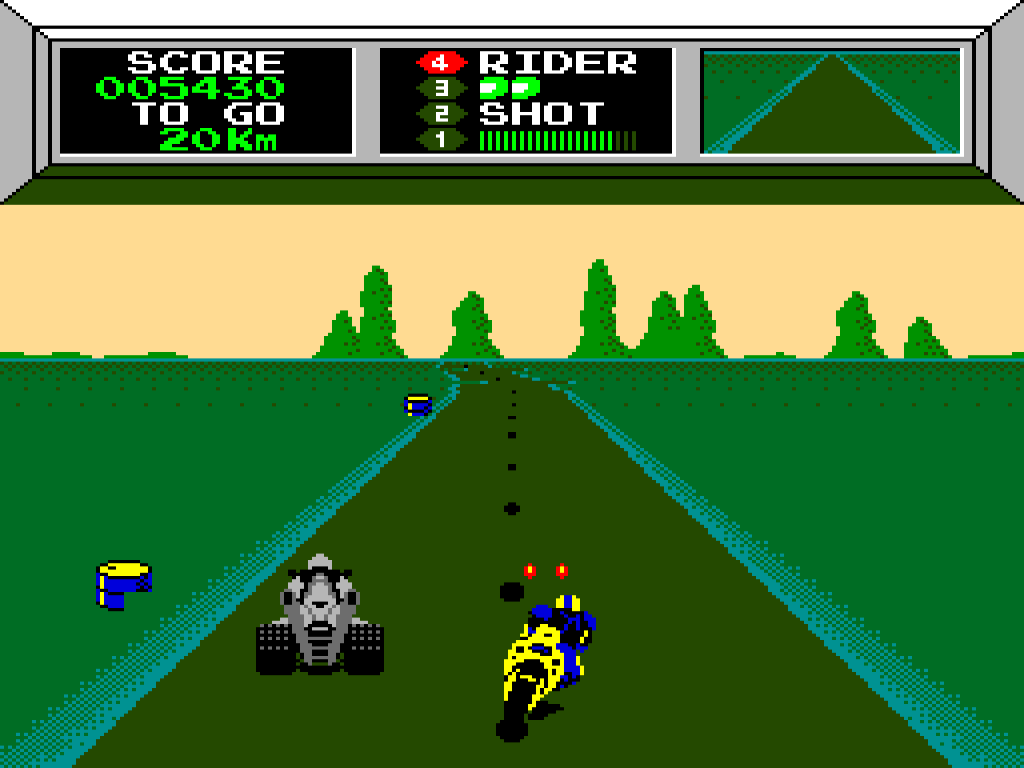
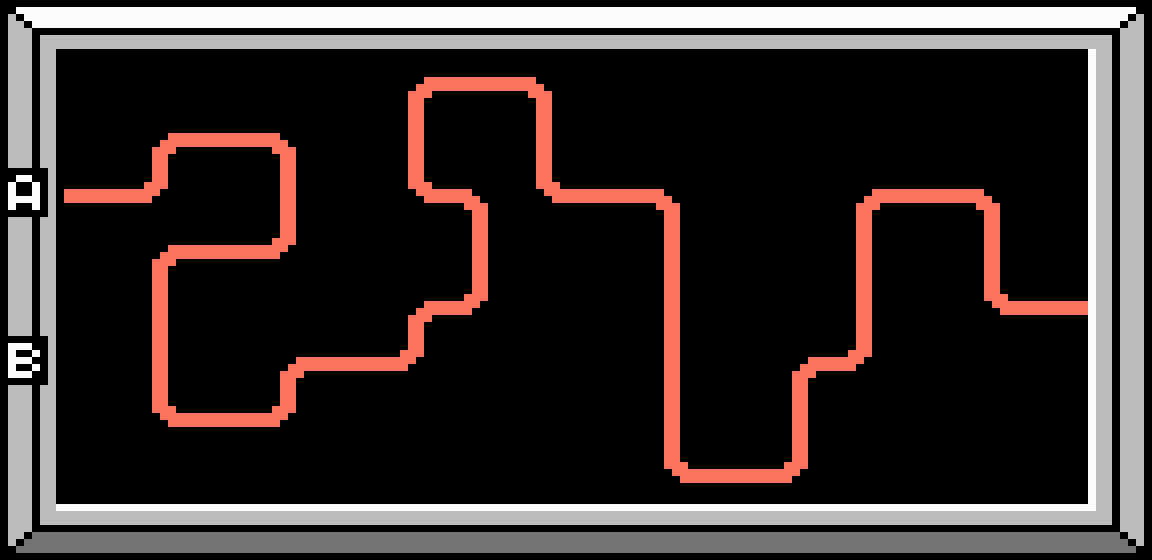
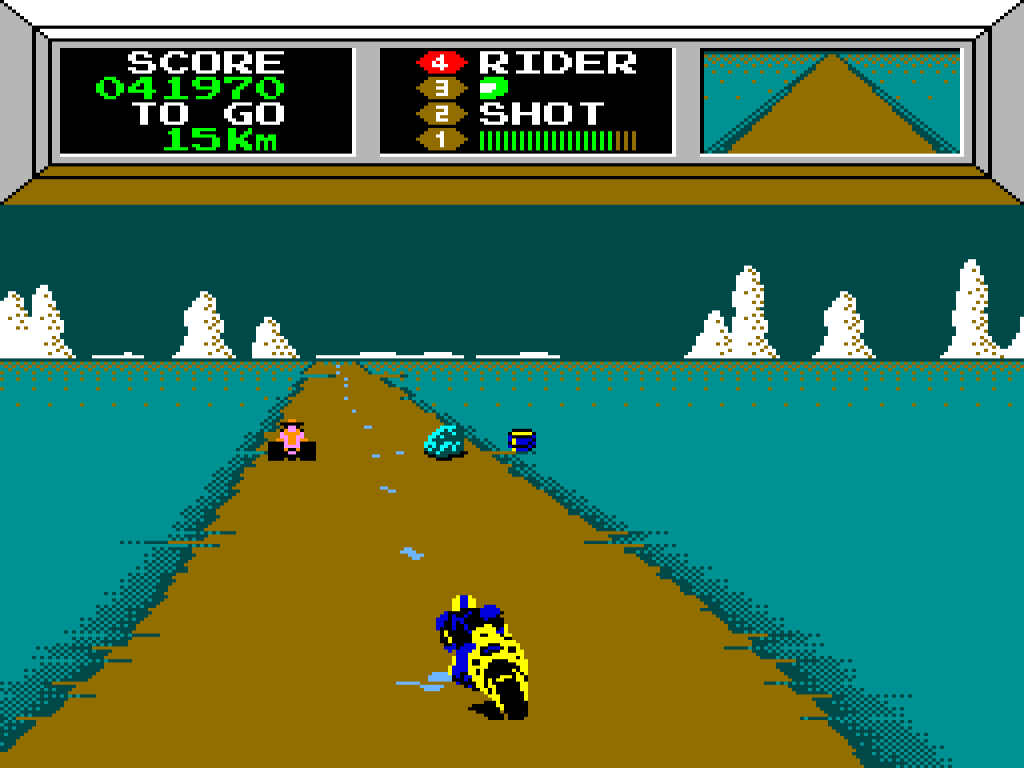
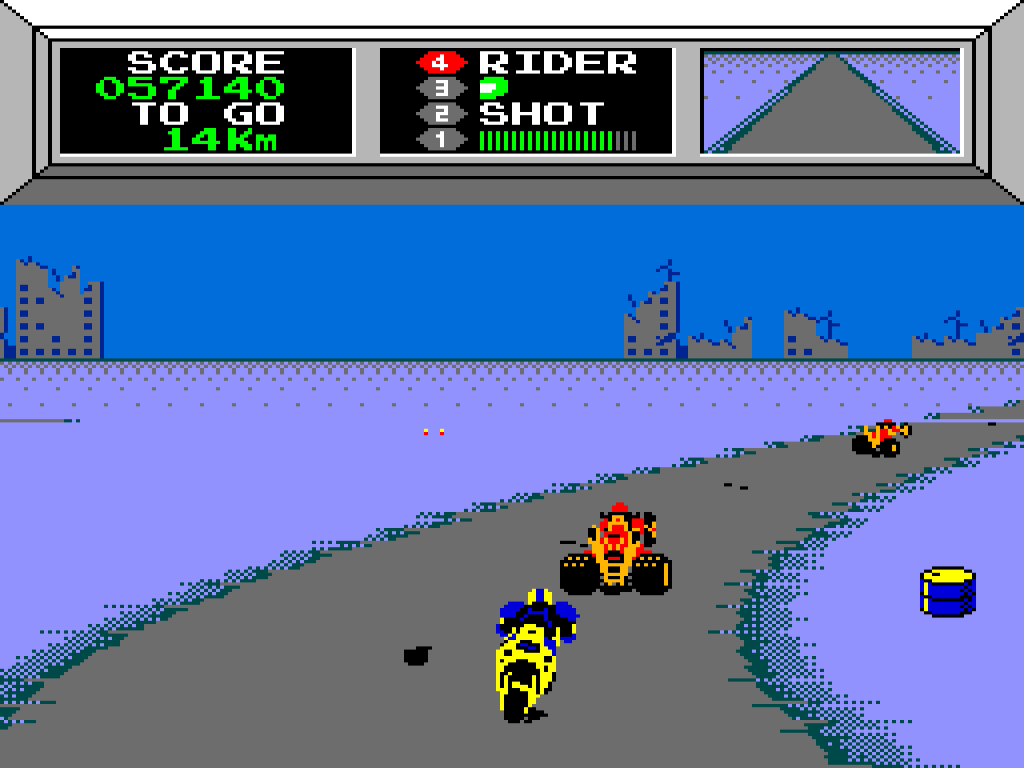
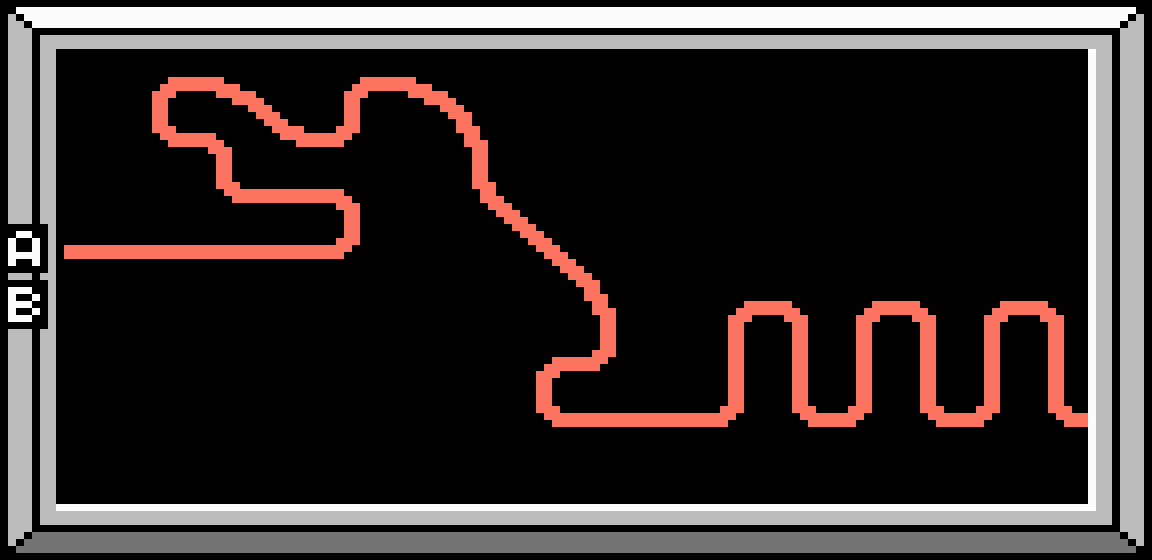
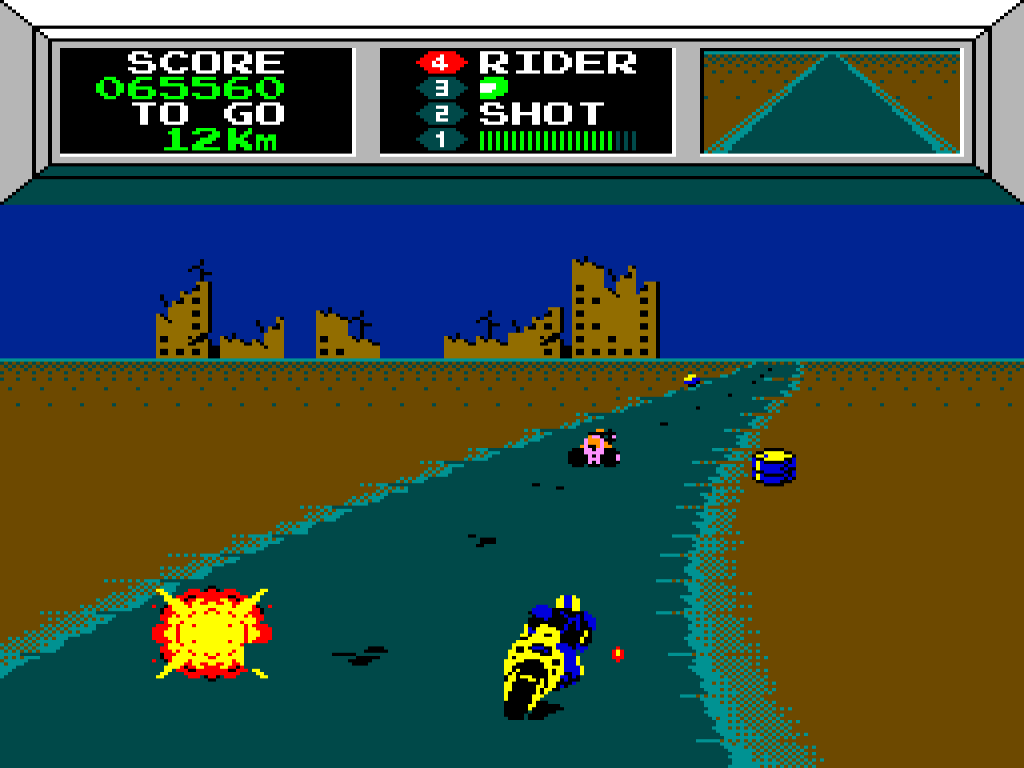
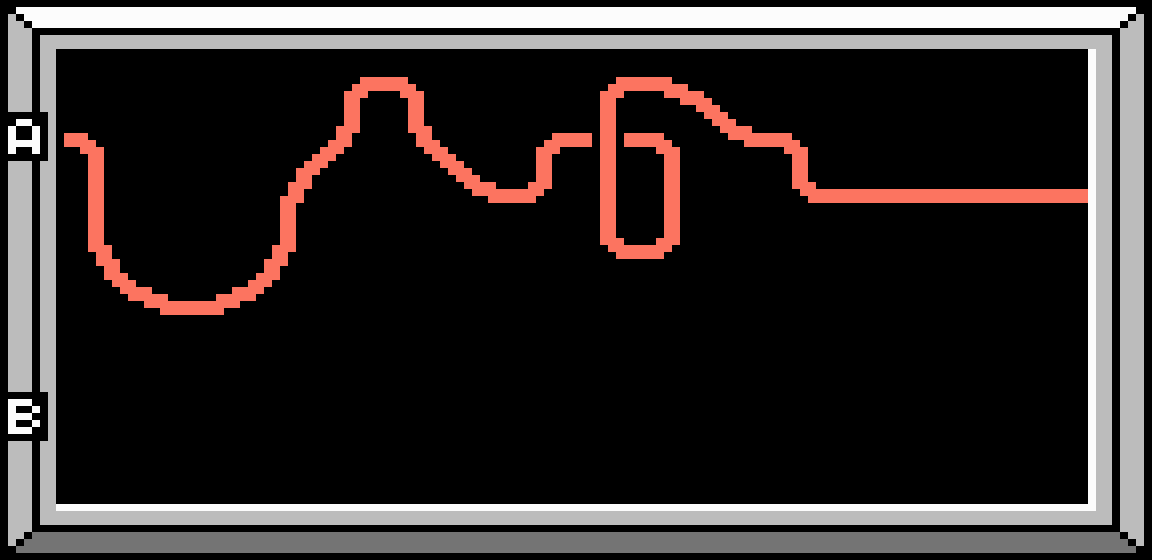
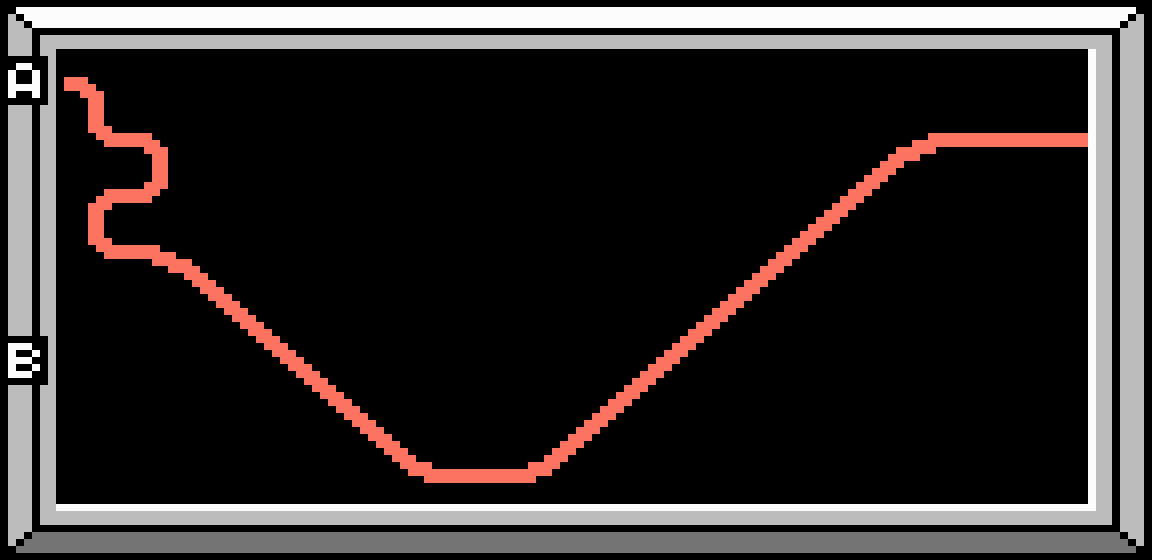
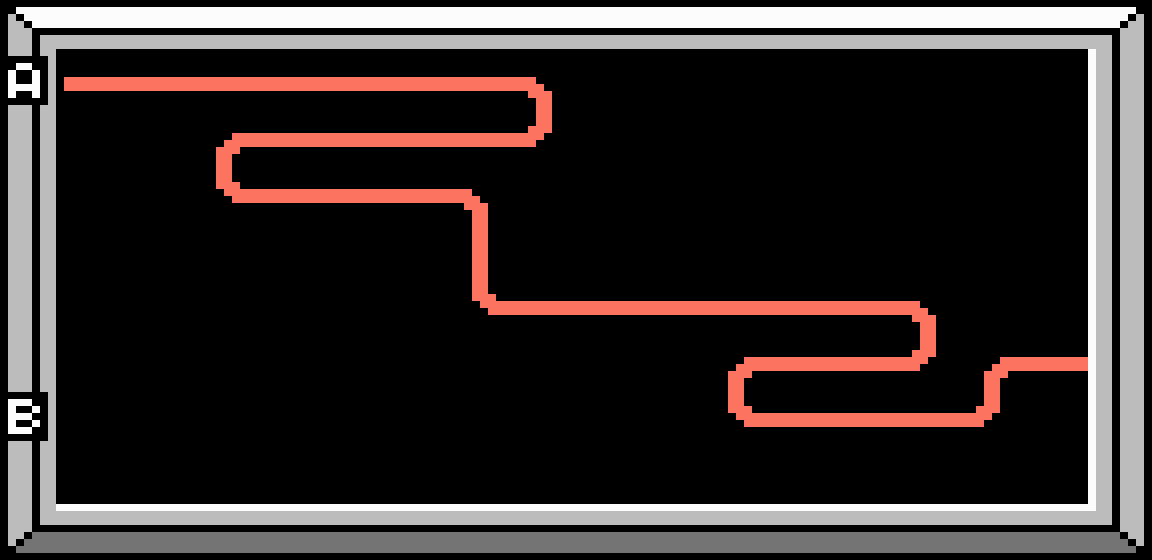
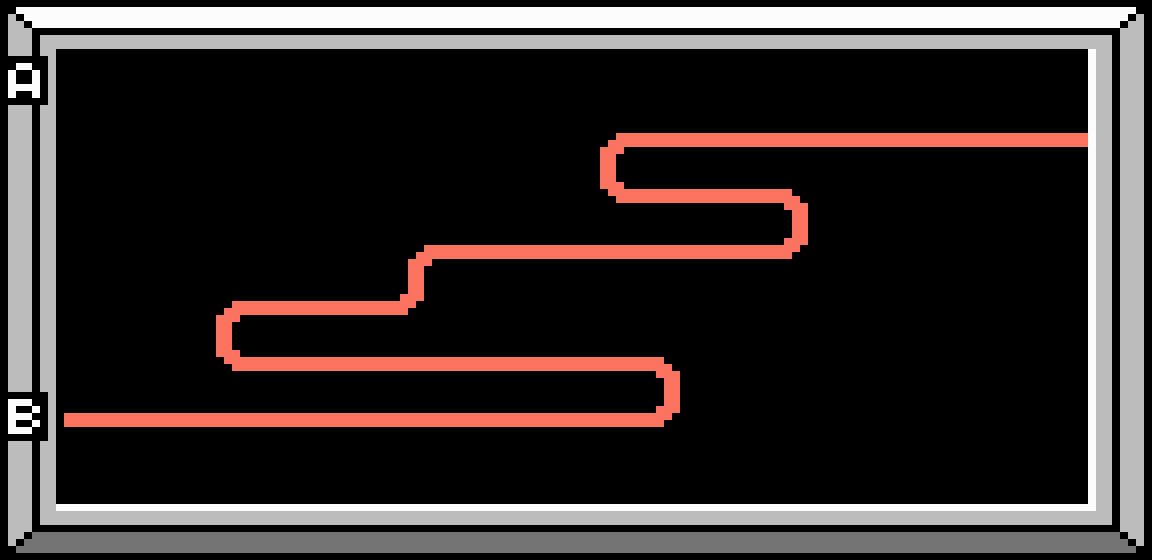
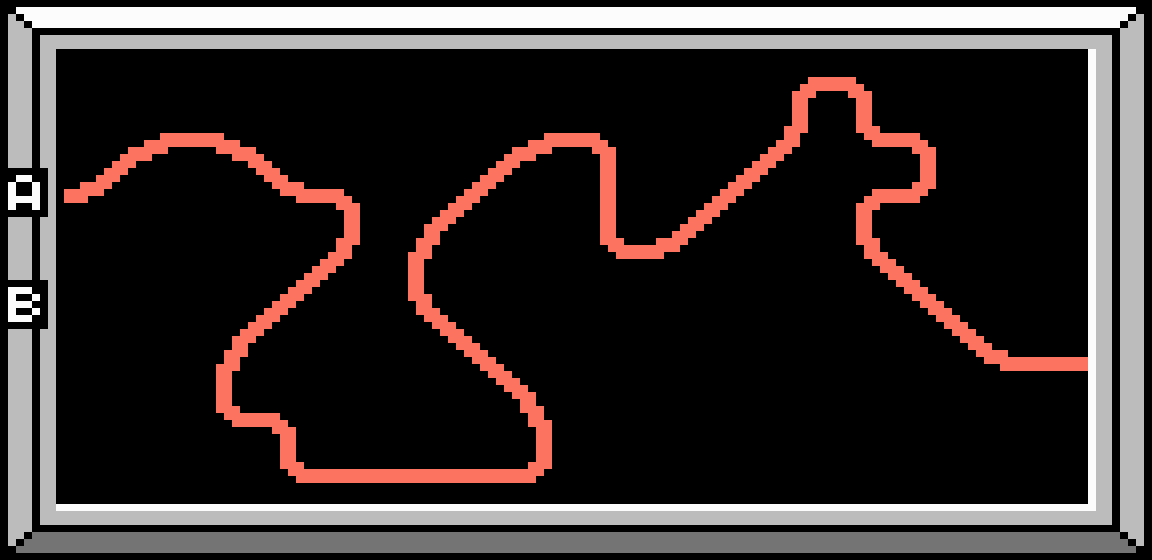
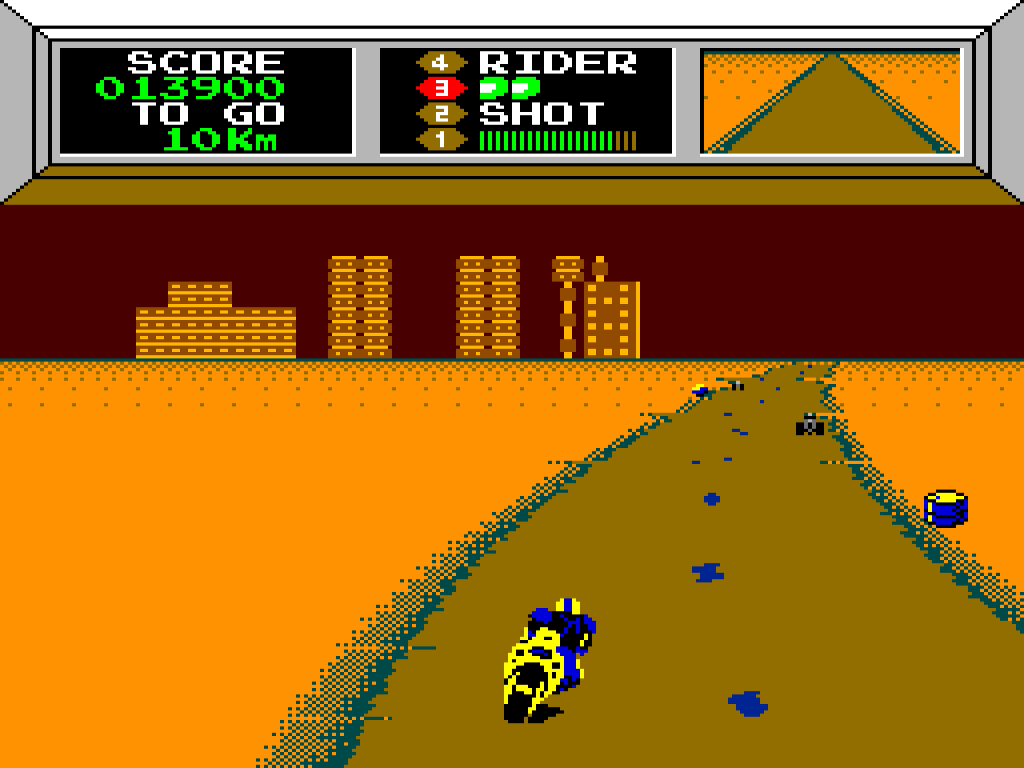
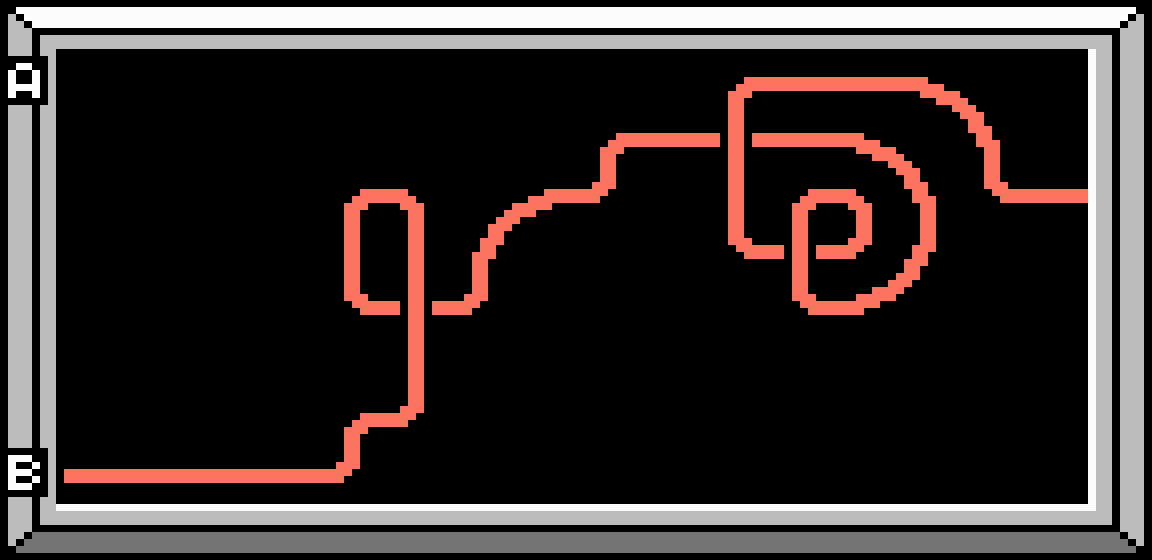
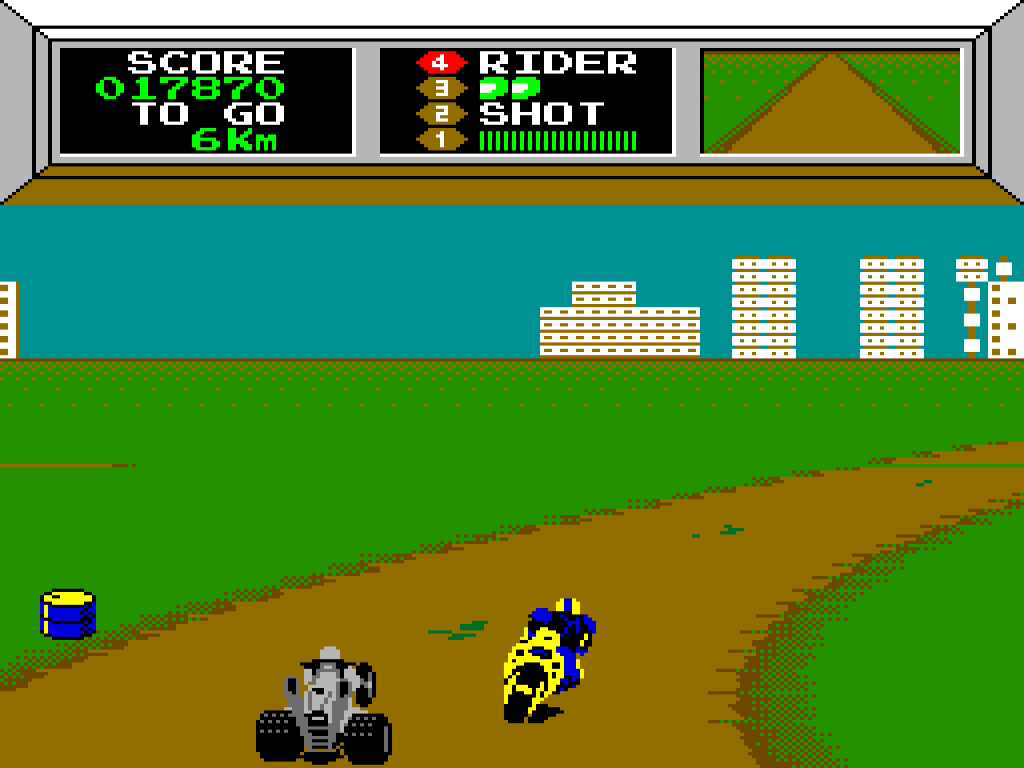
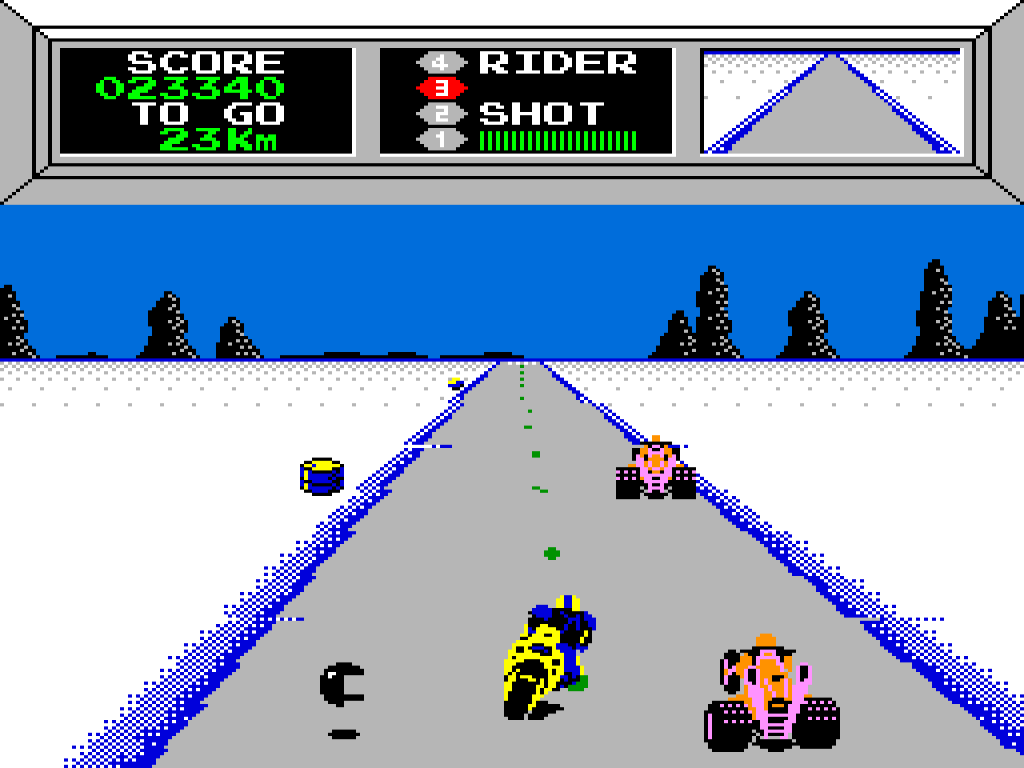
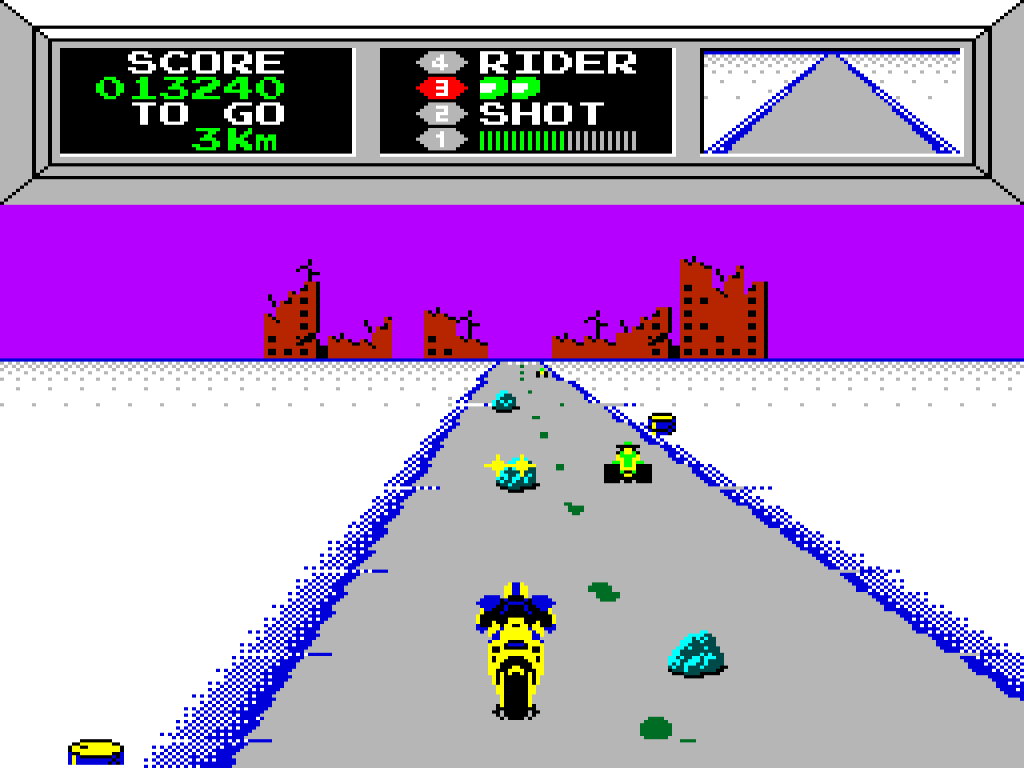
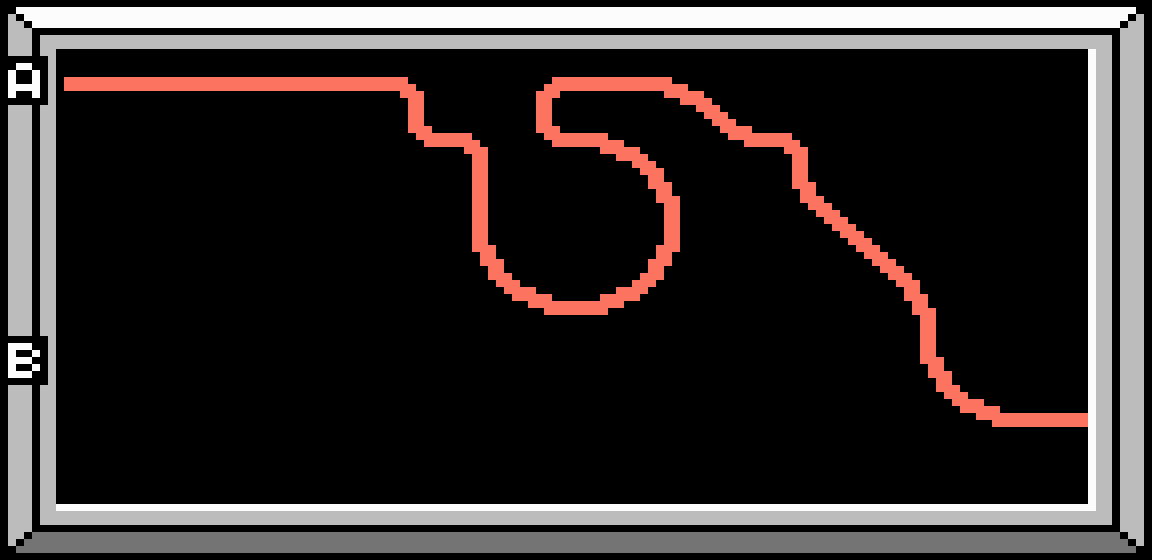
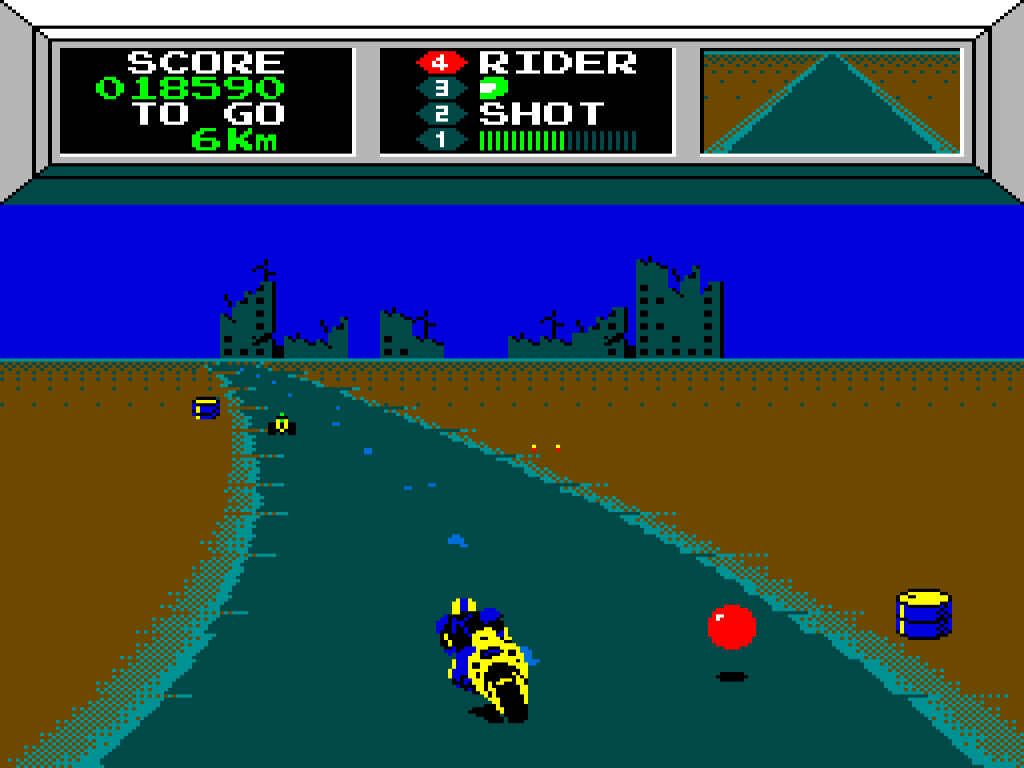
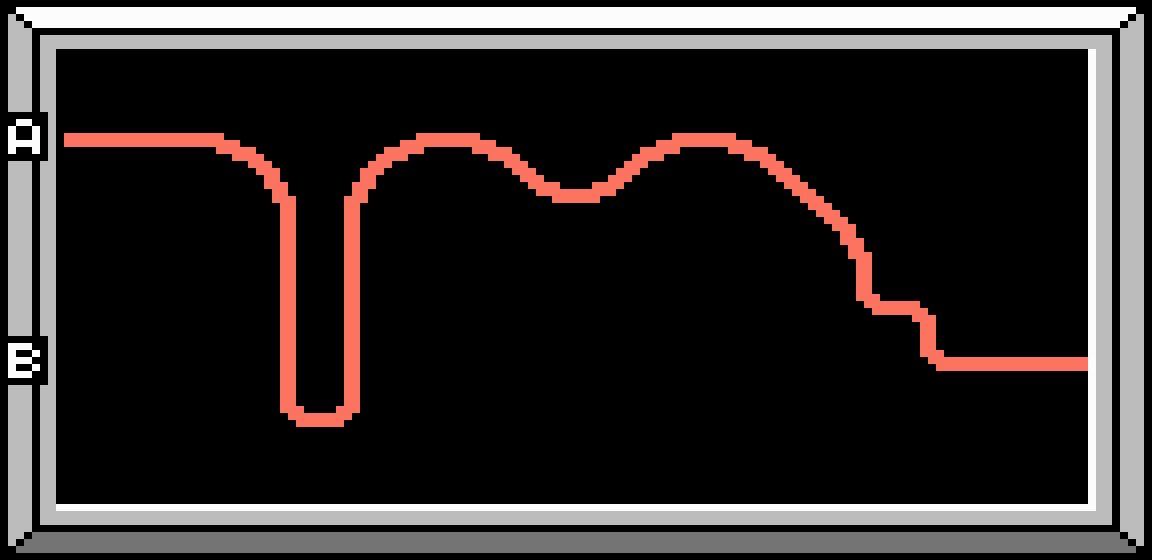
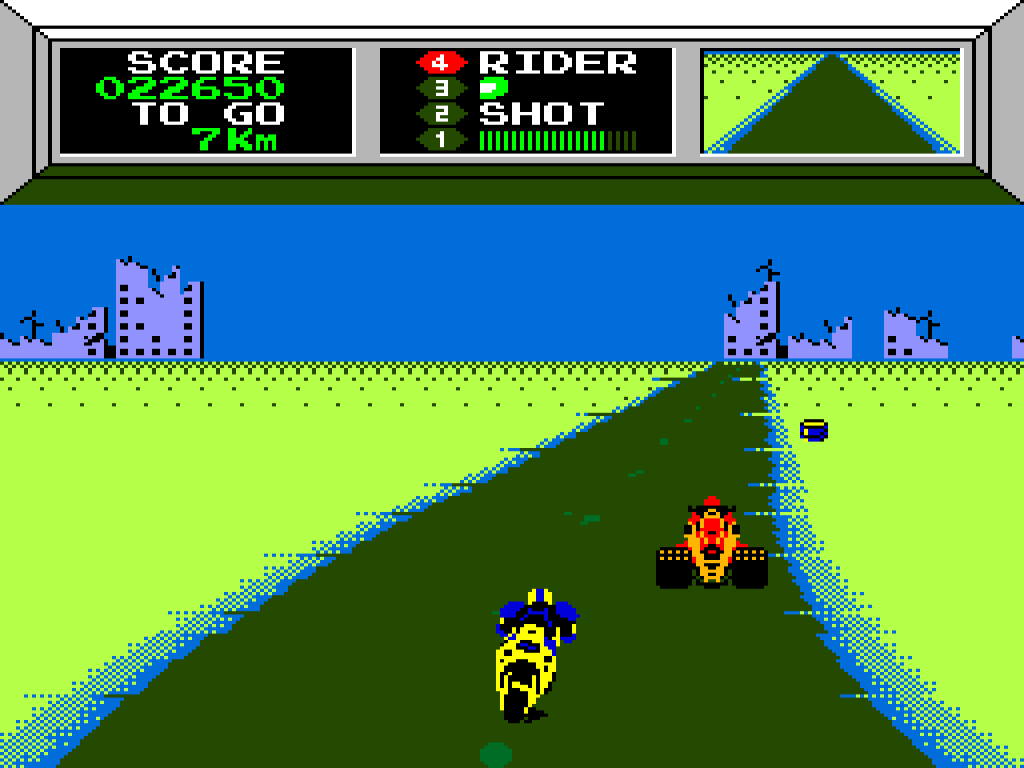
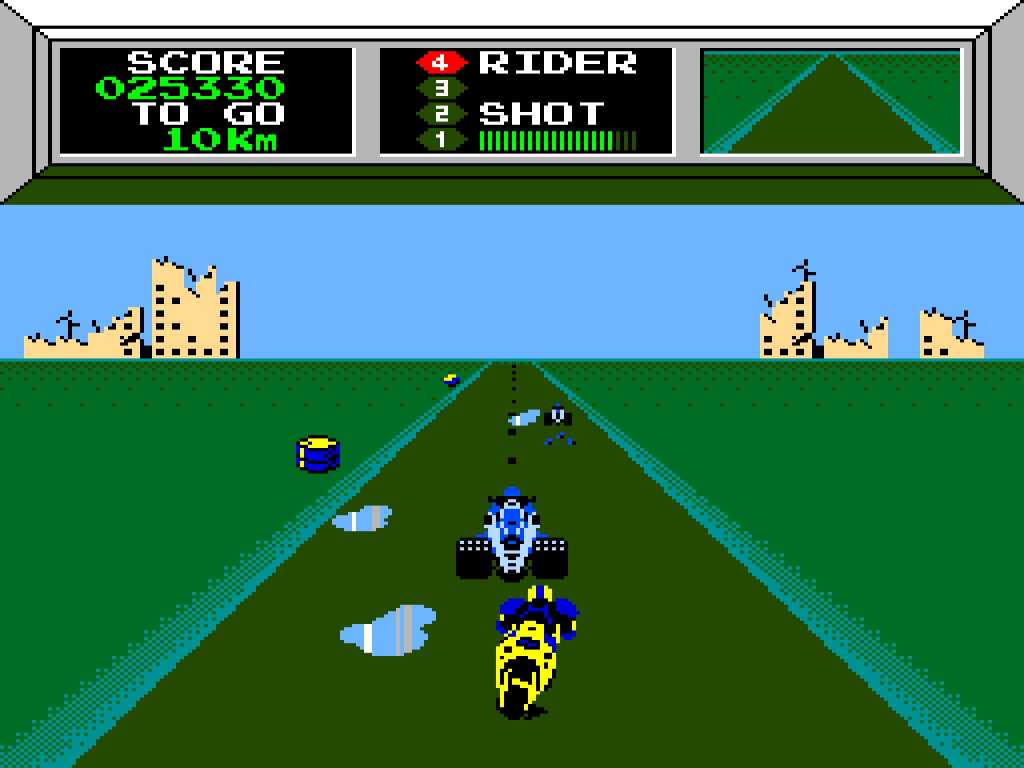
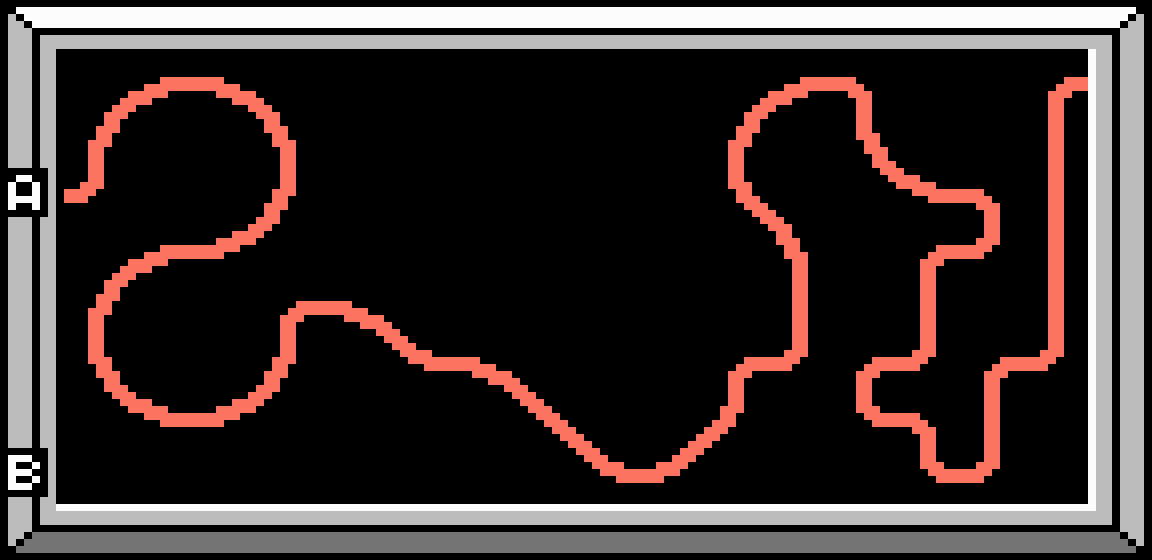
Course 1
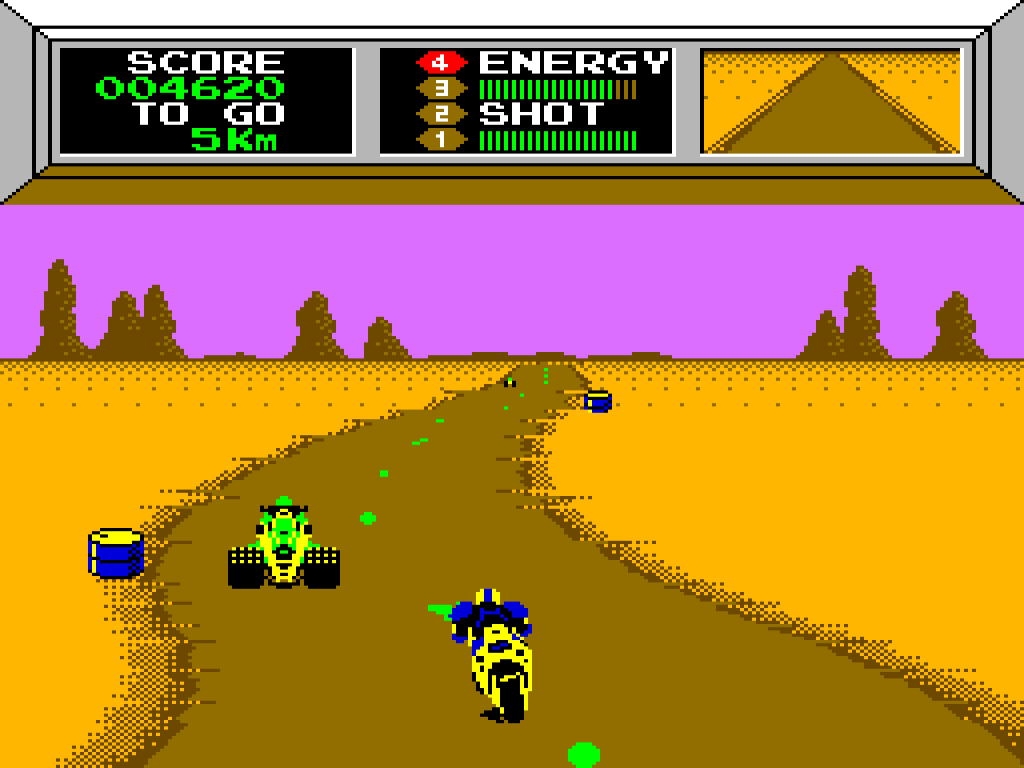
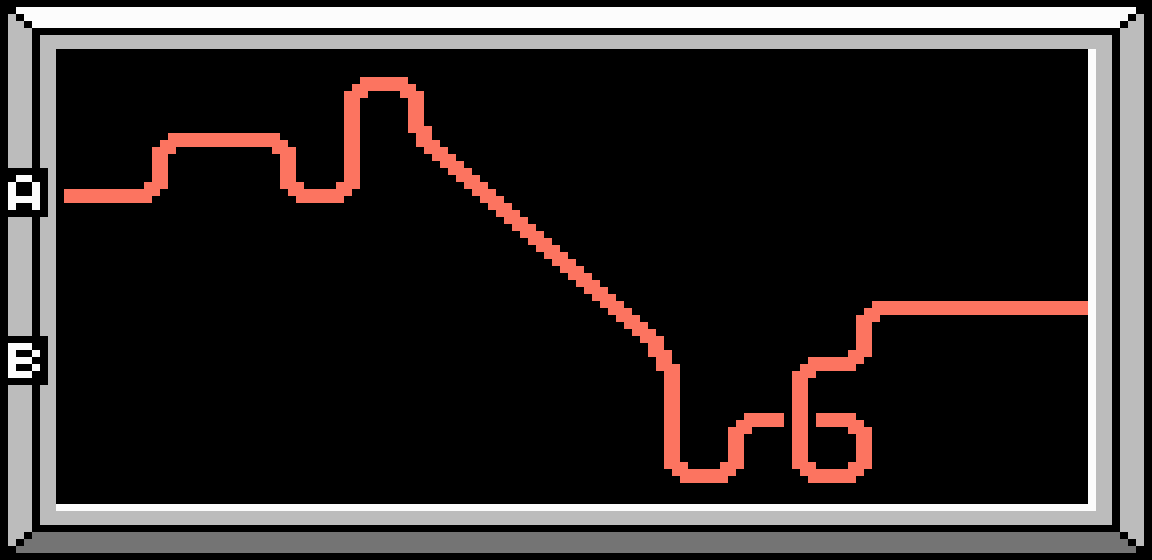
Route A
- This route starts gently with a few straights and gentle bends.
- On the first sharp bend, be ready to swerve the puddles of water.
- On the second half of the course, there are a lot more bends. You'll be swerving tacks and Invaders.
- As the road straightens out, avoid the puddles on the final stretch.
Distance: 12 Km
Obstacles: Tacks, Water
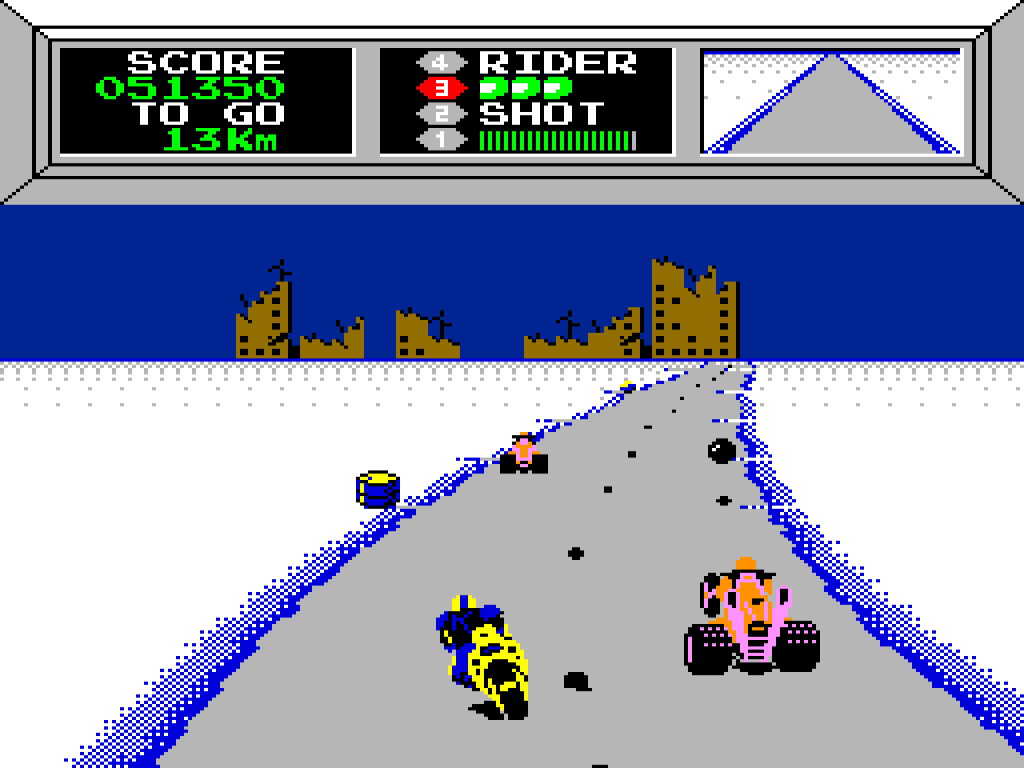
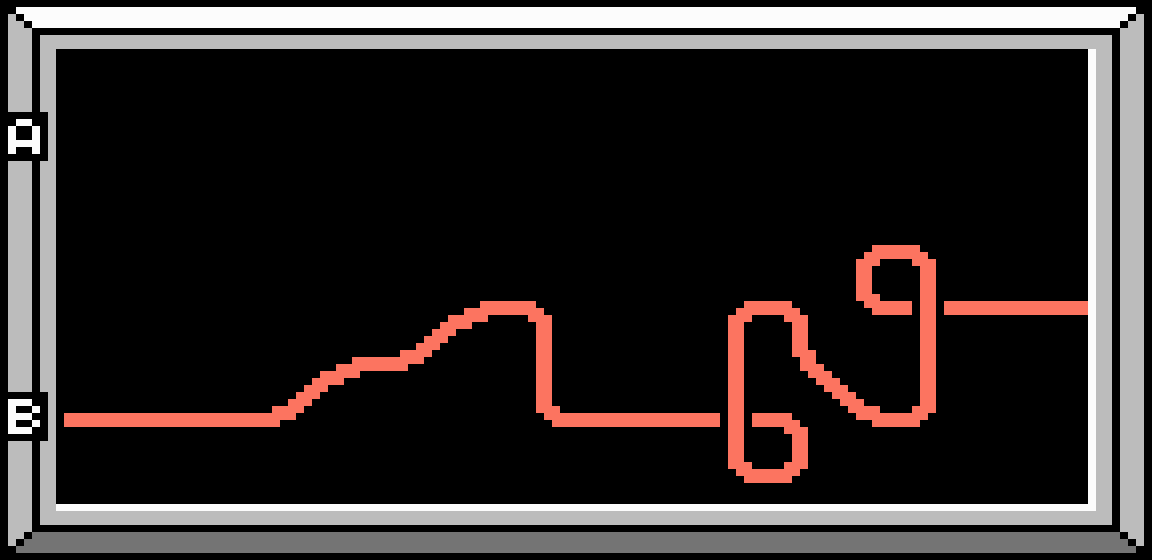
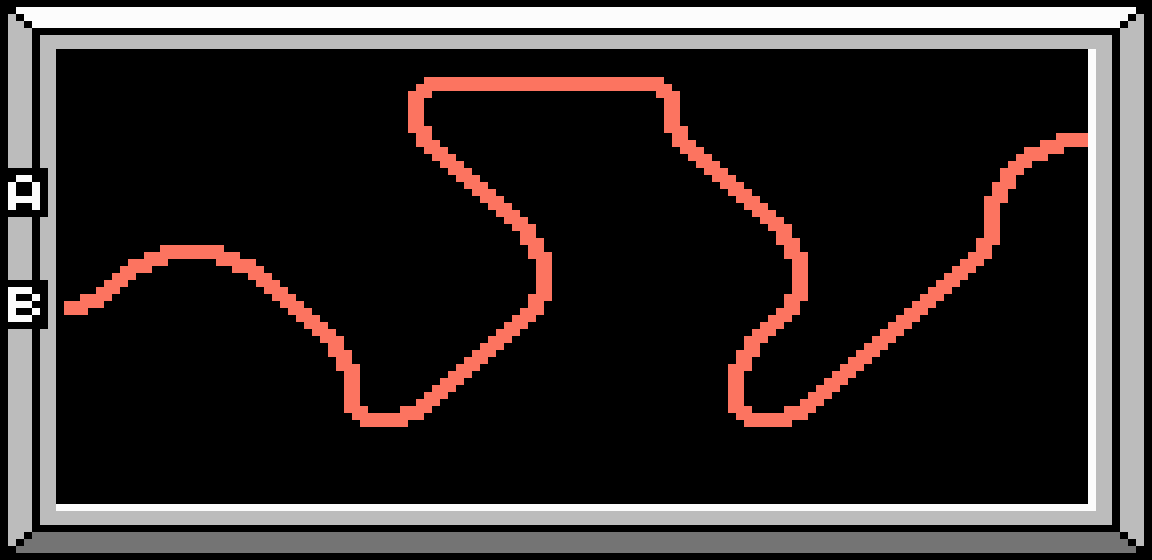
Route B
- You'll run into the first Invaders after the first bend.
- After a batch of Pink Invaders, a cluster of Oil Drums awaits on the next bend. Slow down to slip between them.
- For the rest of the course, Blue Invaders appear, dropping Tacks and trying to push you into obstacles. Try to overtake them rather than trying to bump them.
- A very short slip zone appears for one sharp corner. Drop to 3rd gear to stay on the road.
Distance: 14 Km
Obstacles: Rocks, Oil Drums, Oil, Ice
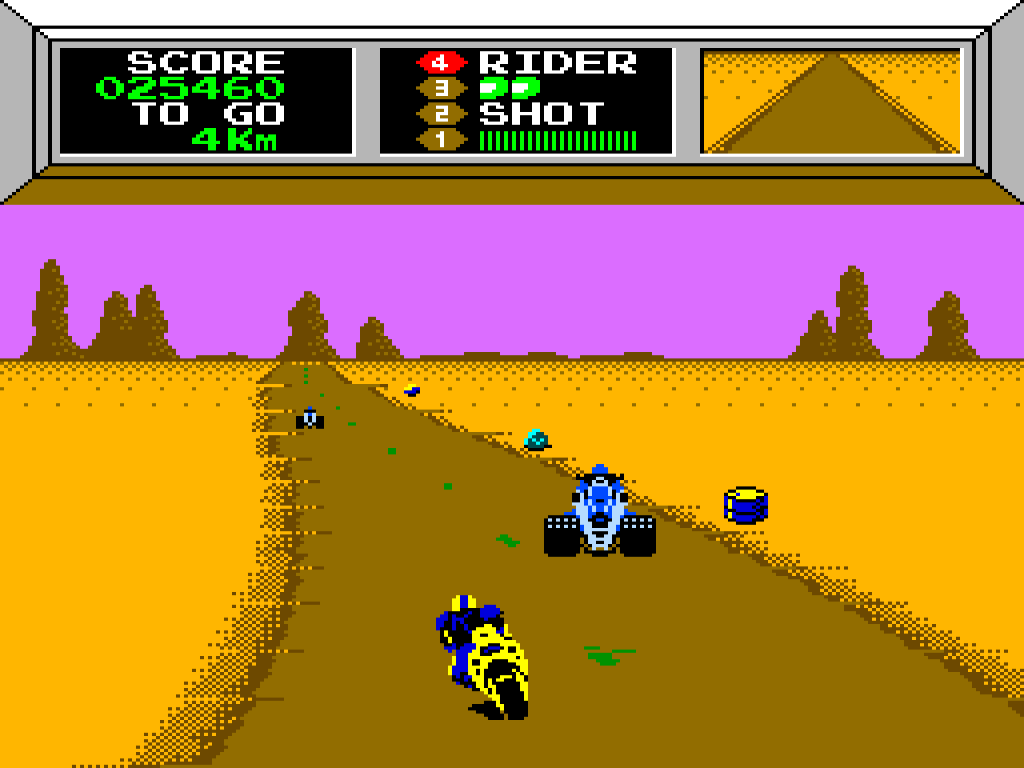
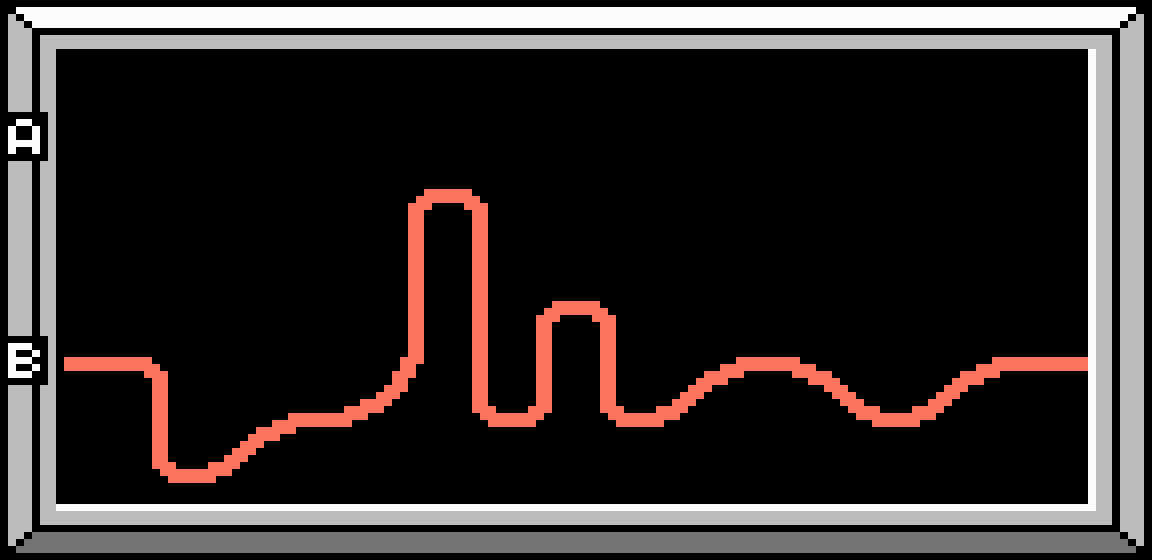
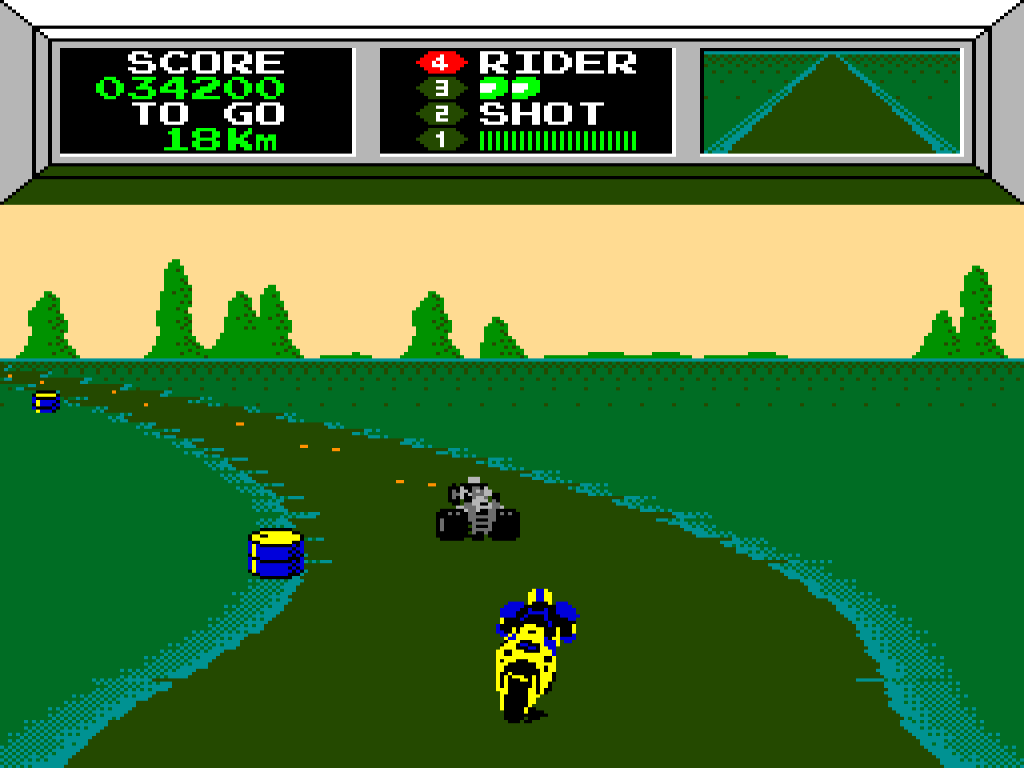
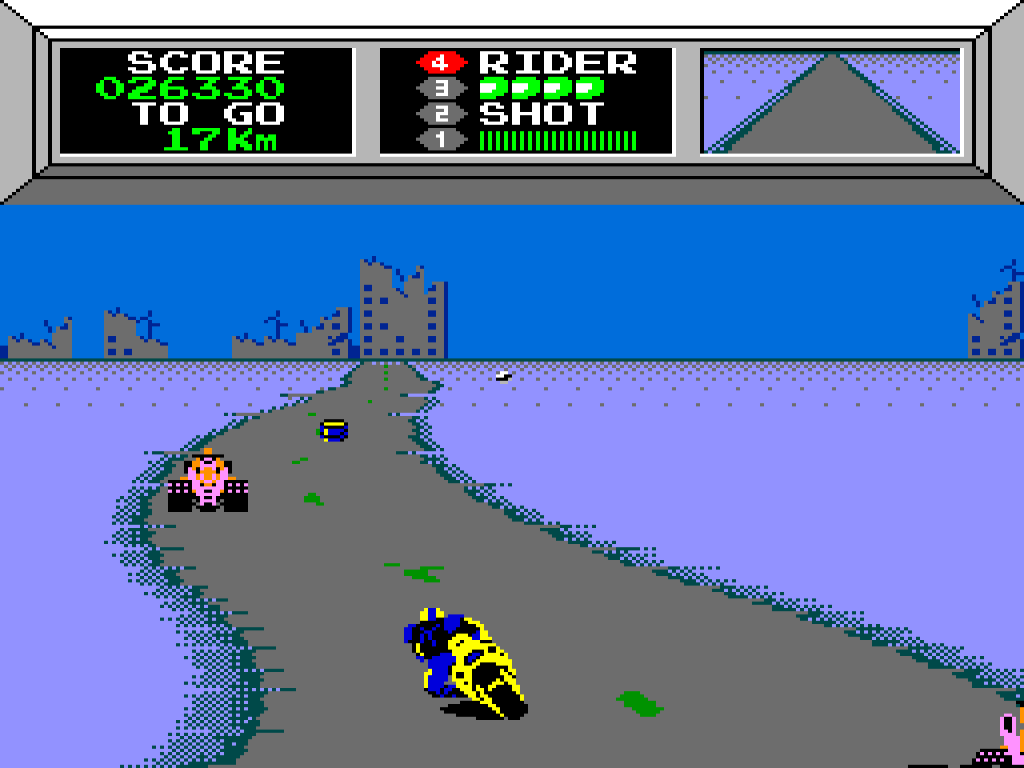
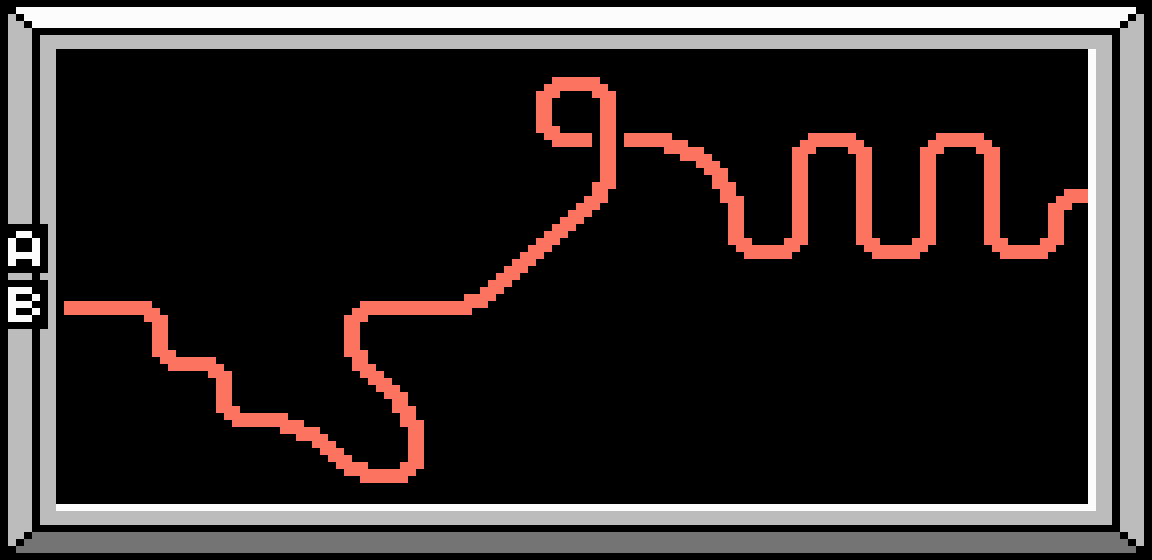
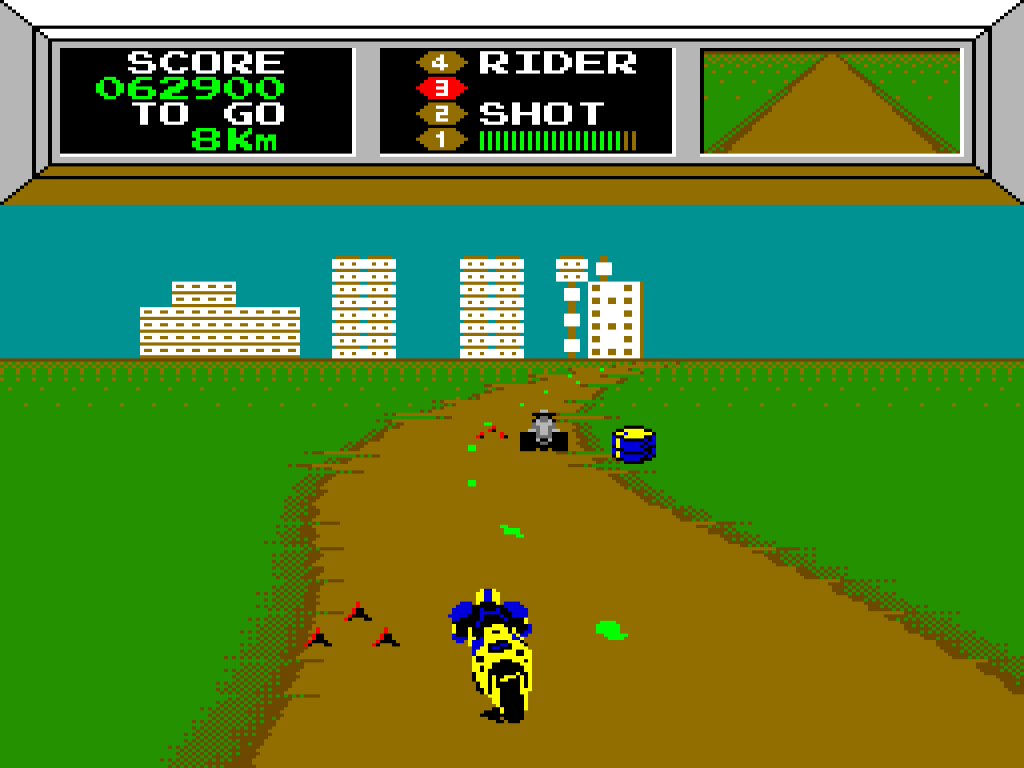
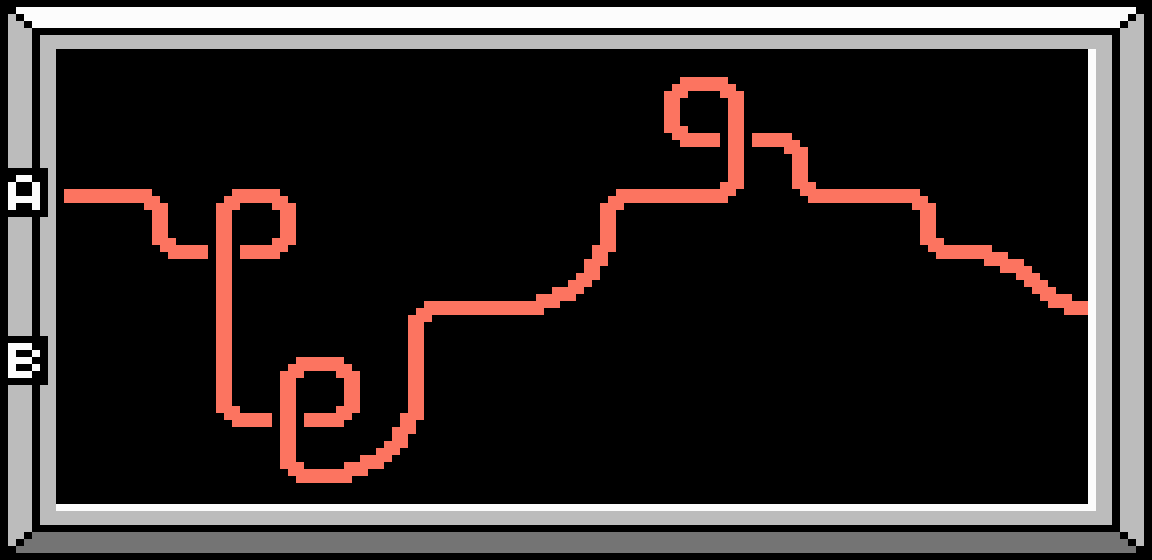
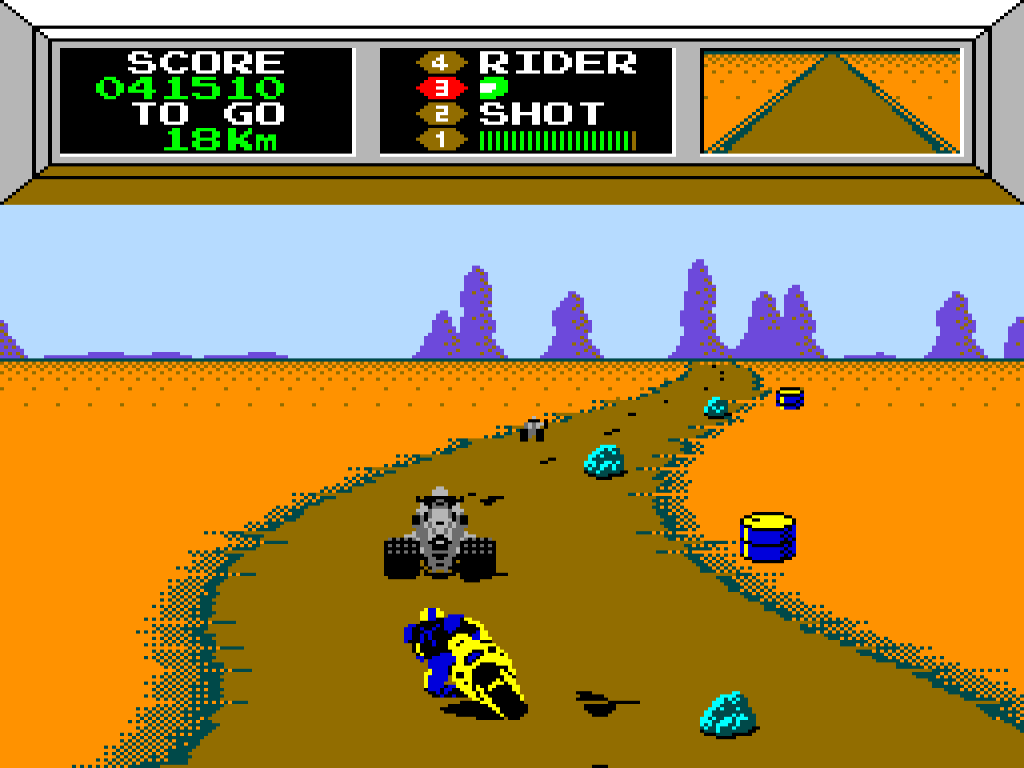
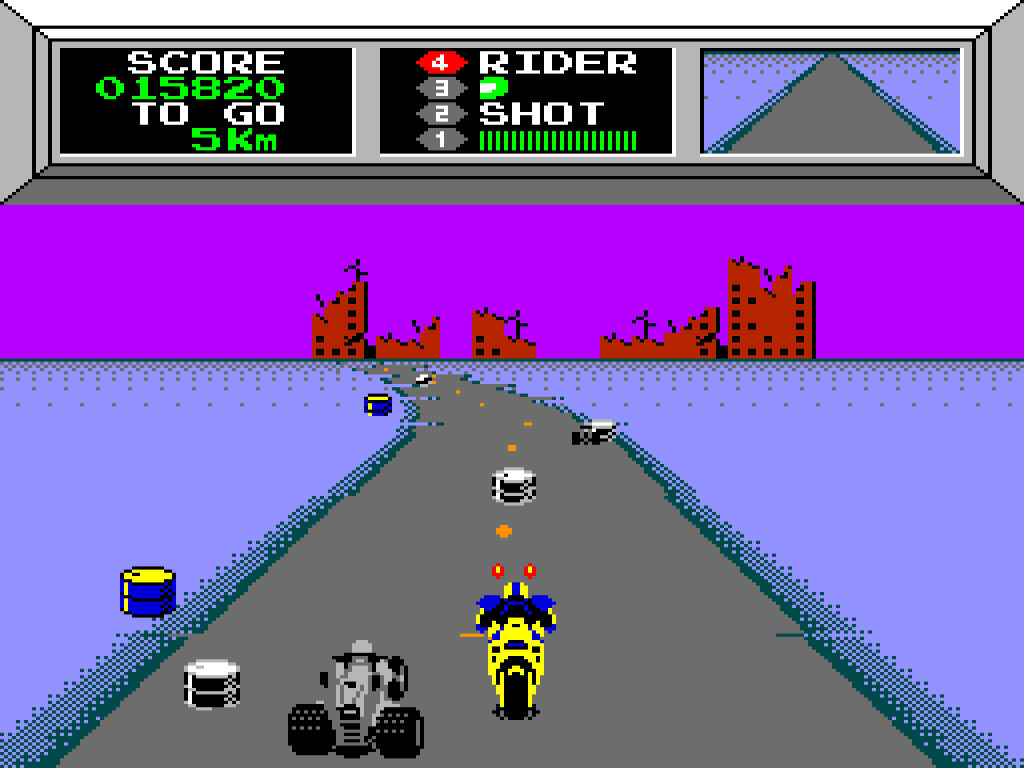
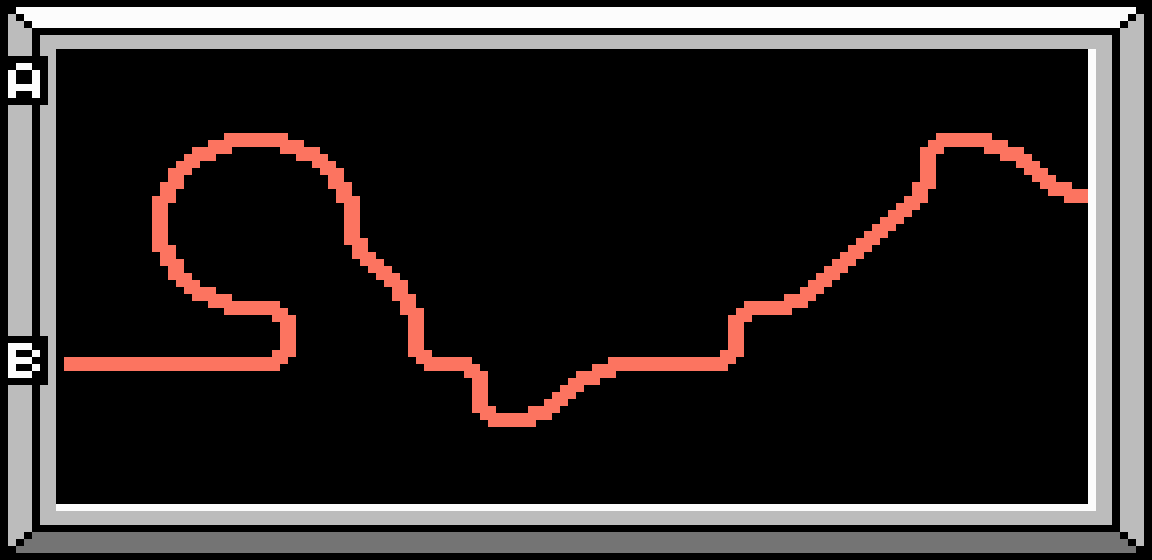
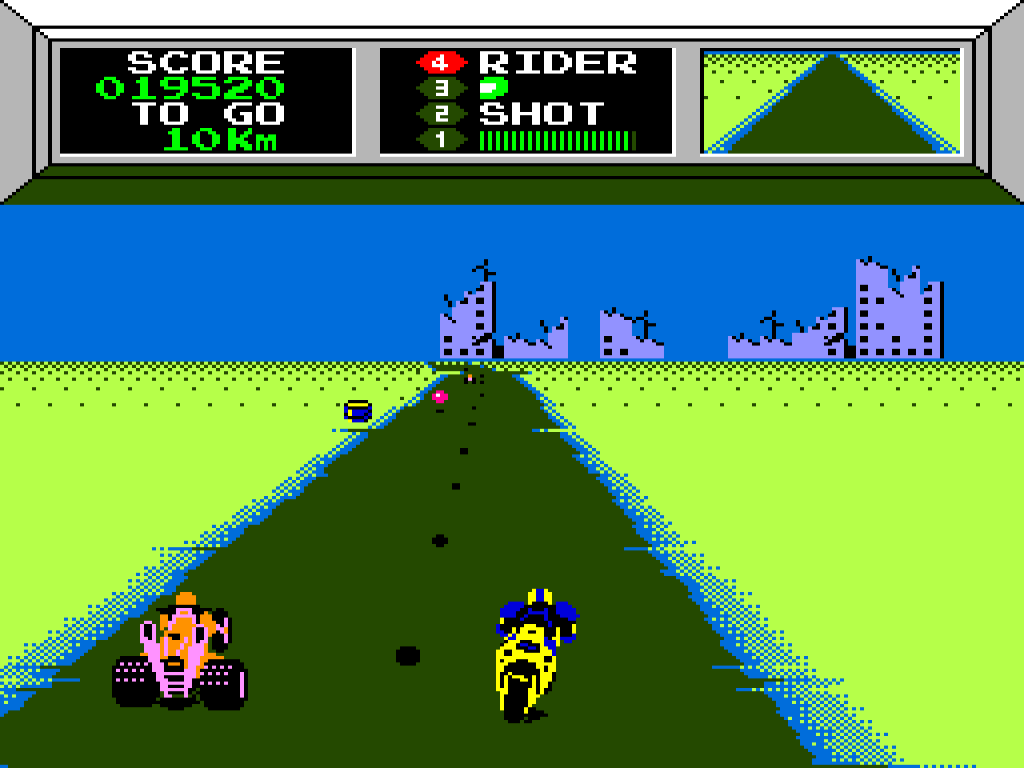
Course 2
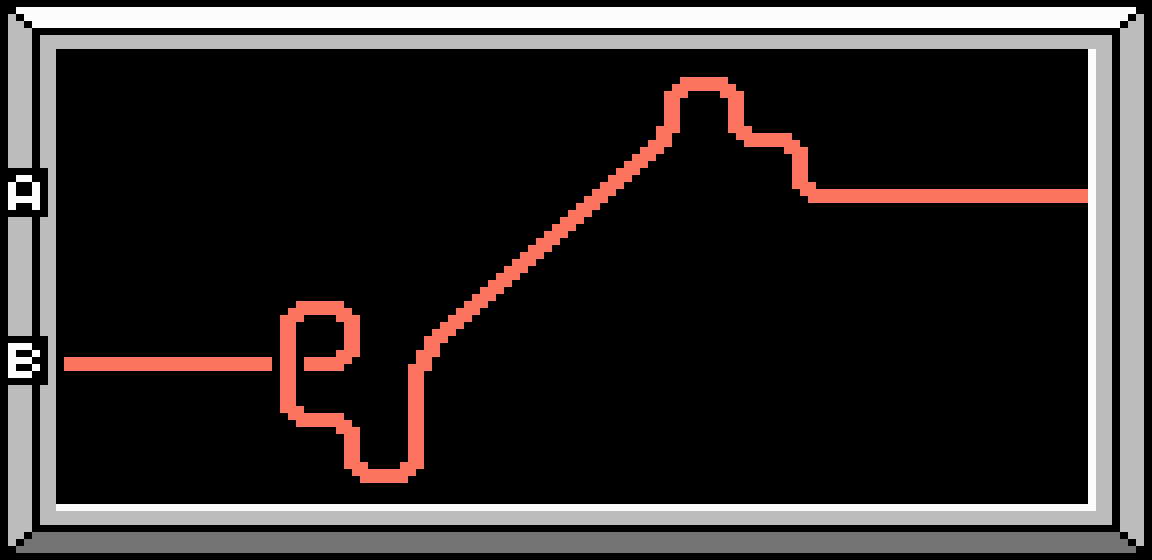
Route A
- This is a long route with a lot of sharp turns.
- Around halfway through, you'll need to block some Black Invaders and weave around slippery obstacles on the bends.
- With 7 Km to go, you'll hit an icy slip zone. Slow down to take the corners.
- Once the ice clears, zip past the Invaders and cross the goal line.
Distance: 25 Km
Obstacles: Tacks, Water, Rocks, Oil Drums, Ice
Route B
- This long route has a lot of sharp turns with obstacles on the blind corners.
- Black Invaders show up with 17 Km to go. Slow down, as the next corner is littered with oil drums.
- When you see oil slicks on the road, you're about to hit an icy slip zone on the next bend. Drop your speed before it appears.
- With 2 Km to go, a second icy slip zone appears on a bend and sticks around to the end of the route. Drop to 3rd again and cruise to the goal.
Distance: 23 Km
Obstacles: Rocks, Oil Drums, Oil, Ice
Course 3
Route A
- After an easy start, you'll hit blind corners littered with Oil Drums and Rocks. Slow down to weave around them or shoot your way through.
- With 11 Km to go, Bomber Balls will appear at the same time as an icy slip zone and Black Invaders.
- Downshift to stay on the road and maintain some distance from the Invaders. However, while you're in 3rd gear, Black Invaders can sneak up on you. Don't let them shove you into the rocks.
- Once the ice clears, you'll face some more oil drums and rocks on the bends. Slow down to weave through them if you need to.
Distance: 17 Km
Obstacles: Oil Drums, Rocks, Water, Bomber Balls, Ice
Route B
- This route starts with some gentle straights and weak Invaders.
- As soon as you see water puddles, Black Invaders will show up. Drop behind them them so they can't push you into the path of the Bomber Balls along the straight.
- On the same straight, an icy slip zone will appear. If you're still at top speed, slow down before the bends as they are lined with rocks.
- With 12 Km to go, there's nothing but Black Invaders and water puddles. Stay at a safe distance and cruise to the goal.
Distance: 26 Km
Obstacles: Rocks, Water, Bomber Balls, Ice
Course 4
Route A
- Watch out for rocks on the first two bends.
- You'll see some red tacks just as a couple of Blue Invaders show up dropping blue tacks as well. You'll then hit water puddles and an icy slip zone. Drop your speed to stay in control.
- Once the ice clears, it's a relatively safe run to the goal line. Only weaker Invaders and a few tacks appear.
Distance: 20 Km
Obstacles: Rocks, Tacks, Water, Ice, Oil Drums
Route B
- As you hit the first few bends, slow down to avoid the oil drums and rocks strewn across the road.
- After passing a couple of Bomber Balls, you'll face Black Invaders. They will try to push you into road obstacles on the corners, so drop back and follow from a safe distance.
Distance: 18 Km
Obstacles: Oil Drums, Rocks, Bomber Balls,
Course 5
Route A
- You start on a bend. Get up to speed quickly and watch out for rocks.
- As the road straightens out, you'll need to dodge a flurry of Bomber Balls for most of the rest of the course. Don't let the Black Invaders push you into the path of the Bomber Balls.
Distance: 15 Km
Obstacles: Rocks, Bomber Balls
Route B
- This entire route takes place in an icy slip zone.
- It can be tempting to get up to top speed on the opening straight, but Bomber Balls and sharp bends will soon appear. Stick to third gear for much of the route.
- Around halfway through, Blue and Black Invaders will start appearing from behind to shove you into rocks. Switch to 4th gear on the straights to try and shake them off your tail.
Distance: 15 Km
Obstacles: Ice, Bomber Balls, Rocks
Course 6

Route A
- This entire route takes place in an icy slip zone. Keep your speed low while you navigate around the corners at the start, then go up to full speed for the long straights.
- Bomber Balls appear, so you may want to downshift to safely dodge out of their way.
Distance: 11 Km
Obstacles: Ice, Bomber Balls, Rocks
Route B
- Be ready as you approach the first sharp corner, as you will be quickly zig-zagging left and right through patches of rocks. Drop speed if you need to.
- Once the quick turns are over, Black Invaders will start trying to shove you into oil drums. Drop your speed and stay at a safe distance until you cross the goal line.
Distance: 12 Km
Obstacles: Rocks, Oil Drums
Course 7
Route A
- This route starts in an icy slip zone, but it clears before you reach any corners or dangerous obstacles. Go straight to high gear.
- Once the ice has cleared, you'll need to weave around a large number of water puddles. Invaders also appear in greater numbers.
- A solitary Bomber Ball appears on this course.
- Black Invaders appear to push you around on the final few bends of the course. Try to block them or drop your speed to follow behind until you reach the goal line.
Distance: 19 Km
Obstacles: Ice, Rocks, Water, Bomber Balls, Tacks
Route B
- This route starts in an icy slip zone. Get up to 4th gear as it clears before the first bend.
- Black Invaders show up to shove you into the path of rocks and Bomber Balls.
- With around 7 Km to go, a second slip zone appears. You'll need to drop your speed for the corners. Black Invaders are likely to try and sneak attack from behind. Vary your speed to keep away from them. Getting into a tussle is likely to lead to you crashing into road obstacles.
Distance: 20 Km
Obstacles: Ice, Rocks, Bomber Balls
Course 8
Route A
- This route starts in an icy slip zone. It clears after just 2 Km and before the first sharp bend, so you can safely get up to 4th gear.
- Weave around Invaders and slippery puddles. Try not to get into a pushing match, as you'll likely end up slipping or crashing.
- With around 9 Km to go, Bomber Balls show up on a sharp bend. Stay in the middle of the road to avoid them.
- Much of the rest of the route involves avoiding tacks while Black Invaders try to push you around. Drop your speed and try to follow behind until you reach the goal.
Distance: 19 Km
Obstacles: Ice, Rocks, Water, Bomber Balls, Tacks

Route B
- This route starts in an icy slip zone. Stay in 3rd gear until it clears.
- Blue Invaders show up, dropping tacks all over the road. Try not to drive directly behind them, as it's very easy to hit tacks and slide into rocks on the corners.
- With 4 Km to go, another icy slip zone appears. You can safely stay in 4th gear as it clears before the next bend.
Distance: 16 Km
Obstacles: Ice, Rocks, Bomber Balls
Course 9
Route A
- There's not much to worry about until you round the first bend and face a flurry of Bomber Balls.
- The road gets quiet again for a while, then a second flurry of Bomber Balls will assault you. These ones keep coming for some time. Stick to the middle of the road if you can.
- Black Invaders show up as you get close to the goal line. Drop your speed so you're following behind and keep an eye out for more Bomber Balls.
Distance: 22 Km
Obstacles: Rocks, Bomber Balls
Route B
- Bomber Balls and Black Invaders show up very early in this route and stick around to the end.
- Drop to 3rd gear and stay a safe distance behind the Black Invaders, keeping two of them ahead of you. You can cruise all the way to the goal line with relatively little trouble.
- When clusters of Bomber Balls show up, stick to the middle of the road and blast a safe path through them.
Distance: 21 Km
Obstacles: Rocks, Bomber Balls
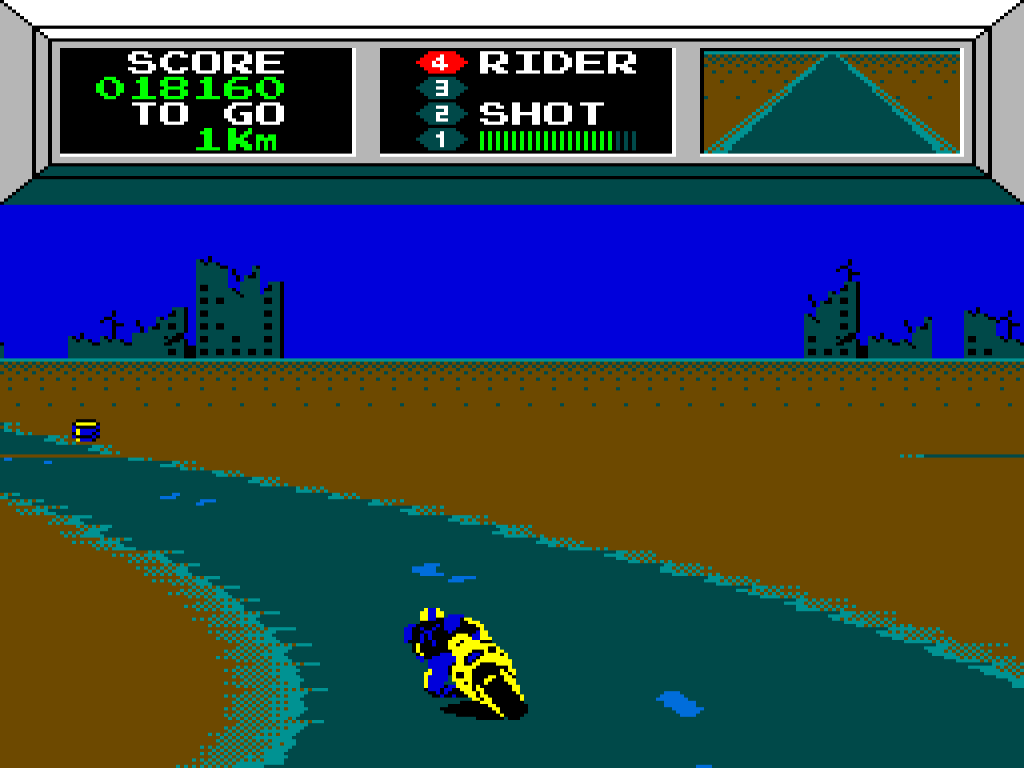
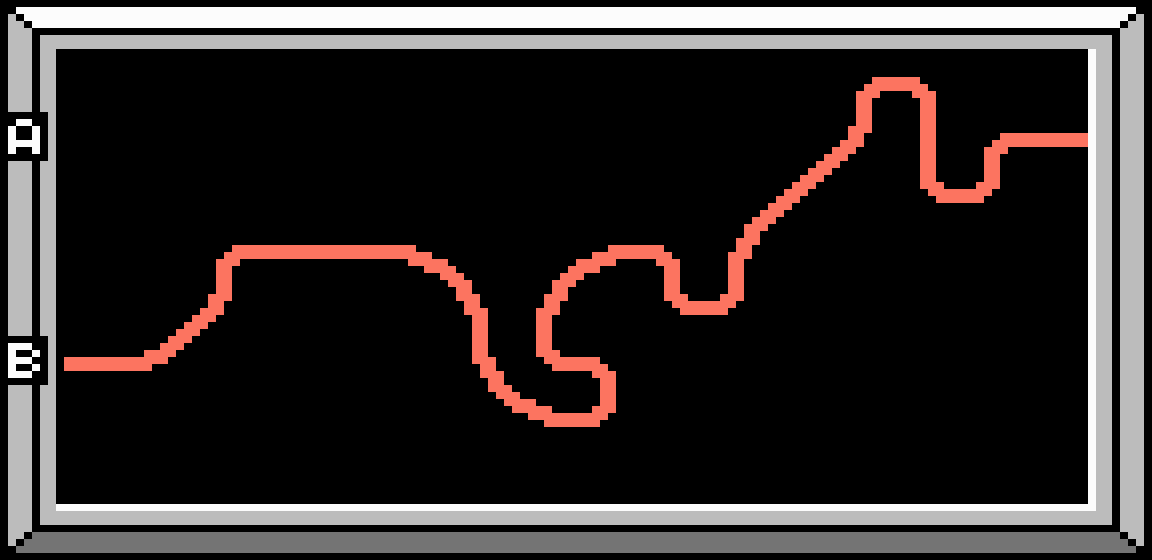
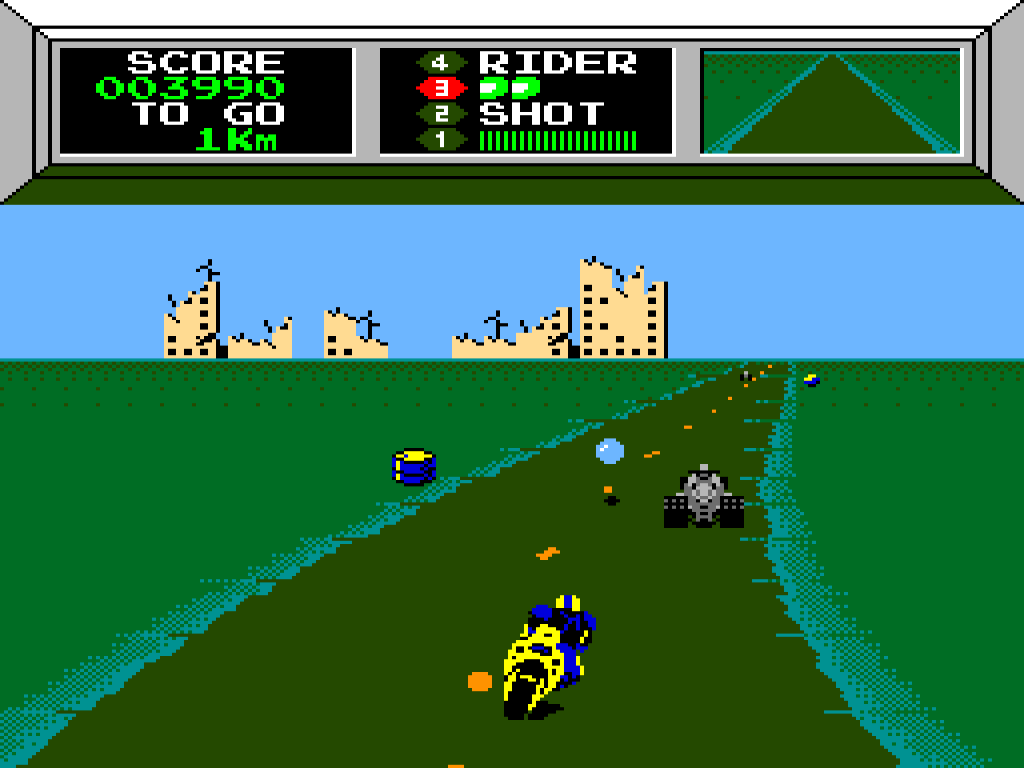
Course 10
Route A
- This route starts in an icy slip zone. It doesn't clear for a long time, so only go up to 3rd gear.
- You'll face a few Bomber Balls on the ice as the road straightens out. Stick to the middle of the road.
- Around halfway through, Black Invaders will start sneaking up from behind. As soon as the ice clears, slow down to fall behind, but try to keep two of them in your sights. This stops any more from sneaking up on you as you ride it out to the goal.
Distance: 19 Km
Obstacles: Ice, Bomber Balls, Tacks
Route B
- The first part of this route is relatively gentle, with only oil slicks and Pink Invaders to contend with.
- With 14 Km to go, an icy slip zone appears, along with Black Invaders. This slip zone is bendy, so you'll need to drop to 3rd gear. This means the Invaders will try to ram into you from behind. Quickly jump up to 4th gear on the straights and drop again for the bends.
- To make matters worse, the Invaders will also try and push you into the path of Bomber Balls. Keep varying your speed to keep out of reach if you can.
- With 8 Km to go, the ice clears. Quickly get two Black Invaders in your sights, drop to 3rd gear and follow them over the goal line from a safe distance.
Distance: 20 Km
Obstacles: Oil, Ice, Bomber Balls, Rocks
Ending
After Course 10, the full image will be revealed.
The story will then start over with 10 new courses.
Course 11
Route A
- This route is made up entirely of alternating left-right turns.
- Stick to the middle of the road as much as possible to avoid the oncoming obstacles.
- Try to avoid engaging with any Invaders, as they'll bump you into oncoming obstacles if you give them a chance.
Distance: 12 Km
Obstacles: Rocks, Bomber Balls, Oil Barrels
Route B
- This route is made up entirely of alternating left-right turns and takes place in an icy slip zone. Stay in 3rd gear throughout.
- Stick to the centre line of the road to avoid most of the road obstacles.
- Black Invaders are likely to appear from behind to shove you into obstacles. You might want to drop your speed even more to get behind them, as they can be very dangerous.
Distance: 11 Km
Obstacles: Ice, Bomber Balls, Rocks
Course 12
Route A
- This long route is mostly straights.
- Stick to the middle of the road to avoid most of the obstacles, but be ready to shoot your way through some oil barrels.
- As you approach the end, Black Invaders show up. Drop your speed to follow behind them safely until you cross the goal line.

Distance: 25 Km
Obstacles: Rocks, Bomber Balls, Oil Drums
Route B
- This long route takes place entirely in an icy slip zone. Stay in 3rd gear for the first half as there are a lot of bends.
- Clusters of Bomber Balls appear near the start and keep coming along some of the straights. Weave between them or blast a path through them.
- If you can match the speed of the weaker Invaders, you can cruise through this level with relatively little difficulty.

Distance: 24 Km
Obstacles: Ice, Bomber Balls, Rocks, Tacks
Course 13

Route A
- This entire route takes place in an icy slip zone.
- The course is full of twists, so you should spend most of it in third gear, only speeding up if you feel bold on the straights.
- Bomber Balls and rocks litter the road, so swerve around them in a low gear to make sure you don't slide off the road.
Distance: 16 Km
Obstacles: Ice, Bomber Balls, Rocks
Route B
- A long and winding route.
- Black Invaders show up early and will try to push you into road obstacles on the blind corners. Drop speed and maintain a safe distance.
- The biggest threats are rocks on the blind corners. Drop your speed if you're not sure what's coming.
Distance: 22 Km
Obstacles: Rocks, Oil Drums
Course 14
Route A
- This entire route takes place in an icy slip zone.
- While you can get up to 4th gear on the long straights, there's little harm staying in third gear for most of this course.
- Try not to get into a bumping match with Invaders. Speed up to overtake them or slow down to blast them from the back instead.
Distance: 14 Km
Obstacles: Ice, Bomber Balls, Rocks
Route B
- A short route where the main threat comes from Black Invaders pushing you into road obstacles.
- Drop your speed to keep a safe distance from the Invaders and swerve around the obstacles on the corners. You can safely clear the whole route with this technique.
Distance: 13 Km
Obstacles: Rocks, Oil Drums
Course 15
Route A
- This route starts in an icy slip zone. It won't clear until around halfway through, so stay in third gear.
- Black Invaders will show up to push you around. Try to stay behind them if you're still on the ice.
- As soon as the ice clears, Bomber Balls show up until the final straight. Stay alert and blast your way through any in the middle of the road.
Distance: 13 Km
Obstacles: Ice, Tacks, Bomber Balls,
Route B
- After the first bend, watch out for clusters of Bomber Balls.
- You'll likely run into some Black Invaders and another cluster of Bomber Balls just as an icy slip zone appears. Quickly drop your speed for the bends, and speed up to keep the Invaders in your sights.
- The ice clears with 2 Km to go, so follow the Invaders over the goal line.
Distance: 13 Km
Obstacles: Oil, Bomber Balls, Ice, Rocks
Course 16
Route A
- This route starts in an icy slip zone. Stay in third gear until it clears with around 8 Km to go.
- As soon as the ice clears, be ready to dodge Bomber Balls. They appear on blind corners, so you might want to slow down enough to swerve them.
- The final part of the course is very bendy and you'll be attacked by Black Invaders. Slow down and follow them over the goal line.
Distance: 14 Km
Obstacles: Ice, Tacks, Bomber Balls
Route B
- After the first bend, several clusters of Bomber Balls show up on the corners. Stick to the centre line and slow down if you need to weave around them.
- With 6 Km to go, an icy slip zone appears, along with Black Invaders. Vary your speed on the straights and bends to try and avoid them sneaking up on you and shoving you into the rocks on the road.
- Once the ice clears, it's a straight run to the goal.
Distance: 13 Km
Obstacles: Oil, Bomber Balls, Ice, Rocks
Course 17
Route A
- This route starts in an icy slip zone. Stay in third gear until it clears with around 15 Km to go.
- After the ice clears, you'll need to swerve puddles while Blue Invaders drop tacks on the road. Try to overtake them.
- Black Invaders appear towards the end of the course again. Drop your speed and safely follow them over the goal line.
Distance: 18 Km
Obstacles: Ice, Rocks, Water, Bomber Balls
Route B
- A very short course that starts in an icy slip zone. Stay in 3rd until the ice clears.
- Rocks litter the road, and both Blue and Black Invaders will try to push you or make you slide into them. Keep your distance as much as possible by varying your speed.
- Bomber Balls show up on the final stretch. Swerve to avoid them.
Distance: 10 Km
Obstacles: Ice, Rocks, Bomber Balls
Course 18

Route A
- This long route starts in an icy slip zone and on a sharp turn. Don't go higher than third gear until it clears with 22 Km to go.
- As soon as the ice clears, the road will be covered in water puddles. Swerve to avoid them.
- You encounter Black Invaders soon after. Drop your speed to stay behind them, and follow safely. If you see one in your rear view, speed up a little until you see two in front of you again, then drop back to third gear.
- With 4 Km to go, another icy slip zone will appear. Make sure to drop to third gear before the first sharp turn.
- The ice will clear again for the final run to the goal. You can put your foot down or follow the Invaders over the line.
Distance: 24 Km
Obstacles: Ice, Rocks, Bomber Balls, Tacks
Route B
- This route starts in an icy slip zone. Stay in 3rd gear until it clears at the first bend, then jump up to 4th gear.
- Bomber Balls will hurtle towards you on the straights, so be ready to weave between them or shoot them.
- With 3 Km to go, a second slip zone appears. Slow down for the initial bend, but once the road straightens out, you can jump to 4th gear and right all the way to the goal line.

Distance: 16 Km
Obstacles: Ice, Rocks, Bomber Balls
Course 19

Route A
- This short route starts gently, but as you round the first bend you'll be bombarded with Bomber Balls.
- The Bomber Balls will keep coming throughout the course. Stick to the middle of the road and shoot your way through them.
Distance: 11 Km
Obstacles: Rocks, Bomber Balls
Route B
- A short route that starts on a few bends. Watch out for rocks.
- As soon as the road straightens out, you'll need to dodge two clusters of Bomber Balls on the gentle bends.
- On the final leg, Blue Invaders will drop tacks to try and make you slide into rocks. Don't drive directly behind them.
Distance: 10 Km
Obstacles: Rocks, Bomber Balls
Course 20
Route A
- This final route has a lot of long straights and very few blind turns.
- Before you reach the end of the first straight, a Bomber Ball will hurtle towards you. They will keep coming for the rest of the course.
- Black Invaders show up once more. Slow to match their speed and follow them through the course at a safe distance.

Distance: 15 Km
Obstacles: Rocks, Bomber Balls

Route B
- This winding route has a patch of quick left-right turns where Bomber Balls will fly at you. Stick to the middle of the road as much as possible and shoot to clear a path.
- As soon as you see a Black Invader, drop your speed and cruise behind it until you cross the goal line.

Distance: 14 Km
Obstacles: Rocks, Bomber Balls
Ending
After Course 20, the full image will be revealed, this time in a different colour scheme.
The story will then start over from course 1.
DIP Switches
Arcade games feature DIP Switches, which allow the venue owner to change the default settings.
Coins and credits
| Option | Switch 1 | Switch 2 | Switch 3 |
|---|---|---|---|
| 1 Coin, 1 Credit Default Setting |
On | On | On |
| 1 Coin, 2 Credits | On | On | Off |
| 1 Coin, 3 Credits | On | Off | On |
| 1 Coin, 4 Credits | On | Off | Off |
| 2 Coins, 1 Credit | Off | On | On |
| 3 Coins, 1 Credit | Off | On | Off |
| 4 Coins, 1 Credit | Off | Off | On |
| Free Play | Off | Off | Off |
Maximum Lives
| Option | Switch 4 | Switch 5 |
|---|---|---|
| 3 | Off | Off |
| 4 Default Setting |
On | On |
| 5 | On | Off |
| 6 | Off | On |
Enemies
| Option | Switch 7 |
|---|---|
| Less Default Setting |
On |
| More | Off |