Super Smash Bros. Melee Trophy Guide
Super Smash Bros. Series Trophies
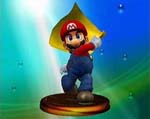
Mario [Smash 1]
Trophy description
Mario is a character without any glaring weaknesses and plenty of strong attacks: he's even equipped with a Meteor Smash. He's a straightforward character who'll reflect the actual skills of the player. Mario's Cape will turn other characters in the opposite direction and can also reflect missile weapons.
How to get it
Clear Adventure with Mario or play 200 VS. Mode matches with Mario.
Mario [Smash 2]

Trophy description
Mass determines how easily a character can be sent flying, as well as a character's physical strength: Mario's mass is the standard upon which other Smash fighters are measured. His Super Jump Punch sends foes skyward in a shower of coins, while the Mario Tornado pulls in nearby foes, spins them silly, and scatters them every which way.
How to get it
Clear All-Star with Mario or play 300 VS. Mode matches with Mario.
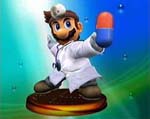
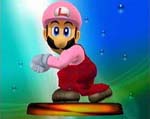
Dr. Mario [Smash 1]
Trophy description
There's hardly any difference in the abilities of Mario and Dr. Mario, so choosing is largely a matter of taste. Dr. Mario is a tad slower due to his lack of exercise, but his Megavitamins pack a bit more punch than Mario's Fireballs. The capsules travel on a unique trajectory and make a distinct sound on impact.
How to get it
Clear Adventure with Dr. Mario or play 200 VS. Mode matches with Dr. Mario.
Dr. Mario [Smash 2]
Trophy description
The differences between Dr. Mario and Mario are more pronounced in some areas than others, but basically they can be played in a similar fashion. While it may be hard to spot the contrasts, they do exist. For example, Dr. Mario's Super Sheet is longer and narrower than Mario's cape, and any opponents hit by Dr. Tornado will fly off in diverse directions.
How to get it
Clear All-Star with Dr. Mario or play 300 VS. Mode matches with Dr. Mario.
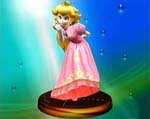
Peach [Smash 1]
Trophy description
Peach's ability to float is invaluable in Super Smash Bros. Melee, as she can return from incredible distances. Balancing this talent, though, is the fact that she's quite light and can be sent flying with a single powerful attack. Her attacks are fairly weak, so you'll have to hang around to win.
How to get it
Clear Adventure with Peach or play 200 VS. Mode matches with Peach.
Peach [Smash 2]

Trophy description
Peach's Smash A attack will set her swinging with either a frying pan, tennis racket, or golf club. These bludgeoning devices appear randomly and have different reaches and power levels. The princess uses Toad to absorb attacks, and he counters by sending spores out at attackers. Don't worry about the little guy, though; he takes his job seriously.
How to get it
Clear All-Star with Peach or play 300 VS. Mode matches with Peach.
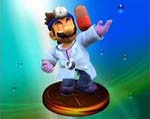
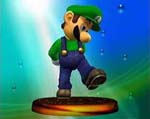
Luigi [Smash 1]
Trophy description
Luigi has worse traction than his brother, but he's a more powerful jumper. His Fireballs aren't affected by gravity, so they fly straight horizontally. The Green Missile is similar to Pikachu's Skull Bash, but there's a 12.5% chance of a spontaneous misfire. Luigi's taunting pose inflicts minor damage.
How to get it
Clear Adventure with Luigi or play 200 VS. Mode matches with Luigi.
Luigi [Smash 2]
Trophy description
Smack someone with Luigi's Super Jump Punch, and if the timing is just right, it will become a Fire Jump Punch of incredible strength. However, Luigi can only jump straight up when delivering this blow, and if his aim is a bit off, he'll only do a single point of damage. The Luigi Cyclone sucks foes in and twirls them about.
How to get it
Clear All-Star with Luigi or play 300 VS. Mode matches with Luigi.
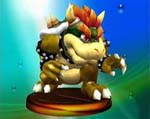
Bowser [Smash 1]
Trophy description
In many ways, Bowser is the toughest character around. Not only does he have near-impervious hide, but his great mass makes him almost impossible to hurl offscreen. Of course, his weight also makes him rather slow to maneuver, so when facing him in battle, it's best to press your attack and not give him a chance to counter.
How to get it
Clear Adventure with Bowser or play 200 VS. Mode matches with Bowser.
Bowser [Smash 2]
Trophy description
Bowser's Fire Breath strikes continually, but it grows gradually smaller over time until it's barely smoldering. The Koopa Klaw rakes enemies at a distance and pulls nearby foes in close for a good gnawing. Bowser's Whirling Fortress moves laterally over the ground; it works in midair as a recovery. The Bowser Bomb is powerful and paves the way for more attacks.
How to get it
Clear All-Star with Bowser or play 300 VS. Mode matches with Bowser.
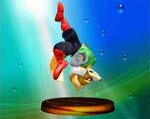
Yoshi [Smash 1]
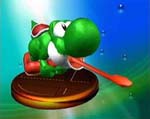
Trophy description
To make up for his lack of powerful airborne attacks, Yoshi has a miraculous jumping ability and is resistant to damage while in the air. Yoshi can also swallow a foe and transform him or her into an egg: try doing this close to an edge! The speed and power of the Egg Roll increases if you hold down the B Button, but it'll be tougher to control.
How to get it
Clear Adventure with Yoshi or play 200 VS. Mode matches with Yoshi.
Yoshi [Smash 2]
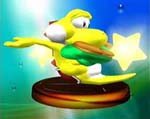
Trophy description
Yoshi has no third jump, so the timing of his second jump is of vital importance. The angle and distance of his Egg Throw can be altered by how you tilt the Control Stick and how long you press the B Button. When Yoshi lands after doing his Yoshi Bomb, stars appear on either side of him, making it hard for enemies to deliver counterattacks.
How to get it
Clear All-Star Mode Yoshi or play 300 VS. Mode matches with Yoshi.
Donkey Kong [Smash 1]
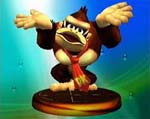
Trophy description
Donkey Kong is a huge target in a fight, so he hates crowds. When he's in the fray, his Giant Punch deals serious damage to multiple opponents. The big ape's Headbutt hits so hard that it temporarily buries opponents in the ground. DK is a lot faster than he looks, and he's lethal in the hands of a master.
How to get it
Clear Adventure with Donkey Kong or play 200 VS. Mode matches with Donkey Kong.
Donkey Kong [Smash 2]
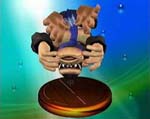
Trophy description
Being the strongest simian around, DK has the upper hand once he grabs an opponent. He can even lift his foe up and make him or her an unwilling travelling companion; if DK grabs you, shake your Control Stick as fast as you can to break his grip. His Spinning Kong covers more lateral distance than vertical, so use it quickly to recover.
How to get it
Clear All-Star with Donkey Kong or play 300 VS. Mode matches with Donkey Kong.
Link [Smash 1]
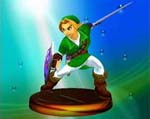
Trophy description
Burdened with a shield, a heavy sword, and plenty of equipment, Link is not a very mobile character. Nevertheless, he's skilled with the blade, and his varied supply of missile weapons makes him a powerful fighter. To master Link, you must control the pace by balancing your long-range attacks with head-to-head swordplay.
How to get it
Clear Adventure with Link or play 200 VS. Mode matches with Link.
Link [Smash 2]
Trophy description
Link's Bow, Boomerang, and Bombs all take time to wield, so you may want to try drawing them in midair to prevent your foes from attacking you while you're vulnerable. The Spin Attack can score consecutive midair hits, and the final slash is very powerful. Link's Bombs are his trump card, but he can't pull one out if he's carrying another item.
How to get it
Clear All-Star with Link or play 300 VS. Mode matches with Link.
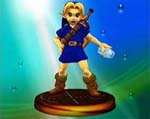
Zelda [Smash 1]
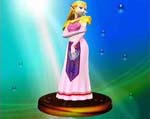
Trophy description
Zelda is a bit slow and, because of her light frame, easy to send flying. On the other hand, her magical skills lend her reliable and explosive attack power. Zelda's easier to use if you focus on waiting and countering rather than pressing attacks. She can use Nayru's Love to reflect projectile attacks or as an offensive weapon.
How to get it
Clear Adventure with Zelda or play 200 VS. Mode matches with Zelda.
Zelda [Smash 2]
Trophy description
Zelda's midair Lightning Kick centers immense magical power in the ball of her foot. If she strikes perfectly, the attack is as strong as can be. If her aim is slightly off, it'll be exceedingly weak. Farore's Wind again utilizes Zelda's magical prowess, this time by transporting her great distances. It's vital to know the lay of the land before using this move.
How to get it
Clear All-Star with Zelda or play 300 VS. Mode matches with Zelda.
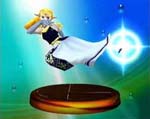
Sheik [Smash 1]
Trophy description
Strategically switching between Zelda and Sheik is key. Compared to her Zelda form, Sheik is nimble and has gorgeous moves, but she lacks a strong knockout attack. The number of needles thrown in Needle Storm is based on how long you hold the B Button before releasing it. Use the Control Stick to wave the chain after brandishing it.
How to get it
Clear Adventure with Zelda or play 200 VS. Mode matches with Zelda.
Sheik [Smash 2]
Trophy description
The best strategy to use when playing as Sheik is to let her flow from one powerful attack into another, like a river of quicksilver. Zelda has some techniques with more punch, however, so in one-on-one battls, use Transform as needed. Sheik only travels a short way when using Vanish, but the move comes with a small explosion that damages foes around her.
How to get it
Clear All-Star with Zelda or play 300 VS. Mode matches with Zelda.
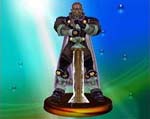
Ganondorf [Smash 1]
Trophy description
Since he's slow and can't jump very high, Ganondorf relies mainly on his immense physical strength to overwhelm his enemies. His great weight also makes him a difficult foe to send offscreen. Ganondorf's Warlock Punch is slow but absurdly powerful, and when he strikes with his Gerudo Dragon, enemies rise skyward enveloped in dark flames.
How to get it
Clear Adventure with Ganondorf or play 200 VS. Mode matches with Ganondorf.
Ganondorf [Smash 2]
Trophy description
Ganondorf's slow speed works against him in single combat, but in melees, his crazy power lets him earn his keep with innumerable KOs. Ganondorf can't strike quickly, but each blow he lands adds up. Ganondorf is at his quickest when he uses the Wizard's Foot, and his Dark Dive blasts foes in a burst of dark energy.
How to get it
Clear All-Star with Ganondorf or play 300 VS. Mode matches with Ganondorf.
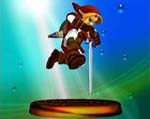
Young Link [Smash 1]
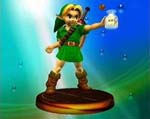
Trophy description
Young Link is lighter and faster than his older self, and his Kokiri sword packs less punch. Even though his Boomerang has a shorter range, he has greater control over it. He's a smaller target, and while his Hookshot has less reach than older Link's, you can still use it in midair as a last ditch attempt to grab a ledge.
How to get it
Clear Adventure with Young Link or play 200 VS. Mode matches with Young Link.
Young Link [Smash 2]
Trophy description
With a youthful spring in his step, Young Link can perform amazing wall-jumps. Once he hits a wall, tap the Control stick in the opposite direction to send him leaping upward; you can practice to your heart's content in Target Test. His Spin Attack can strike multiple times even on the ground, and although it's hard to discern, so do his Bombs.
How to get it
Clear All-Star with Young Link or play 300 VS. Mode matches with Young Link.
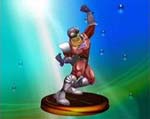
Captain Falcon [Smash 1]

Trophy description
Falcon's style is a balanced combination of raw power and speed. His attacks are slow, but when combined with Falcon's high mobility, he's a formidable combat force. The Falcon Punch packs the highest degree of destructive power, while the explosive Raptor Boost can be used to smash airborne foes into the depths.
How to get it
Clear Adventure with Captain Falcon or play 200 VS. Mode matches with Captain Falcon.
Captain Falcon [Smash 2]
Trophy description
The Knee Smash, used in midair on foes in front of you, is slow and has a short reach, but if it connects, it'll send foes flying a long way on a low trajectory. Falcon uses his Falcon Dive to grab an enemy in midair and fling them away with an explosive blast. He can do this technique repeatedly without landing, so it can also be used as a recovery move.
How to get it
Clear All-Star with Captain Falcon or play 300 VS. Mode matches with Captain Falcon.
Fox McCloud [Smash 1]
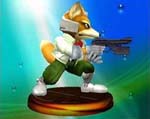
Trophy description
Fox is among the quickest and nimblest of the Smash Bros. characters. His speed is offset by low firepower, however, and he's better at one-on-one fights than melees with multiple foes. His Blaster is unique: it does damage but it doesn't make enemies flinch. His Fox illusion is best used as a surprise attack.
How to get it
Clear Adventure with Fox or play 200 VS. Mode matches with Fox.
Fox McCloud [Smash 2]
Trophy description
Fox falls quickly, so he's a tough target to strike from below; however, this advantage can work against him when he goes flying sideways. You can use the Control Stick to set the direction of the Fire Fox technique while it's charging up. On a side note, Fox is also much lighter than he was in the N64 Super Smash Bros. game.
How to get it
Clear All-Star with Fox or play 300 VS. Mode matches with Fox.
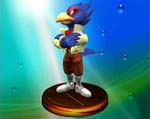
Falco Lombardi [Smash 1]
Trophy description
Where his leader, Fox, has blinding speed, Falco has his own distinct skills and advantages. He has both a higher jump and a longer reach than Fox, and although his Blaster lacks rapid-fire capabilities, it strikes with shocking force. Unlike Fox, Falco can stop enemies in their tracks with his Blaster fire.
How to get it
Clear Adventure with Falco or play 200 VS. Mode matches with Falco.
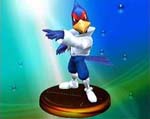
Falco Lombardi [Smash 2]
Trophy description
Falco's amazing jumping abilities have many merits, but it's vital to realize that it comes at the cost of some attack power and defensive strength. He falls at a high speed, which disrupts potential attackers, but this also prevents successful recoveries occasionally. Hit an opponent with Reflector, and he or she will fly straight up; this is Falco's quickest attack.
How to get it
Clear All-Star with Falco or play 300 VS. Mode matches with Falco.
Samus Aran [Smash 1]

Trophy description
Samus has an abundance of projectile weapons, making her a long-distance attack specialist. The most powerful weapon in her arsenal is her Charge Shot, but be warned: it can be reflected. Her missiles have homing capabilities, but when fired as Smash Attacks, they fly on a straight trajectory and have boosted power.
How to get it
Clear Adventure with Samus or play 200 VS. Mode matches with Samus.
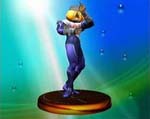
Samus Aran [Smash 2]
Trophy description
While Samus's arsenal of missile weapons is indeed formidable, her enemies are in for a rude awakening if they guard against nothing else. Her Grappling Beam captures foes and latches on to walls, and the Screw Attack drags foes upwards in a series of spins that doubles as a recovery move. Samus can also use her bombs to perform Bomb Jumps.
How to get it
Clear All-Star with Samus or play 300 VS. Mode matches with Samus.
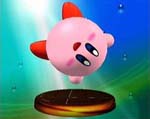
Kirby [Smash 1]
Trophy description
Kirby's small size lets him dodge many attacks, but his light weight makes him fly far when struck. Using his ability to inflate, he can jump five times. His Swallow attack creates wild combos; not only can he copy foes' moves, but he'll also put on special hats and mimic their voices. His Hammer is unwieldy but powerful.
How to get it
Clear Adventure with Kirby or play 200 VS. Mode matches with Kirby.
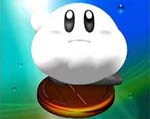
Kirby [Smash 2]
Trophy description
Because of his light weight, Kirby is always in danger of being sent flying, but his ability to puff up and fly allows him to come back from amazing distances. His Final Cutter strikes on the way up and on the way down, and it sends out a beam of force upon landing. Kirby transforms into various objects and crashes down when he uses his Stone technique.
How to get it
Clear All-Star with Kirby or play 300 VS. Mode matches with Kirby.
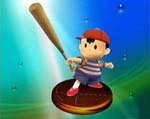
Ness [Smash 1]
Trophy description
The key to mastering Ness is controlling his unique midair jump, which makes up for what he lacks in speed. His PK Flash attack may seem weak at first glance, but it grows more powerful the longer you hold down the B Button. To do a lot of damage with PK Fire, try to burn your opponent as many times as possible.
How to get it
Clear Adventure with Ness or play 200 VS. Mode matches with Ness.
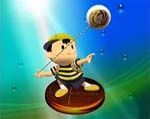
Ness [Smash 2]
Trophy description
Ness's mind is his best weapon. PK Thunder is a PSI missile weapon that can be guided using the Control Stick, and if Ness hits himself with it, he turns into a living missile capable of doing massive damage. This move can also be used for recovery. PSI Magnet turns energy missile attacks into health; try out certain Pokémon for stamina replenishment.
How to get it
Clear All-Star with Ness or play 300 VS. Mode matches with Ness.
Marth [Smash 1]
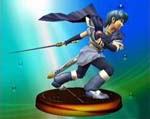
Trophy description
Marth is a magnificent swordsman. While his swordplay is faster than that of Link, he lacks power, and his quickness is offset by a marginal endurance. His Shield Breaker gains power the longer it's held. The Dancing Blade combination uses both the Control Stick and the B Button to produce a series of up to four attacks.
How to get it
Clear Adventure with Marth or play 200 VS. Mode matches with Marth.
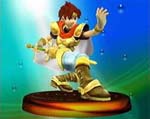
Marth [Smash 2]
Trophy description
The tip of Marth's blade causes the most damage, so you should try to create adequate distance between you and your enemy to gracefully strike with that point. Marth's Dolphin Slash is fast and powerful, but it leaves him vulnerable upon landing. Marth uses Counter to block a foe's attack and deal a return strike. If you're fighting a Counter-happy Marth, grab him.
How to get it
Clear All-Star with Marth or play 300 VS. Mode matches with Marth.
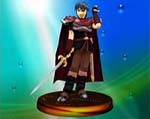
Roy [Smash 1]
Trophy description
While Roy's moves are well balanced, he's a little on the slow side, and doesn't excel at midair combat. His blade, the Sword of Seals, gives him excellent reach, and makes his Double-Edge Dance slightly different than Marth's Dancing Blade. When it's fully charged, Roy's destructive Flare Blade delivers an instant KO.
How to get it
Clear Adventure with Roy or play 200 VS. Mode matches with Roy.
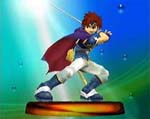
Roy [Smash 2]
Trophy description
Roy's blade is different than Marth's: he does the most damage hitting with the center of his sword. So, a fearless advance into the arms of his foe is Roy's best bet. Blazer is a bit slower than Marth's Dolphin Slash, but it's still a mighty attack that sets anyone it strikes aflame. Roy's attack after using Counter differs slightly from Marth's.
How to get it
Clear All-Star with Roy or play 300 VS. Mode matches with Roy.
Pikachu [Smash 1]
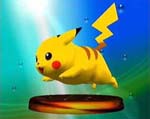
Trophy description
While its electrical attacks, such as Thunder Jolt, are powerful, Pikachu is at its best speeding around the fray and waiting for its chance to strike. You can control the path of Pikachu's two-directional Quick Attack, allowing you to jump twice. Hold down the B Button to charge up Skull Bash.
How to get it
Clear Adventure with Pikachu or play 200 VS. Mode matches with Pikachu.
Pikachu [Smash 2]
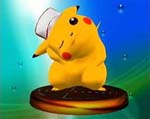
Trophy description
The angle of the Control Stick controls the direction of Pikachu's Quick Attack. Pikachu will move blindingly fast, and it will also cause damage to any character it runs into. Move the Control Stick during Quick Attack and Pikachu will move in up to two directions. Be sure to check out the ceilings on the level when you use Thunder.
How to get it
Clear All-Star with Pikachu or play 300 VS. Mode matches with Pikachu.
Pichu [Smash 1]
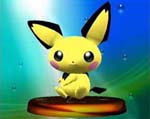
Trophy description
Compared with Pikachu, Pichu is a tad more nimble and a little more difficult to hit. Those are the only two advantages, however, and since Pichu damages itself when it uses electrical attacks, it's best suited for handicapped matches. Even though Pichu's tough to catch, it's easy to throw its tiny frame great distances.
How to get it
Clear Adventure with Pichu or play 200 VS. Mode matches with Pichu.
Pichu [Smash 2]
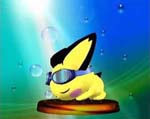
Trophy description
Pichu is the lightest character in Super Smash Bros. Melee., and it's top of the class in weakness, too! For Pichu, it's all about scampering here and there to pick up items that will help it survive. The first warp in Agility causes 1 point of damage to Pichu, and the second causes 3, so try to limit the number of times you use the move.
How to get it
Clear All-Star with Pichu or play 300 VS. Mode matches with Pichu.
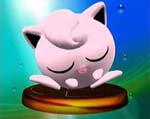
Jigglypuff [Smash 1]
Trophy description
Jigglypuff's normal attacks are weak, and because of its light weight it's easily sent flying. However, with its incredible midair agility, it seems to dance when airborne. Rollout is a powerful speed attack, but be careful not to fly off the edge. Pound does serious damage, and it can also help as a recovery move.
How to get it
Clear Adventure with Jigglypuff or play 200 VS. Mode matches with Jigglypuff.
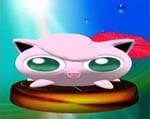
Jigglypuff [Smash 2]
Trophy description
Jigglypuff can put its enemies to sleep if they are in range of its Sing attack, although the attack does not work on airborne foes. Rest puts Jigglypuff into a deep sleep, but at the instant it drops off, an intense energy force radiates out of the exact center of its body. If this force comes in contact with an enemy, look out! Rest is Jigglypuff's wild card.
How to get it
Clear All-Star with Jigglypuff or play 300 VS. Mode matches with Jigglypuff.
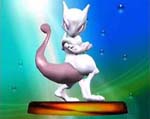
Mewtwo [Smash 1]
Trophy description
As Mewtwo relies mostly on its powerful brain, there are times when it scarcely uses its arms and legs. Since Mewtwo spends much of its time floating, it flies far when struck. Shadow Ball traces a jagged path once released: the longer Mewtwo holds it, the more powerful it becomes. Mewtwo uses Confusion to spin its foes around.
How to get it
Clear Adventure with Mewtwo or play 200 VS. Mode matches with Mewtwo.
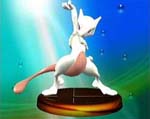
Mewtwo [Smash 2]
Trophy description
Mewtwo is definitely not a speedy character, but its ESP-powered grab and throw moves are comparatively strong. Teleport has a short range, but doesn't leave it open to attack. It's best used as an escape move during disturbances. Mewtwo can daze a foe if it makes eye contact and uses Disable; the move is useless unless Mewtwo is facing its enemy.
How to get it
Clear All-Star with Mewtwo or play 300 VS. Mode matches with Mewtwo.
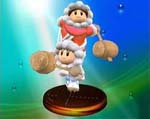
Ice Climbers [Smash 1]
Trophy description
This unique twosome fights together as a team. Your score will not be affected if the CPU-controlled character is KO'd, but a lone Ice Climber won't be able to use teamwork moves, which will make for a tough and frantic solo fight. The Ice Shot fires mini-glaciers out of their hammers, while Squall Hammer is at its strongest when Nana and Popo combine their strength.
How to get it
Clear Adventure with Ice Climbers or play 200 VS. Mode matches with Ice Climbers.
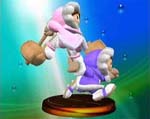
Ice Climbers [Smash 2]
Trophy description
The colors of the Ice Climbers' parkas denotes who's in the lead: Nana's in pink or orange, while Popo's in green or blue. Their hairstyles are also slightly different. Belay allows them to cover great distances, but doesn't give foes the chance to target their landing. Blizzard is best used in close quarters; in the fray, Nana and Popo will sometimes freeze opponents.
How to get it
Clear All-Star with Ice Climbers or play 300 VS. Mode matches with Ice Climbers.
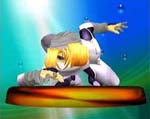
Mr. Game & Watch [Smash 1]
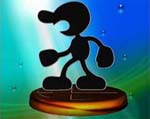
Trophy description
A resident of a totally flat world, Mr. Game & Watch's frame-by-frame movement is distinctive. His image is known far and wide and respected by gamers everywhere. In Super Smash Bros. Melee, he hurls sausages with his Chef technique. The random strength of his Judgement is determined by the number displayed; food appears on lucky 7.
How to get it
Clear Adventure Mode with Mr. Game & Watch.
Mr. Game & Watch [Smash 2]
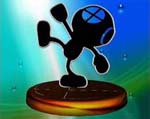
Trophy description
A man of great stature in the world of Nintendo characters, Mr. Game & Watch is a comparatively light fellow and doesn't feature many powerful attacks. When he's in danger of falling, Fire calls out a rescue brigade to send him skyward once more. He can also catch missile weapons with Oil Panic; once he's caught three, he can dump the bucket on his foes.
How to get it
Clear All-Star Mode with Mr. Game & Watch.
Barrel

Trophy description
Like Crates, Barrels are often filled with items and occasionally explosives. Thrown Barrels may break on contact or go rolling along the ground to smash into characters. Like the Crate, the Barrel is heavy, so it will restrict the speed at which the character carrying it can move. This speed differs between characters.
4/99
How to get it
Available in the Lottery and as a random drop in Classic, Adventure and All-Star.
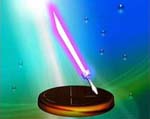
Beam Sword
Trophy description
With its distinctive glowing blade, the Beam Sword is eye-catching and lethal. At first, the blade is about the size of a short sword, but the length changes depending on who wields it. The blade also lengthens in direct proportion to the power of an attack, so it reaches its maximum size when swung as a smash attack.
4/99
How to get it
Available as a random drop in Classic, Adventure and All-Star.
Crate

Trophy description
A Crate will release lots of items when it's broken open. It's very heavy, so unless your character is strong, you'll walk slowly while under its burden. You can throw Crates up, down, left or right, but it's hard to hit opponents because the throwing process takes time. Every now and then, a Crate will explode under duress.
4/99
How to get it
Available in the Lottery and as a random drop in Classic, Adventure and All-Star.
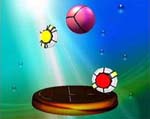
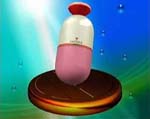
Capsule
Trophy description
These small containers contain items that fly out when the Capsules break. Capsules will explode roughly 12.5% of the time, so deciding where to break them can be quite a strategic decision; sometimes it's better to throw them rather than attacking them directly. Explosive Capsules pack a tremendous punch.
4/99
How to get it
Available in the Lottery and as a random drop in Classic, Adventure and All-Star.
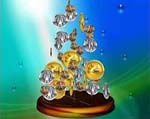
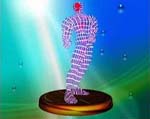
Smash Coins
Trophy description
These coins are used in Super Smash Bros. Melee Coin Battle mode. The gold coins are worth ten points, silver are worth five, and the copper are worth one. Hit an opponent and coins will come raining down. If you're knocked off the screen, you'll lose half of your coins. Once time's up, the player with the most coins wins.
12/01
How to get it
Play 100 VS. Coin Matches.
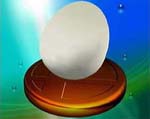
Egg
Trophy description
Eggs are basically the same as Capsules, in that they'll release items when you break them open. They've been known to explode, too. The likelihood that certain items may be inside Eggs depends on the type of stage being played. Sometimes Eggs will contain health-replenishing food items; other times, they may hold weapons.
4/99
How to get it
Available in the Lottery and as a random drop in Classic, Adventure and All-Star.
Food

Trophy description
These food items will restore your health when you eat them. There are 28 different types of food, and the nutritional value and yumminess quotient differs slightly with each type. Party Balls tend to hold the largest amount of food items. You may be vulnerable when gorging yourself, but you do need to eat to survive.
12/01
How to get it
Play 1000 VS. Mode matches.
Fan
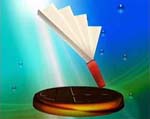
Trophy description
The Fan can be swung so rapidly that it leaves opponents unable to counterattack. It is, however, an exceedingly weak weapon. Despite this shortcoming, the Fan is quite effective as a shield breaker, and it works well at disrupting an enemy's equilibrium. Throw the fan to send your foe bouncing straight up into the sky.
4/99
How to get it
Available in the Lottery and as a random drop in Classic, Adventure and All-Star.
Home-Run Bat
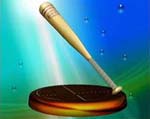
Trophy description
Smash an enemy with this slugger, and you'll send them flying out of sight; hence the name Home-Run Bat. The sound of the bat being swung immediately strikes fear into the hearts of opponents and can turn the tide of a battle. It's slightly risky to use, though; it has a very limited range, and it takes a little time to wind up for your swing.
4/99
How to get it
Available in the Lottery and as a random drop in Classic, Adventure and All-Star.
Party Ball
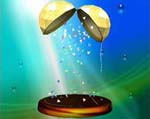
Trophy description
Party Balls are just what they sound like: a recipe for wild fun packed into a paper ball. Throw or strike one into the air, then wait for it to trigger its time-release. Parties are always unpredictable, so here are the odds on how zany your party might be: Self-destruction: 10% Food banquet: 36% Bob-omb fest: 12% Other: 42%
12/01
How to get it
Available in the Lottery and as a random drop in Classic, Adventure and All-Star.
Ray Gun
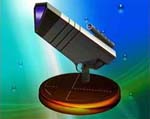
Trophy description
The Ray Gun is toy-like in appearance and shoots short, fat, highly reflective beams of green light. The gun is fairly weak, but since it fires so fast, it can easily juggle enemies. It contains enough energy for only 16 shots. Try dropping it with a few shots left and watch your foes waste time and energy retrieving it.
4/99
How to get it
Available in the Lottery and as a random drop in Classic, Adventure and All-Star.
Sandbag
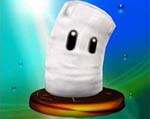
Trophy description
Sandbag exists for one reason only: to get smashed in the Home-Run Contest. Pound on Sandbag as much as possible in the time allotted, then swing for the fences as you compete for the longest home run of all time. Getting hit doesn't hurt Sandbag at all. As a matter of fact, it loves to see players wind up and let loose.
12/01
How to get it
Hit 984 feet (300 metres) in Home-Run Contest with any character.
Target
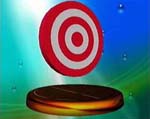
Trophy description
This is one of the targets you must hit and destroy in a bonus stage of Super Smash Bros. Melee. All bonus stages are specially designed to test the individual abilities of each fighter. Clearing the target-breaking levels requires an ultimate combination of skill, timing, and the specific techniques of each character.
4/99
How to get it
Clear Target Test with all 25 characters.
Battlefield
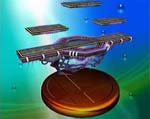
Trophy description
Super Smash Bros. Melee borrows settings from many different games to create its stages, but the Battlefield is an original creation. While its initial impression may strike some players as a bit ominous, the layout itself is fairly standard, lending it to serious, straightforward matches. Additionally, it's used to pit players against the Fighting Wire Frames.
12/01
How to get it
Clear All-Star.
Final Destination

Trophy description
As time passes on this stage, the level appears to travel through a wormhole from the imaginary Super Smash Bros. Melee world into reality. You move through a cloud-filled sky over a vast mountain range, then into a deep-space vista of dark blues and purples. The scenery is as real as you get in this fantastical world.
12/01
How to get it
Clear Event Match 51: The Showdown.
Male Wire Frame
Trophy description
Who built the Fighting Wire Frames and to what purpose remains a mystery. They're a simple collection of wires which house a sparse framework of bones and organs that lends them a rather disturbing appearance. They look rather big and powerful, but in reality, both their offensive and defensive abilities are subpar.
12/01
How to get it
Clear 100-Man Melee in under 4 minutes.
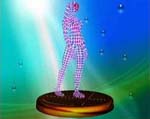
Female Wire Frame
Trophy description
This is the female model of the Fighting Wire Frames. The female's abilities are roughly the same as the male model's. All Fighting Wire Frames lack the ability to use special techniques, and their attacks lack any real physical strength. Additionally, they're slow and are therefore easy to outmaneuver. They tend to attack in gangs.
12/01
How to get it
Defeat 100 enemies in Endless Melee.
Fighting Wire Frames

Trophy description
The Multi-Man Melee mode consists of 10-Man, 3-Minute, Endless, and other such matches, which pit you against the Fighting Wire Frames under varied rules. Of particular note is the Cruel Melee, where the Wire Frames pull no punches; they'll come after you with a single-minded fury rarely seen in CPU opponents.
12/01
How to get it
Clear 15-Minute Melee.
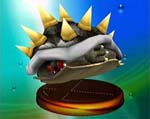
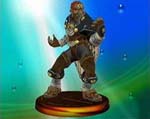
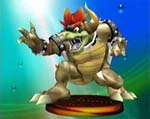
Giga Bowser
Trophy description
An even more imposing figure than the original King of the Koopas. Giga Bowser is roughly twice the size of his scaly, fire-breathing, spike-studded Super Smash Bros. Melee counterpart. Predictably, this monstrous creature's offensive and defensive powers are a grade higher than those of regular Bowser. Good luck defeating this colossus!
12/01
How to get it
Clear Adventure on Normal difficulty or higher in under 18 minutes and without using continues, then defeat Giga Bowser.
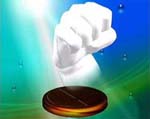
Master Hand
Trophy description
The Master Hand awaits anyone who survives the long and difficult road to the Final Destination. This symbolic link between the real world and the imaginary battlefields of Super Smash Bros. Melee is quite a handful in battle, and just because it wears a white glove doesn't mean it fights clean. Get ready to be flicked, swatted, punched and poked like crazy!
4/99
How to get it
Clear Classic on Hard or Very Hard difficulty without using continues.
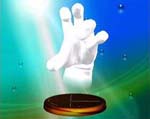
Crazy Hand
Trophy description
Where the Master Hand loves to create, its alter ego is impulsive and destructive, consumed with that hollow feeling which comes from destroying one's own creations. The Crazy hand appears when a player clears obstacles quickly and the Master Hand's power is low. You have only one chance to defeat the Crazy Hand.
12/01
How to get it
Clear Adventure on Hard or Very Hard difficulty without using continues.