Heisei Shin Onigashima Walkthrough
Introduction
Overcoming the language barrier of the Shin Onigashima series is difficult for players interested in the series but who are unable to understand the language. In many ways, Heisei: Shin Onigashima is even more difficult than the original, as it uses all three Japanese alphabets (while the original only used the phonetic Hiragana).
This guide has been written to help players who are interested in playing the game for themselves, or who simply want to find out what is going on. Instructions are given in on-screen Japanese text (where relevant) alongside translations in English so you know what actions you are performing. Key plot points have also been included so you can follow the events of each story.
The game is divided into four parts. The first three focus on the lives of Ringo the dog, Matsunosuke the monkey and Ohana the pheasant, while the final chapter retells the closing of the original game from the perspective of the animal characters.
Ringo's Story: Chapter 1
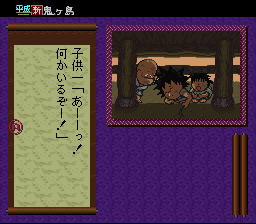
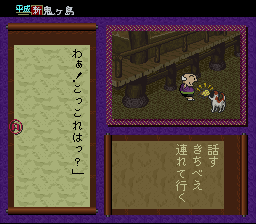
A small brown and white dog is hiding under a shrine in the village near the river. Three children find him and poke at him with a stick.
- 吠える (Bark)
- 吠える (Bark)
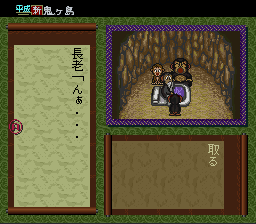
An old man pulls the kids out and scolds them for misbehaving. He reaches under the shrine and coaxes out the dog. The dog is named Ringo, and he decides to stay with the old man and his wife.
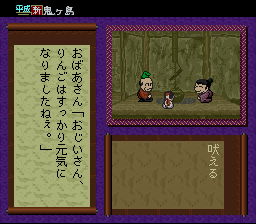
The old man tells Ringo all about the Spring Festival, and how the ashes from his hearth make the trees magically burst into blossom. He gathers a bag of the ashes, but while they are talking, the ashes mysteriously walk into the next room. The old man chases them in there to find them, while the old woman heads to the kitchen to prepare dinner. Ringo looks through the remaining ash and finds the old man's smoking pipe.
- 見る (Look) いろり (Hearth)
- 取る (Take) いろりの灰 (Hearth Ashes)
- 取る (Take) 何か (Something)
- 移動 (Move) 分かった (Understand)
- Down, 分かった (Understand)
- 歩く (Walk) along the path to the left and follow it under the house
- 移動 (Move) Up
- 歩く (Walk) back into the house
- 移動 (Move) Left
- 持ちもの (Inventory) きせる (Smoking Pipe) 渡す (Give)
The old man takes his smoking pipe and sits back by the hearth. He was covering up a hole in the floor all along. Ringo heads back under the house to investigate the hole again.
- 見る (Look) 床 (Floor)
- 移動 (Move) Right
- 移動 (Move) Down
- 歩く (Walk) along the path to the left and follow it under the house
- 移動 (Move) Up
- 見る (Look) 地面 (Ground)
- 移動 (Move) Left
- 見る (Look) 地面 (Ground)
- 移動 (Move) Right
- 移動 (Move) Down
He sees the hole from underneath and follows a small trail of ash to another hole in the back of the house. He spots mouse footprints in the dirt.
- 歩く (Walk) south of the house and to the left where the chickens are
- 話す (Talk) めんどり (Hen)
- 聞く (Ask)
- 聞かない (Listen)
- 移動 (Move) Down
- 歩く (Walk) left to the stable
- 話す (Talk) あお (Blue)
- 移動 (Move) Right
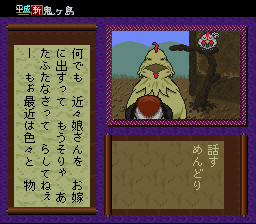
The chickens and Blue the horse has some information. A mouse that lives nearby is getting married and are gathering items for their celebration.
- Walk all the way to the right to the Old Man's Field
- 見る (Look) 畑 (Field)
- 探す (Search) 菜の花 (Blossoms)
- 探す (Search) れんげ草 (Lotus Grass)
- うん (Yeah)
- 移動 (Move) Left
Ringo digs in the field and uncovers a hole. He can hear voices, but he needs to coax the occupants out.
- 歩く (Walk) to the kitchen
- 食べない (Eat)
- 移動 (Move) Left
- 持ちもの (Inventory) 昆布 (Kombu) 渡す (Give)
- 移動 (Move) Down
- 歩く (Walk) down and to the right to the Old Man's Field
- 持ちもの (Inventory) 昆布 (Kombu) 穴の中へ (Inside the Hole)
When the delicious Kombu is dropped down the hole, an old mouse appears. He looks uncomfortable when asked about the Ash, and dashes off, looking for something white for his daughter's wedding.
- 移動 (Move) Left
- 歩く (Walk) to the left to the Stable
- 見る (Look) あお (Blue)
- 話す (Talk) あお (Blue)
- 話す (Talk) あお (Blue)
- 移動 (Move) Right
- 歩く (Walk) back to the Old Man's Field
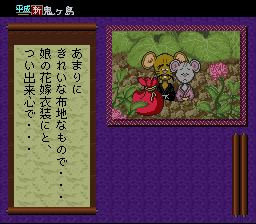
Blue gives Ringo a white handkerchief for the wedding celebration. Ringo takes it back to the hole in the field, where the blushing bride and her father await... with the bag of ash!
- 許す (Forgive)
- 持ちもの (Inventory) 灰の袋 (Bag of Ash) 渡す (Give) おじいさん (Old Man)
The old man is overjoyed when the bag of ash is returned. The next day, Ringo is congratulated by the whole village.
- 歩く (Walk) Right
- 歩く (Walk) Right
- Select either option
- 歩く (Walk) Right
- 歩く (Walk) Right
- 歩く (Walk) Right
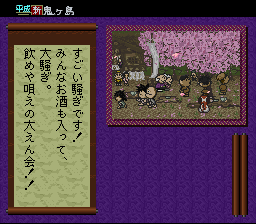
The old man spreads the ash on the trees and, as promised, they magically spring into bloom. And so begins the Spring Festival.
Ringo's Story: Chapter 2
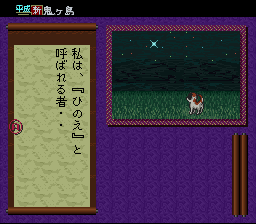
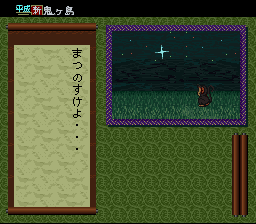
Eight years have passed and Ringo is still living with his owners by the river. One day he was taking another nap under the Hinoe Shrine when he has an unusual dream: A star in the night sky speaks to Ringo.
Ringo wakes up and overhears two people talking. They are unfamiliar to him and are discussing stealing precious items from the village. One of them has a very strong floral smell.
- 移動 (Move)
- かぐ (Sniff) 誰か (Somebody)
- 聞く (Listen)
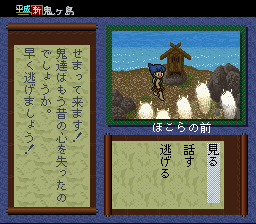
It's too late. By the time Ringo climbs out from under the shrine, the thieves have already gone. He decides to head home.
- 移動 (Move) Up
- 移動 (Move) Left
- 移動 (Move) Down
- 歩く (Walk) left to the first house (Ringo's House)
- 話す (Talk) おばあさん (Old Lady)
- 話す (Talk) おばあさん (Old Lady)
- 移動 (Move) Down
- 歩く (Walk) in front of the Old Man and Press A to talk
The old man seems to be running around the village trading goods. He is carrying a large bundle of straw.
- 歩く (Walk) to Yokubee's House (the next one on the left)
- 話す (Talk) よくべえ (Yokubee)
- 話す (Talk) よくべえ (Yokubee)
- 移動 (Move) Down
- 歩く (Walk) all the way left and stand in front of the Old Man. Press A to talk.
After visiting Yokubee, the old man appears again carrying a pile of oranges around in his arms. He dashes off again.
- 歩く (Walk) to Kichibee's House (the house on the far left)
- 話す (Talk) きちべえ (Kichibee)
- 話す (Talk) きちべえ (Kichibee)
- 話す (Talk) きちべえ (Kichibee)
- 移動 (Move) Down
- 歩く (Walk) all the way right and stand in front of the Old Man. Press A to talk.
After visiting Kichibee, the old man appears once more having traded the oranges for persimmon fruit.
- 歩く (Walk) to the Hineo Shrine (building on the far right, where you started Chapter 2)
- 移動 (Move) Up
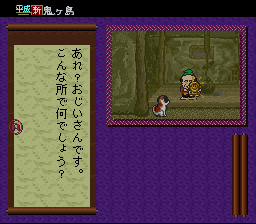
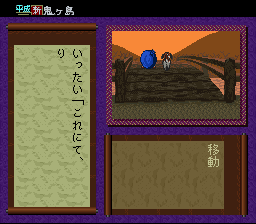
- 話す (Talk) 謎の老人 (Mysterious Old Person)
The old man introduces himself as Mr. Ittai. He tells Ringo that in the coming days he will meet a young boy, and he must travel with him and be loyal to him.
- 移動 (Move) Down
- 見る (Look) 本でん (Shrine)
- かぐ (Sniff) さいせん箱 (Collection Box)
- 移動 (Move) Right
- かぐ (Sniff) お金の匂い (Smell of Gold)
- 掘る (Dig)
After remembering the smell of gold, Ringo uncovers a pile of it buried near the shrine. Could this be where the thieves were hiding their stolen treasures?
- 移動 (Move) Left
- 移動 (Move) Down
- 歩く (Walk) all the way left to Kichibee's House.
- 話す (Talk) きちべえ (Kichibee)
- 連れて行く (Take Him With You)
(At this point, you can take Kichibee or Yokubee with you to the gold, and the story plays out slightly differently depending on your choice.)
Kichibee takes you to the Village Leader in the north of the village. He is amazed at Ringo's skill and asks if he would search for a missing ornamental hairpin that means a lot to his daughter, Ayuki.
- 歩く (Walk) straight up to the Village Leader's House.
- 見る (Look) おゆき (Ayuki)
- 分かった (Understand)
- 移動 (Move) Down
- 歩く (Walk) left, down and right to Ringo's House.
- 話す (Talk) おばあさん (Old Lady)
- 移動 (Move) Down
- 歩く (Walk) up and right to the Abandoned House (left of the Village Leader's House).
The old man is standing in the abandoned house with a small golden statue representing the Buddhist image of money (It's Mario!)
- 移動 (Move) Down
- 歩く (Walk) left to the Dumpling Store (far left house)
- 話す (Talk) あんすけ (Ansuke)
- 移動 (Move) Down
- 歩く (Walk) left to the Bridge (next screen)
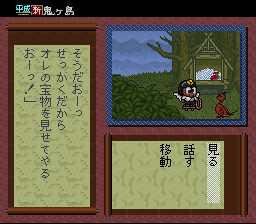
Sure enough, the old man traded the gold statue for a huge pile of dumplings. He gives one to Ringo and then heads home.
- 移動 (Move) Right
- 歩く (Walk) right, down and left and stand in front of Gorusaku (the man with the moustache)
- 話す (Talk)
- 渡す (Give) お団子 (Dumpling)
- 歩く (Walk) Right and stand in front of Oeno (the man with the long hair).
- 話す (Talk)
- 話す (Talk)
- 歩く (Walk) Left, up and right to the Village Leader's House.
- 話す (Talk) おゆき (Ayuki)
- かぐ (Sniff) におい袋 (Smell Bag)
- 移動 (Move) Down
Ringo gets the smell of the hairpin and follows it to the inn. The innkeeper is known for hating dogs, but Ringo has to investigate the theft.
- 歩く (Walk) left to the Inn (the large building).
- 吠える (Bark) 宿の主人 (Inn Landlord)
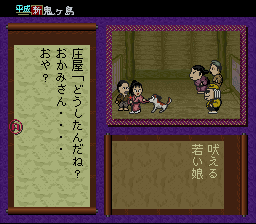
With the landlord gone, Ringo has five rooms to investigate. (Note: For this section you have a limit of 9 commands before you have to start over at the inn entrance. You get a warning at 6 commands.)
- 移動 (Move) Left
- 移動 (Move) Up
- 見る (Look) 若い娘 (Young Girl)
- 見る (Look) 若い娘 (Young Girl)
- かぐ (Sniff) 手荷物 (Luggage)
- 吠える (Bark) 若い娘 (Young Girl)
Ringo recognises the scent of the girl's room from earlier at the shrine, and his barking brings the landlord who tries to escort the girl away. But Ringo grabs the girl's sleeve and others show up to restrain them. Both of the true criminals have been found.
Thanks to following his nose, Ringo becomes the hero of the village yet again.
Ringo's Story: Chapter 3
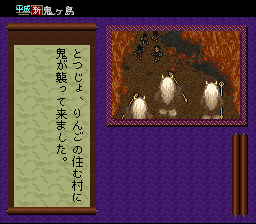
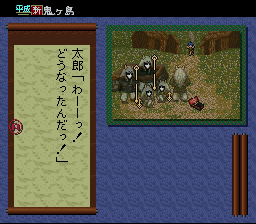
The Oni descend on Ringo's village. Many escape, but Ringo is trapped inside a collapsing house. When he comes to and pulls himself free, the village is nearly deserted.
- 歩く (Walk) right to the Village Leader's house. Gorusak appears.
- 話す (Talk)
Gorusak complains that he is hungry. He wonders what has happened to those who have been captured by the Oni, and then he runs away.
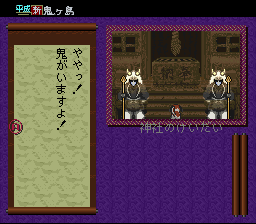
The shrine is guarded by Oni.
- 歩く (Walk) to Ringo's House.
- 移動 (Move) Down
- 歩く (Walk) right to the Shrine.
- 吠える (Bark)
- 移動 (Move) Down
The Oni don't react to Ringo's barking, and continue guarding the entrance.
- 歩く (Walk) to Mokichi's House (formerly the Abandoned House).
- 話す (Talk) 誰か (Somebody)
- 話す (Talk) もきち (Mokichi)
- 移動 (Move) Down
Mokichi came back to the village to see his house. He explains that when the Oni hear people talking, they attack.
- 歩く (Walk) in front of the Crow near Yokubee's house.
- 話す (Talk)
- 歩く (Walk) in front of the Crow near the Village Leader's house.
- 話す (Talk)
The crow tells Ringo that the Oni came here from the capital city, which has also been deserted.
- 歩く (Walk) in front of the Crow near Yokubee's house.
- 話す (Talk)
Ringo asks the crow whether his owners escaped or if they were captured. The crow responds by pointing towards the shrine where the Oni are.
- 歩く (Walk) in front of the Crow near the Village Leader's house.
- 話す (Talk)
The crow says the shrine is where the Oni are pulling the souls out of humans. He also mentions that a strange man has been seen walking around near the bridge.
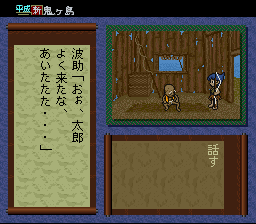
- 歩く (Walk) to the village bridge - Kintaro stands in front of the entrance
- 話す (Talk)
Kintaro has been waiting for Ringo, and tells him to go onto the bridge.
- 話す (Talk)
- 話す (Talk) 男の子 (Boy)
- 移動 (Move) Right
The young boy (Donbe) gives Ringo a dumpling. As soon as he eats it, Ringo is filled with courage and strength. Donbe asks Ringo if he has seen a girl come by here, and when Ringo responds he is able to speak in a human voice.
- 歩く (Walk) to the Shrine
- 話す (Talk)
- 移動 (Move) Down
- 叫ぶ (Shout)
With his newfound voice, Ringo is able to lure the Oni away from the shrine.
- 移動 (Move) Up
- Action Scene: Move from pillar to pillar without the turning Oni seeing you. When standing behind the narrow pillars, press Down to face forward. If you are spotted, Ringo returns to outside the shrine and you can try again.
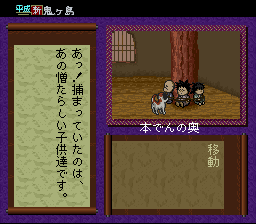
- 見る (Look) 子供達 (Children)
- 助ける (Rescue)
Ringo finds the three young boys from the village tied to a pillar. They are shocked to hear him speak, but grateful when he chews through the ropes. Ringo asks them if they know where his owners went, and the boys say they escaped into the mountains safely. Ringo creates a diversion by calling out to the Oni so the boys can escape.
Hinoesama appears in the sky above him and says that while his bravery freed those children, they are still not safe. Nobody will be safe unless Ringo helps the boy at the bridge with his mission. With that, Hinoesama disappears.
- 歩く (Walk) to the Bridge.
- はい (Yes)
- 移動 (Move) Right
- 歩く (Walk) to Ringo's house.
- 見る (Look) 部屋の中 (Interior)
- 聞く (Listen)
- 話す (Talk)
- かぐ (Sniff)
- 移動 (Move) Down
- 歩く (Walk) to Yokubee's house.
- 聞く (Listen)
- 移動 (Move) Down
- 歩く (Walk) to Kichibee's house.
- 見る (Look) 部屋の中 (Interior)
- 移動 (Move) Down
Ringo walks around the deserted village houses, taking in the sights and smells that have been so familiar to him. Before he gets too overwhelmed by emotion, he runs to the bridge and joins Donbe. The two walk over the bridge and into the sunset.
Matsunosuke's Story: Chapter 1
In a dream, Matsunosuke is visited by Hinoesama. He is told of an evil dragon, the Avatar of Darkness, which feeds on the souls of human beings and transforms them into Oni.
Many years ago, the dragon was sealed in a box and kept in the care of Princess Oto of the Ryukujin people. Over the years she entrusted care of the box to a dog, a monkey and a pheasant, whose descendents became guardians of the box. But a foolish man broke the seal on the box and freed the dragon. Matsunosuke is the ancestor of the monkey who helped Princess Oto, and he must join the group of heroes who are fighting to stop the end of the world.
Matsunosuke wakes up. He is in his cave. If he wants to leave on this very important journey he will have to get permission from the Boss.
- 旅に出る (Leave on a Journey)
- 移動 (Move) Left
- 歩く (Walk) All the way left to the Spa
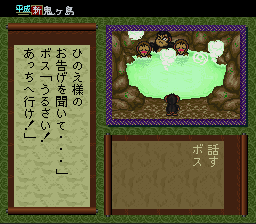
- 話す (Talk) ボス (Boss)
- 話す (Talk) ボス (Boss)
- 話す (Talk) ボス (Boss)
The boss has decided they will continue to guard the Water Shrine in the valley temple. Nobody may leave.
- 移動 (Move) Right
- 歩く (Walk) right to Monkey Room 2 (second cave)
- 話す (Talk) ボスの事 (About the Boss)
- 話す (Talk) 宮水の事 (About the Water Shrine)
The boss has been in a bad mood lately because the Elder is sick. The water at the shrine is said to heal all ills. Matsunosuke decides to go into the shrine and fetch some water to heal the Elder.
- 移動 (Move) Down
- 歩く (Walk) in front of Kakinosuke (climb the cliff, monkey on the far right)
- 話す (Talk)
Kakinosuke wants to come with you when you go on your journey. You agree to bring him along.
- 歩く (Walk) in front of Kunugimaru (next monkey on the left)
- お見舞い (Enquiry)
- 約束する (Promise)
- 歩く (Walk) up to the 3 little monkeys (to the left)
- 怒る (Angry) or あそぶ (Play)
- 歩く (Walk) to the cave entrance (continue left)
- 移動 (Move) Up
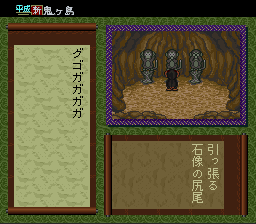
- 歩く (Walk) in front of the right stone statue
- 見る (Look)
- 引っ張る (Pull) 石像の尻尾 (Statue's Tail)
- 歩く (Walk) in front of the left stone statue
- 引っ張る (Pull) 石像の尻尾 (Statue's Tail)
- 歩く (Walk) in front of the middle stone statue
- 引っ張る (Pull) 石像の尻尾 (Statue's Tail)
- 歩く (Walk) left, up, right, up to Mural Room 1
- 歩く (Walk) in front of the mural
- 見る (Look)
- 入れる (Put) 手 (Hand)

After solving the first riddle of the shrine, putting your hand in the second mural doesn't work. There must be another way through.
- 歩く (Walk) down, left into the pit
- 温泉に入る (Get in Spring)
- 出ない (Get out)
- 移動 (Move) Right
- 歩く (Walk) to Monkey Room 1 (first cave)
- 移動 (Move) Down
- 歩く (Walk) in front of Takemaru (dancing monkey to the right)
- 話す (Talk)
- うん (Yeah)
- うん (Yeah)
- 歩く (Walk) to the Monkey Valley Gate (to the right)
- 見る (Look) くりのすけ (Kurinosuke)
- 移動 (Move) Left
After chasing the little monkey through the village, Matsunosuke gets the Hand Stone, which will unlock the second door in the shrine.
- 歩く (Walk) up and left to the cave entrance
- 移動 (Move) Up
- 歩く (Walk) left, up, right, up to Mural Room 1 and stand in front of the Mural
- 入れる (Put) 石 (Stone)
- 歩く (Walk) right, up, left, up to Mural Room 2 (avoid the dark spots on the ground - these are traps)
- 歩く (Walk) in front of the Mural
- 見る (Look)
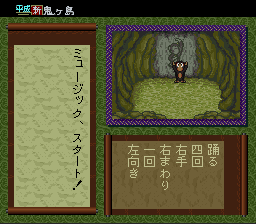
To open the final door, Matsunosuke will have to do the dance he learned from Takemaru.
- 踊る (Dance)
- 四回 (4 Times)
- 右手 (Right Hand)
- 右まわり (Turn Right)
- 一回 (1 Time)
- 左向き (Left Direction)
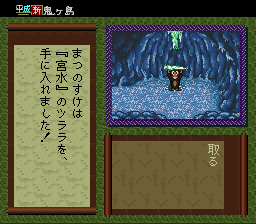
The final door opens and Matsunosuke reaches the water shrine. However, how will he transport the water back to the Elder?
- 歩く (Walk) 宮水の泉 (Water Shrine)
- 歩く (Walk) Move in front of the Water Shrine
- 取る (Take)
- 手ですくう (Hand Scoop)
- 考える (Think)
- 口にふくむ (Use Mouth)
- 歩く (Walk)
- 考える (Think)
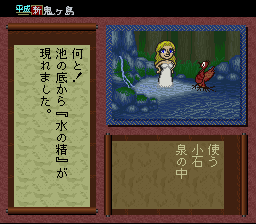
Matsunosuke can't work it out and loses his temper, knocking over the water shrine and spilling it. Now what can he do?
- 歩く (Walk) left, down, right to the room in front of the Water Shrine
- 歩く (Walk) on top of the trap (dark patch on floor)
- 歩く (Walk) in front of the icicle
- 見る (Look)
- 取る (Take)
The frozen shrine water in the ice cave is perfect. He takes it back to the Elder and gives him some of the water. The Elder sits bolt upright in no time at all. For saving the Elder, the Boss gives Matsunosuke special permission to go on his journey.
Matsunosuke's Story: Chapter 2
Matsunosuke and Kakinosuke are off travelling to find the heroes who will stop the Avatar of Darkness. They are still on the path from the valley, however, when Kakinosuke decides he wants to eat.
- 話す (Talk) かきのすけ (Kakinosuke)
- 話す (Talk) かきのすけ (Kakinosuke)
- 話す (Talk) かきのすけ (Kakinosuke)
- 賛成 (Agree)
- 見る (Look) まわり (Surroundings)
- 話す (Talk) かきのすけ (Kakinosuke)
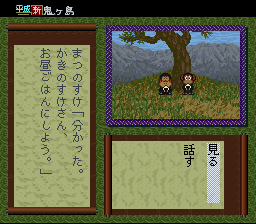
The two sit down to eat. Matsunosuke finishes his lunch faster, and decides he is going to investigate the nearby village.
- 話す (Talk) かきのすけ (Kakinosuke)
- 移動 (Move) Right
- 移動 (Move) Right
- 移動 (Move) Right
- 移動 (Move) Right
- 見る (Look) 街道 (Main Road)
The village is deserted, except for one house with a thunderous snoring coming from inside. Gravestones have been knocked over in the graveyard, and on the other side of the village is the main road. The village would be a good shortcut on their journey.
- 移動 (Move) Left
- 移動 (Move) Left
- 移動 (Move) Left
- 移動 (Move) Left
- 話す (Talk) かきのすけ (Kakinosuke)
- 話す (Talk) かきのすけ (Kakinosuke)
- 話す (Talk) かきのすけ (Kakinosuke)
- 話す (Talk) かきのすけ (Kakinosuke)
- 見る (Look) まわり (Surroundings)
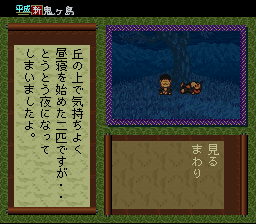
Matsunosuke reports back to Kakinosuke, but he wants to rest a little longer. When they both wake up again it is the middle of the night. Regardless, they decide to press on through the village to the main road.
- 移動 (Move) Right
- 移動 (Move) Right
- 移動 (Move) Right
- 話す (Talk) かきのすけ (Kakinosuke)
- 聞く (Listen)
- 話す (Talk) かきのすけ (Kakinosuke)
- 聞く (Listen)
- 移動 (Move) Up
- 行ってみる (Do It)
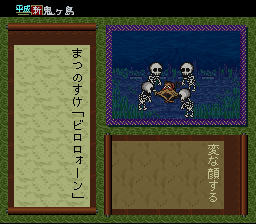
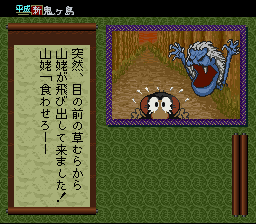
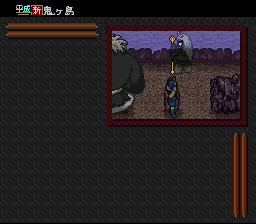
The pair hear a strange conversation on the other side of the grass. They burst through and see four skeletons. Kakinosuke escapes as fast as he can, while Matsunosuke is trapped by the advancing skeletons.
- 移動 (Move) Down
- 話す (Talk) 骸骨 (Skeleton)
- 変な顔する (Silly Face)
- 踊る (Dance)
- いいよ (I Do)
The skeletons are amused by Matsunosuki's antics. They tell him they were Elders of the village, and when their time came to move on to the afterlife the Oni attacked the village, knocked over their graves and scared away any villagers that could help. Now they are trapped on Earth until somebody puts their graves back.
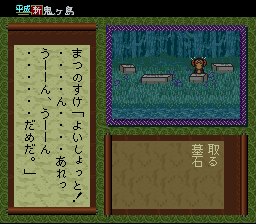
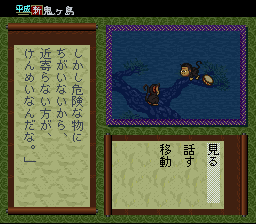
Matsunosuke agrees to help, but he's not sure he can do it alone. He tells them he heard a villager snoring. The skeletons laugh and say that'll be Netaro, who sleeps so heavily only thunder will wake him. The village had a special Thunder Drum made for that very purpose, but it went missing in the Oni attack.
- 話す (Talk) 骸骨 (Skeleton)
- 話す (Talk) 骸骨 (Skeleton)
- 移動 (Move) Down
- 移動 (Move) Left
- 取る (Take) 墓石 (Gravestone)
- 移動 (Move) Left
- 移動 (Move) Left
- 移動 (Move) Left
- 見る (Look) 松の木 (Pine Tree)
- 移動 (Move) Up
Kakinosuke escaped up the tree, terrified. When Matsunosuke tries to talk him round, Kakinosuke loses his grip and slides onto a strange object behind him that shocks him awake.
- 見る (Look) まわり (Surroundings)
- 話す (Talk) かきのすけ (Kakinosuke)
- 話す (Talk) かきのすけ (Kakinosuke)
- 見る (Look) 何か (Something)
- 話す (Talk) かきのすけ (Kakinosuke)
- たたく (Beat) 太鼓? (Drum?)
- 移動 (Move) Right
- 移動 (Move) Right
- 話す (Talk) 寝太郎 (Netaro)
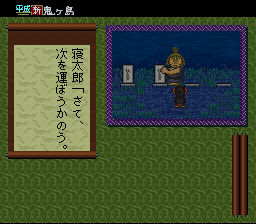
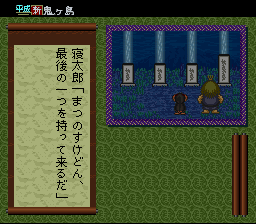
The Thunder Drum works! Although it destroys the tree and shocks the two monkeys, Netaro is awake. He agrees to help replace the gravestones for the skeletons, but he doesn't know which one goes where. Matsunosuke has to solve the skeletons' riddle to work out where to put them back.
- Press X Button > Press L Button
- Press L Button > Press Y Button
- Press R Button > Press X Button
The graves are returned and each skeleton has some advice to pass on before they move into the afterlife.
- 話す (Talk) 骸骨一 (Skeleton 1)
- もういい (OK)
- 話す (Talk) 骸骨二 (Skeleton 2)
- もういい (OK)
- 話す (Talk) 骸骨三 (Skeleton 3)
- もういい (OK)
- 話す (Talk) 骸骨四 (Skeleton 4)
- もういい (OK)
- 話す (Talk) かきのすけ (Kakinosuke)
The first tells you that you will meet people in the Mysterious Forest. The second says you can reach the forest by crossing the mountains, but beware of the Mountain Witch - and also that "Ceiling Steam" will be important somehow. The third skeleton has heard talk of a "Disk System version". The fourth skeleton tells you not to forget the language of flowers if you are to win Ume's heart.
They depart, and Kakinosuke appears. He found his destination and now he is ready to leave. Matsunosuke decides he will press on towards the mountains and the Mysterious Forest.
Matsunosuke's Story: Chapter 3

Matsunosuke is continuing his journey alone now, but he is still far from the Mysterious Forest.
- 移動 (Move) Right
- 移動 (Move) Right
- 移動 (Move) Right
- 見る (Look) まわり (Surroundings)
- 移動 (Move) Right
Matsunosuke approaches an old man who was waving at him from a hill. It's Mr. Ittai! He asks him how to get to the Mysterious Forest so he can continue his adventure.
- 話す (Talk) いったい (Ittai)
- 話す (Talk) いったい (Ittai)
- 話す (Talk) いったい (Ittai)
Mr. Ittai gives Matsunosuke a coin charm. All he has to do is concentrate and he will see the way he has to go.
- 使う (Use) お札 (Coin) 念じる (Think About) 奇怪々森 (Mysterious Forest)
- 使う (Use) お札 (Coin) 念じる (Think About) 奇怪々森 (Mysterious Forest)
- 念じる (Think About)
- 声に注意 (Warning)
- 声の方へ (Direction)
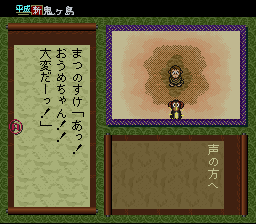
Matsunosuke tries to concentrate on the forest, but he is distracted by a call for help from the mountains. He sees Ome, his beloved, being held in the Lair of the Mountain Witch. He decides he must rescue her before he can join the quest Hinoe sent him on.
- 話す (Talk) いったい (Ittai)
- 山姥の家へ (Lair of the Mountain Witch)
- うん (Yeah)
Mr. Ittai's charm sends Matsunosuke charging towards the mountains. When he eventually arrives he is at the top of a cliff near a line of Guardian Deity statues.
- 歩く (Walk) up two screens and the mountain witch will appear. Matsunosuke will automatically escape down one screen, but you have to find a way to hide from the witch.
- Hold down the B Button to run over the muddy puddle and get covered in mud.
- 歩く (Walk) down one screen and right one screen and stand at the end of the line of statues. Don't press any buttons until the witch leaves.
The muddy Matsunosuke blends into the statues. The witch appears and curses that she lost him, returning back the way she came.
Matsunosuke shakes himself off when the coast is clear and heads back along the path. He comes across a little old lady along the way who needs help getting back to her house.
- 歩く (Walk) back left and up two screens to where the witch appeared.
- 見る (Look) おばあさん (Old Lady)
- 話す (Talk) おばあさん (Old Lady)
- 話す (Talk) おばあさん (Old Lady)
- いいよ (It is Good)
- 見る (Look) おばあさん (Old Lady)
- 見る (Look) まわり (Surroundings)
- 移動 (Move)
- 話す (Talk)
- 話す (Talk)
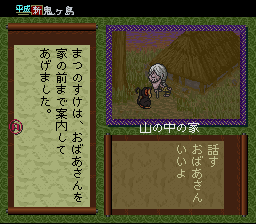
Matsunosuke tries to decline the old lady's offer of coming in to her house as he has to keep looking for Ume. But it's getting dark and she eventually talks him in.
- 見る (Look) おばあさん (Old Lady)
- 見る (Look) まわり (Surroundings)
- 見る (Look) ナベ (Pan)
- 話す (Talk)
- 話す (Talk)
- 話す (Talk)
- 話す (Talk)
Inside the pan is only water. When Matsunosuke asks what's behind the doors, the old lady says one is a bedroom and the other is a store room for food. The old lady's complexion has changed, but she insists it is simply the lighting. Matsunosuke is invited to sleep the night in the room on the left.
When Matsunosuke wakes up he hears some strange noises. When he asks what it is, the old lady responds that she's just preparing breakfast.
- 聞く (Listen)
- 話す (Talk)
- 聞く (Listen)
- 話す (Talk)
- 起きる (Get Up)
- 歩く (Walk) in front of the sliding door and press A
- 開ける (Open)
- 開ける (Open)
- ける (Kick) 引き戸 (Sliding Door)
- ける! (Kick!)
Matsunosuke decides to get up, but the door is locked fast. He kicks it and a small bit of plaster crumbles off the walls.
- 歩く (Walk) in front of the small hole that appears in the wall
- 見る (Look)
- ほじくる (Dig) カベ (Wall)
- 止めない (Stop)
- 歩く (Walk) back to the (now large) hole in the wall
- ほじくる (Dig) カベ (Wall)
- 止めない (Stop)
- 見る (Look)
- 登る (Climb)
By scraping the plaster off carefully, Matsunosuke avoids drawing the old lady to his room and reveals some beams that will allow him to climb onto the ceiling.

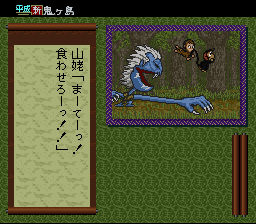
He hears the strange noises again and looks down to see the old woman is actually the Mountain Witch, boiling water to cook the monkey! He moves on a little further and sees Ome tied up in the next room. If he tries to rescue Ome now then he will be trapped in the room with her, so he has no choice but to disable the witch somehow.
- 歩く (Walk) to the steam, behind the witch. Matsunosuke will stop a couple of times, but then you can walk behind it.
- Facing the direction of the beam (as opposed to into the room) 見る (Look) to find a rope tied to the beam. You may have to 歩く (Walk) a couple of times to find the right spot behind the steam.
- 見る (Look) ナワ (Rope)
- ほどく (Untie) ナワ (Rope)
- おりる (Descend) into the witch's room
The witch is now blinded by the boiling water, running back and forth across the room. She is hitting the door on the left.
- 歩く (Walk) in front of the Door Bar on the left door
- はずす (Remove)
- 歩く (Walk) in front of the Sliding Door
- 開ける (Open)
- When the witch runs left into the open room, 閉める (Close) to trap her.
- 歩く (Walk) in front of Door Bar on the left door
- かける (Put Back)
With the witch trapped behind the locked door, Matsunosuke heads to the other room to rescue Ome.
- 歩く (Walk) in front of the Door Bar on the right door
- はずす (Remove)
- 歩く (Walk) in front of the right door
- 開ける (Open)
- 歩く (Walk) through the right door
The two monkeys escape, but the witch also breaks out of the room and gives chase. Ome tells Matsunosuke about timed action scenes and the two escape to the south.
- 話す (Talk)
- 話す (Talk)
- 移動 (Move) Down
- 話す (Talk)
- 話す (Talk)
The witch is behind them and their only option is to jump down the cliff using the small ledges.
- 見る (Look) 下 (Down)
- Action Scene: The screen scrolls down the cliff and up again, and you have to memorise the sequence and press the correct button for each direction before the timer runs out.
Solution: When prompted, Press L, R, L, R, L, L, L
They descend the cliff, but the witch jumps down next to them and attacks.
- Action Scene: The Mountain Witch is chasing behind the monkeys. When either Up or Down is displayed on the screen, press that direction on the Control Pad quickly to dodge her attacks. The pattern here is random.
The witch hits a tree branch and the monkeys reach the top of an even bigger cliff.
- 見る (Look) 下 (Down)
- Action Scene: The same as the first timed cliff jumping action scene, only there are more steps to memorise.
Solution: When prompted, Press L, R, L, L, L, R, L, R, R, R, R, R
They descend the second cliff, but again the witch is right behind them.
- Action Scene: The same as the first witch chasing scene, only this time she will attack you 9 times. After the first few attacks she will speed up her lunges and so you have to press the direction faster.

The monkeys escape again, but they reach a river. If they can't find a way to escape they will surely be eaten. Matsunosuke remembers Mr. Ittai's coin charm.
- 見る (Look) まわり (Surroundings)
- 話す (Talk) おうめ (Ome)
- 使う (Use) お札 (Coin)
- 念じる (Think About)
The coin charm makes a log appear in the river. They jump on board just in time, as the witch bursts from the undergrowth behind them.
- Action Scene: There are three stretches of river strewn with rocks. You have to avoid all of the rocks in order to escape the Mountain Witch for good. They either appear Top, Middle or Bottom.
Solution: The rocks appear (first stretch) Bottom, Top / (second stretch) Top, Middle, Bottom, Top / (final stretch) Bottom, Top, Middle, Bottom, Top & Middle together
The witch crashes into the rocks and the monkeys escape her for good. Matsunosuke returns Ome to the monkey valley.
- 見る (Look) おうめ (Ome)
- 話す (Talk) おうめ (Ome)
- 歩く (Walk) in front of Kurinosuke (monkey on the left)
- 話す (Talk)
- もう行くよ (Already Gone)
Ome had been sent to assist Matsunosuke, but had been captured by the witch and used as a lure to bring Matsunosuke. He remembered the skeleton's words and gave Ome the right flowers, and he gets his kiss. The other monkeys tell him that a shortcut to the Mysterious Forest has been found, and that strange people have been seen entering. Matsunosuke knows what he has to do and he runs off to join Donbe, Hikari and Ringo on their mission to Onigashima.
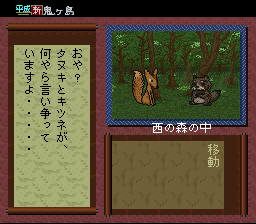
Ohana's Story: Chapter 1
Many, many years ago, a box containing a world of pure evil was given to Princess Oto of the underwater Ryukujin people. Her task was to defend the box and prevent it from ever being opened. But Princess Oto wasn't immortal, and at the end of her life she would entrust the box to a brave soul while she returned to the surface world and underwent a reincarnation ceremony.
Many generations later, Princess Oto has returned to the surface to prepare for the reincarnation ceremony where she is protected by a forest of woodland animals. The loyal pheasant Ohana has seen Oni in the area, which means the box of evil must have been opened.
Ohana rushes to tell the princess, but the mean baboon Bunkichi declares that he now works for a dragon, and Princess Oto has been taken prisoner.
- 話す (Talk) 文吉 (Bunkichi)
- 突っつく (Peck)
- Timed Action: かわす (Dodge) Left
Ohana decides to formulate a strategy to rescue the princess, but she can't do it alone. She will have to recruit the other woodland animals to help her. She will also need somewhere to stop Bunkichi.
- Fly right and down to the wooden bridge.
- 移動 (Move) Down
- 話す (Talk)
- 移動 (Move) Up
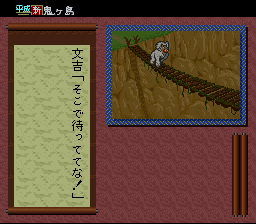
- 見る (Look) 吊り橋 (Bridge)
- 見る (Look) 吊り橋 (Bridge)
- 移動 (Move) Up
The bridge is the ideal setting for the plan to take place. Ohana will need someone to distract Bunkichi, someone to help free the princess and someone fast to escape, someone with sharp claws to cut the ropes on the bridge and someone who can prevent him from crossing the bridge.
- Fly directly left to the thick forest.
- 見る (Look)
- 見る (Look) 葉っぱ (Leaf)
- 話す (Talk) ミツバチ (Mitsubachi)
- 作戦 (Strategy)
Mitsubachi the bee agrees to help in any way he can.
- 移動 (Move) Down
- 話す (Talk)
- 作戦 (Strategy)
- タヌさん (Tansan)
- 移動 (Move) Up
- 移動 (Move) Up
Ohana chooses between the bickering Tansan (Tanuki racoon) and Keabo (Keaton fox) to take the role of distracting Bunkichi long enough to free the princess. Tansan's transformation skills will definitely come in handy.
- Fly to the giant tree
- 作戦 (Strategy)
- Select any option
- 移動 (Move) Down
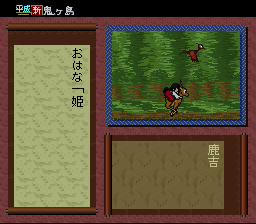
- 話す (Talk)
- 作戦 (Strategy)
- 鹿吉 (Shikakichi)
- 移動 (Move) Up
- 移動 (Move) Up
Beneath the giant tree, Shikakichi the deer and Itaro the boar agree to help. Shikakichi is the fastest of the two and will come in very helpful for an escape.
- Fly back to the bridge
- 移動 (Move) Down
- 話す (Talk)
- 作戦 (Strategy)
- 二番 (Two Claws)
- 移動 (Move) Up
- 移動 (Move) Up
The giant, 50 year old crab, Kani Hei, will come in very useful for cutting the ropes on the bridge. He agrees to help.
- Fly back to the giant tree
- 作戦 (Strategy)
- 四番 (Fourth)
- 移動 (Move) Up
- Now you have to wait for Jano to return by visiting other places
- Fly back to the giant tree
- 話す (Talk) ジャノウ (Jano)
- 移動 (Move) Up
Jano the sparrow is wise, but he refuses Ohana's request at first. When Ohana presents the full strategy, however, Jano consults with the forest spirits and then agrees to the request to rescue the princess.
- Fly to the forest clearing near the bridge
- 見る (Look) 地蔵 (Travellers' Statue)
- 分かった (Understand)
- Select either option
- 見る (Look) 森 (Forest)
- When the tree rustles, quickly select 見る (Look) 地蔵の方 (Statue Person)
- 見る (Look) 森 (Forest)
- 見る (Look) 地蔵 (Travellers' Statue)
- When the tree rustles, quickly select 見る (Look) 森の方 (Forest Person)
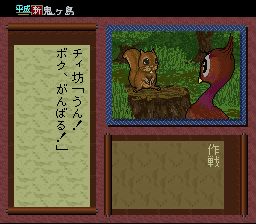
- 話す (Talk) チィ坊 (Chebo)
- 作戦 (Strategy)
- 移動 (Move) Up
With the squirrel Chebo's sharp teeth, your plan is ready to be put into action.
- Fly to the shrine where you started
- 作戦開始 (Start Strategy)
- はい (Yes)
- 移動 (Move) Left - Select quickly
- 移動 (Move) Right - Select quickly
- 移動 (Move) Right - Select quickly
- 話す (Talk) 鹿吉 (Shikakichi) - Select quickly
- Don't make any selections until the rope bridge collapses
- 合図 (Signal) - Select quickly
- 今だっ! (Now!) - Select quickly
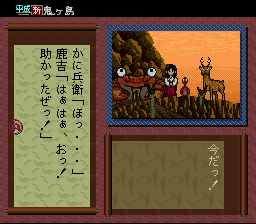
Tansan's transformation as Princess Oto distracts Bunkichi long enough to allow Ohana and Chebo to sneak in and chew through the real princess's ropes. Outside, Shikakichi awaits, and they escape through the forest with Bunkichi on their tail. They safely get across the bridge and wait for Bunkichi to cross as well, when Kani Hei cuts one of the ropes. Bunkichi grips with all his strength and continues to edge closer, so Ohana directs Mitsubachi to sting the hand. Bunkichi falls into the ravine. The strategy worked!
Princess Oto thanks the woodland creatures and returns to the shrine. She tells that if the box containing the evil world has been opened somehow, then the Dragon Ball that contains the spirit of the Avatar of Darkness will be reviving. The dragon will take several years to fully regain his strength, but the princess knows she won't be able to undergo the usual 50 year reincarnation ceremony. She will have to prepare for an emergency reincarnation.
Ohana's Story: Chapter 2
In her past reincarnations, the box of evil had been entrusted to a dog, a monkey and a pheasant. This time the box was entrusted to a brave young boy named Taro. Somehow, that boy opened the box and the evils from within are spilling out into the world. She has to undergo an emergency reincarnation.
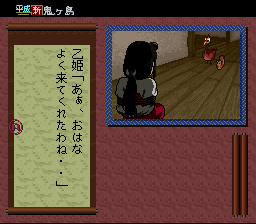
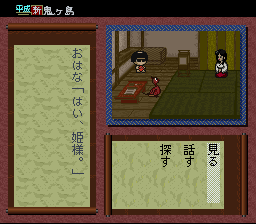
Kintaro arrives at the princess's shrine, hoping to take the necklace in preparation for the reincarnation.
- 見る (Look) まわり (Surroundings)
- 話す (Talk) 乙姫 (Youngest Princess)
- 探す (Search) こうり (Baggage)
- 探す (Search) 文机 (Desk)
- 話す (Talk) 乙姫 (Youngest Princess)
The necklace isn't where it should be. The princess requests that Ohana looks for it.
- 見る (Look) 吊り橋 (Bridge)
- 移動 (Move)
- 話す (Talk) ジャノウ (Jano)
- 話す (Talk) ジャノウ (Jano)
- 移動 (Move) Down
Jano says he saw a mysterious creature fly south to another forest with something shining in its mouth. Ohana doesn't remember seeing another forest before, and Jano warns her that it is the Forest of Monsters. Regardless, her mission is too important and Ohana enters the forest.
- 移動 (Move) Up
- 話す (Talk) 森の事 (About Forest)
- 話す (Talk) 天狗の事 (About Tengu)
- 自己紹介 (Introduce Myself)
- 話す (Talk) 首飾りの事 (About Necklace)
- 移動 (Move) Up
- 移動 (Move) Up
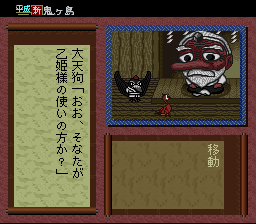
- 話す (Talk) 大天狗 (Big Tengu)
The Big Tengu grants Ohana permission to search the Forest of Monsters, as he and the princess are old acquaintances. He mentions that his young son has a liking for shiny things, and may be the culprit who was seen taking the necklace.
- 移動 (Move) Down
- 移動 (Move) Left
- 移動 (Move) Up
- 話す (Talk)
- はい (Yes)
- 話す (Talk)
- はい (Yes)
- 話す (Talk)
- 勝負 (Contest)
- はい (Yes)
- Action Scene: You have to guess which direction Satori will look in 5 times without getting it wrong, or you will have to touch the ground in front of the Travellers' Statue (Ittai Statue) before you can try again. It seems impossible to do it randomly, but if you wait until the clock is nearly up you can time it so Satori will be looking in the same direction as you point. If you are using an emulator, it is worth using savestates at this point.
- 移動 (Move) Up
Ohana eventually beats Satori's game and is allowed to travel north to where the Big Tengu's son, Tenchan, is hiding.
- 話す (Talk)
- 話す (Talk)
- 話す (Talk)
Tenchan will give you the necklace, but only in exchange for something even better. Ohana decides she will investigate the area to see what she can find.
- 移動 (Move) Down
- 移動 (Move) Down
- 移動 (Move) Right
- 移動 (Move) Up
- 話す (Talk) 大天狗 (Big Tengu)
- 話す (Talk) カラス天狗 (Crow Tengu)
- 移動 (Move) Down
- 移動 (Move) Left
- 移動 (Move) Left
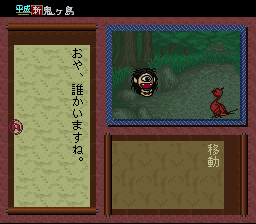
- 話す (Talk) 天の邪鬼 (Amanojak)
- いいえ (No)
- 移動 (Move) Right
- 移動 (Move) Right
- 移動 (Move) Right
- 移動 (Move) Down
- 見る (Look) まわり (Surroundings)
- 見る (Look) 何か (Something)
- 突っつく (Peck)
- 移動 (Move) Up
- 移動 (Move) Left
- 移動 (Move) Down
- 話す (Talk) 雪女の事 (About Snow Fairy)
- 話す (Talk) 河童の事 (About Kappa)
- 移動 (Move) Up
- 移動 (Move) Right
- 移動 (Move) Down
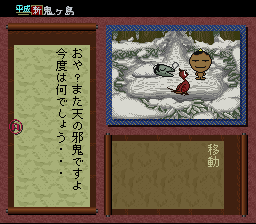
- 話す (Talk) 天の邪鬼 (Amanojak)
- 移動 (Move) Up
Ohana finds out that the snow fairy arrives every year and stays until the trees blossom. The kappa spends this time hibernating in the snow. Ohana also acquires a pebble, and it is said something good will happen if it is thrown into the fountain.
- 移動 (Move) Left
- 移動 (Move) Left
- 移動 (Move) Left
- 使う (Use) 小石 (Pebble) 泉の中 (In Fountain)
- 話す (Talk) 水の精 (Nizuno Spirit)
- 小石 (Pebble)
The Nizuno Spirit fairy appears and doesn't return the pebble, but a huge diamond! This will surely please Tenchan.
- 移動 (Move) Right
- 移動 (Move) Up
- 移動 (Move) Up
- 渡す (Give) ダイヤ (Diamond)
- 見る (Look) まわり (Surroundings)
- 見る (Look) ほこら (Shrine)
- 話す (Talk)
- 取る (Take) 赤い袋 (Red Bag)
- いいえ (No)
- 知らない (Don't Know)
- 移動 (Move) Down
Tenchan's shrine was absolutely filled with diamonds, but it also contained a red bag of ash. When Ohana asks about it (but doesn't take it), Tenchan sprinkles it on the trees and they burst into blossom. The Snow Fairy sees this and leaves, so the snow starts melting.
- 移動 (Move) Down
- 移動 (Move) Right
- 移動 (Move) Right
- 移動 (Move) Down
- 話す (Talk) 河童 (Kappa)
- 話す (Talk) 河童 (Kappa)
- 移動 (Move) Up
- 移動 (Move) Left
- 移動 (Move) Up
- 話す (Talk) 大天狗 (Big Tengu)
- 移動 (Move) Down
Ohana finds out about the Invisibility Cloak passed down through the Tengu family, although it has been lost for many years. If she can find the cloak then that will surely be good enough to trade for the necklace.
- 移動 (Move) Down
- 見る (Look) かん板 (Noticeboard)
- 話す (Talk) ヤブの事 (About Overgrowth)
- 移動 (Move) Left
- 移動 (Move) Left
- 移動 (Move) Down
- 移動 (Move) Right
- 移動 (Move) Up
- 移動 (Move) Up
- 移動 (Move) Left
- 話す (Talk)
- 話す (Talk)
- 移動 (Move) Right
- 移動 (Move) Right
The giant, weeping stone wants to be reunited with her child, a little pebble. Ohana realises that the pebble she threw into the fountain must have been the child, but wasn't it turned into a diamond?
- 移動 (Move) Up
- 移動 (Move) Right
- 移動 (Move) Down
- 話す (Talk) 河童 (Kappa)
- 移動 (Move) Up
- 移動 (Move) Left
- 移動 (Move) Left
- 移動 (Move) Left
- 移動 (Move) Right
- 移動 (Move) Right
- 移動 (Move) Down
- 移動 (Move) Left
- 移動 (Move) Left
- 渡す (Give) 小石 (Pebble)
- 見る (Look) まわり (Surroundings)
- 見る (Look) 何か (Something)
- 渡す (Give) かくれミノ (Invisibility Cloak)
The kappa dives into the fountain and returns the pebble to Ohana, who takes it to the weeping rock. It disappears, revealing the invisibility cloak, which she trades with Tenchan for the necklace.
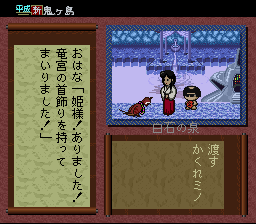
Ohana arrives at Shiraishi Fountain and returns the necklace to Princess Oto. Both her and Taro, the human who was entrusted with the stone, are ready to begin the reincarnation process. However, because the process is being hurried along, they will be reborn as children and spend 8 years growing up. That will be when Ohana will see them both again.
They enter the mysterious reincarnation craft, and Ohana agrees to remain at Shiraishi Fountain, waiting for the heroes to return.
Taro's Story
Many years ago, a young boy named Taro lived in a small village on the beach. One day he rescued a turtle who was being bullied by the local children. The turtle introduced himself as Shinnosuke and thanked him by taking him to visit Princess Oto of the Ryukujin in her underwater Dragon Palace. Taro's bravery was applauded, and he spent several days there, but he came to miss life on the surface and it was agreed he would be sent back.
When he returned to his village, everything and everyone had changed. What had been days for him in the Dragon Palace had been many years on the surface world. Nevertheless, the new villagers took him in and he grew into a strong young man.
The turtle returned to the island looking for Taro one day, but (unluckily) he was set upon by the new village children.
- 話す (Talk) カメ (Turtle)
- 起こす (Flip) カメ (Turtle)
- 話す (Talk) カメ (Turtle)
- 分かった (Understand)
Taro is unable to help the turtle and the children won't leave it alone, but he promises to return. He has a plan to catch and prepare dinner so the children will have to leave.
- 移動 (Move) Up
- 移動 (Move) Up
- 移動 (Move) Up
- 移動 (Move) Right
- 見る (Look) 部屋の中 (Inside Room)
- 取る (Take) 釣竿 (Fishing Rod)
- そうだなぁ (It Is)
- 移動 (Move) Left
- 移動 (Move) Down
- 移動 (Move) Down
- 移動 (Move) Down
- 移動 (Move) Right
- 見る (Look) 小船 (Boat)
- 使う (Use) 小船 (Boat)
- よし! (OK!)
- 使う (Use) 釣竿 (Fishing Rod)
- まだまだ (More to Go)
- 移動 (Move) 浜 (Shore)
Nothing is biting today. Taro decides to consult the village elder.
- 移動 (Move) Left
- 移動 (Move) Up
- 移動 (Move) Up
- 移動 (Move) Left
- 話す (Talk)
- 行った (Do It)
- ぜんぜん (Not At All)
- 移動 (Move) Right
- 移動 (Move) Up
- 移動 (Move) Up
- お参り (Worship)
- 三番 (Third)
Taro prays for a rich and happy village.
- 移動 (Move) Down
- 移動 (Move) Down
- 移動 (Move) Left
- 話す (Talk)
- うん! (Yeah!)
- うん! (Yeah!)
- 分かった (Understand)
- 話す (Talk)
- 移動 (Move) Right
The elder gives Taro a true fisherman's tool, the spear. With it, Taro should be able to get a good haul. He suggests that Taro finds out what everybody in the village will want.
- 移動 (Move) Right
- 話す (Talk)
- 話す (Talk)
- 移動 (Move) Left
- 移動 (Move) Up
- 移動 (Move) Left
- 話す (Talk)
- 話す (Talk)
- 移動 (Move) Right
- 移動 (Move) Down
- 移動 (Move) Down
- 移動 (Move) Down
- 移動 (Move) Right
- 使う (Use) 小船 (Boat)
- よし! (OK!)
- 使う (Use) モリ (Spear)
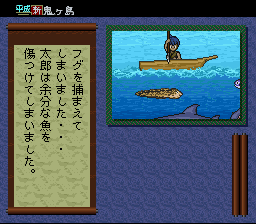
- Action Scene: Time pressing the A Button to catch a Bream (red fish), Jack (blue fish with big fin) and three Mackerel (small gray fish). Avoid spearing the sharks too many times.
With his fish in hand, Donbe heads back to the village to hand out everybody's orders.
- 移動 (Move) Left
- 移動 (Move) Up
- 移動 (Move) Up
- 移動 (Move) Left
- 渡す (Give) タイ (Bream)
- 移動 (Move) Right
- 移動 (Move) Right
- 渡す (Give) アジ (Jacks)
- 移動 (Move) Left
- 移動 (Move) Up
- 移動 (Move) Left
- 渡す (Give) サンマ三匹 (Three Mackerel)
- 渡す (Give) アジ (Jacks)
- 移動 (Move) Right
- 移動 (Move) Down
- 移動 (Move) Right
- 話す (Talk)
- 移動 (Move) Left
- 移動 (Move) Up
- 話す (Talk) おはま (Ohama)
Ohama starts to cook the fish outside his home. That should get the children back to the village.
- 移動 (Move) Down
- 移動 (Move) Down
- 移動 (Move) Down
- 話す (Talk) 子供達 (Children)
The children run back to the village for their dinner.
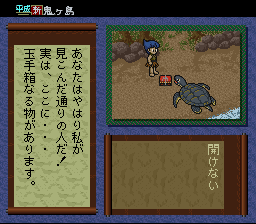
Grateful for your help, the Turtle asks you a series of questions to judge if you are worthy to be entrusted with a special item.
- 話す (Talk) カメ (Turtle)
- 起こす (Flip) カメ (Turtle)
- 話す (Talk) カメ (Turtle)
- いいよ (OK)
- もちろん (Of Course)
- たぶん (Maybe)
- 開けない (Won't Open)
- 移動 (Move) Up
Having answered Shinnosuke's questions correctly, he is entrusted with a box. He is not to open it under any circumstances, and the turtle will return for it in 50 years. This task has been given to him as he has shown utmost bravery and befriended the princess of the Ryukujin.
- 移動 (Move) Up
- 移動 (Move) Left
- 話す (Talk)
- 話す (Talk)
- 移動 (Move) Right
- 移動 (Move) Up
- 移動 (Move) Up
- しまう (Put Away)
The elder suggested Taro hide the box in the shrine, where it won't be touched by anybody.
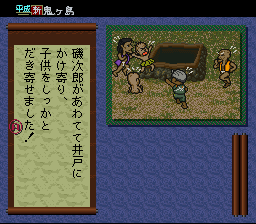
Taro heads north to hide it, but then he hears a scream from the well. The village children were playing and look like they're about to fall in. Taro spins around and runs through the village without thinking, but trips.
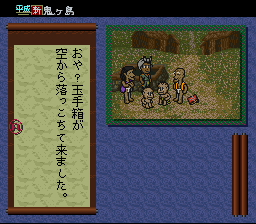
The other villagers reach the well first and help the children when a small box lands next to them. The seal had been unwound by the fall and it opens... Smoke pours out and a horrible sound is heard from within. When the smoke clears the villagers are no more. Stood in their place are soulless Oni. Taro runs down towards them, but he gets no response.
- 話す (Talk) 鬼達 (Oni)
- 逃げる (Escape) Up
- 話す (Talk) 鬼達 (Oni)
- 逃げる (Escape) Up
- 逃げる (Escape) Left
- 見る (Look) 海 (Sea)
- 逃げる (Escape) Left
Taro has no choice but to escape into the ocean. While he is floating, unconscious, he hears Hinoesama speak to him. He was entrusted with the box, but his rash actions have led to a great evil being unleashed on the world. For this, he must atone for his actions by travelling to the Dragon Palace and receiving a special bracelet. With it, he will help the princess seal the dragon once again.

He wakes up, still underwater, when he hears several fish nearby. They have escaped the Dragon Palace as something is very wrong.
- 話す (Talk) 魚一 (Fish 1)
- 話す (Talk) 魚二 (Fish 2)
- 話す (Talk) 魚三 (Fish 3)
- 話す (Talk) 魚四 (Fish 4)
- 見る (Look) まわり (Surroundings)
- 移動 (Move) Right
- 話す (Talk) くらげ (Jellyfish)
- 話す (Talk) おしの (Oshino)
Oshino the jellyfish tells Taro that a great vortex has swallowed the Dragon Palace, and the ground around it has begun to rise up. If he wants to travel there, he must do so quickly by swimming through the vortex.
- 移動 (Move) Right
- Action Scene: Inside the vortex, press Up and Down on the Control Pad as they are displayed to dodge the debris.
Taro makes it through the vortex to the palace.
- 見る (Look)
- 話す (Talk)
Shinnosuke is still at the palace. He was told to wait here for Taro, and he hands over the bracelet. Now they must hurry to the Shiraishi Fountain, where the princess awaits. Taro jumps on Shinnosuke's back and they swim away.
Final Story: Chapter 1

Taro arrived at the Shiraishi Fountain and met Princess Oto of the Ryukujin. She said they must both go through the reincarnation process together if they are to stop the Avatar of Darkness from taking over the world. They enter the craft that will take them back to the surface world, but because the process has been rushed the craft loses control. The reborn princess appears in a bamboo field and the reborn Taro ends up trapped in a bowl that floats downstream, neither of them have any memories of the dangers behind or ahead of them. They are found by an elderly, childless couple and named Donbe and Hikari.
Donbe and Hikari are raised by the elderly couple for 8 years. One day they discover an unusual bracelet and necklace in a mysterious saucer hidden behind a waterfall. They return to the village just in time to see the Oni appear and steal their parents' souls. Their adventure began, and on their travels they met a dog and a monkey. Now at the Shiraishi Fountain they have found Ohana the pheasant.
- Enter the names for the human heroes (press START without entering anything to choose the default names of Donbe and Hikari).
- 見る (Look) ひかり (Hikari)
- 見る (Look) りんご (Ringo)
- 見る (Look) まつのすけ (Matsunosuke)
- 見る (Look) おはな (Ohana)
- 見る (Look) まわり (Surroundings)
- 見る (Look) 泉の中 (Inside the Fountain)
- 話す (Talk) おはな (Ohana)
- 話す (Talk) ひかり (Hikari)
- 話す (Talk) おはな (Ohana)
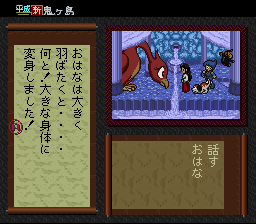
The Shiraishi Fountain shows them a mysterious island. Ohana tells them that is Onigashima, where the Avatar of Darkness and the Oni come from, and where the harvested souls are sent. Ohana is able to grow to a gigantic size, and offers to fly them to the island.

- 移動 (Move) Up
- 移動 (Move) Right
- 移動 (Move) Right
- 移動 (Move) Down
- 移動 (Move) Up
- 移動 (Move) Down
- 移動 (Move) Down
- 移動 (Move) Right
- 移動 (Move) Down
- 見る (Look) まわり (Surroundings)
- 見る (Look) 何か (Something)
- 話す (Talk) まつのすけ (Matsunosuke)
- 移動 (Move) Down
- 移動 (Move) Down
- 話す (Talk) おしの (Oshino) 鬼の事 (About the Oni)
The strange object that Matsunosuke fetches from the rocks and throws in the ocean turns out to be Oshino the jellyfish. The island was created when the seabed rose up, and Oshino had dried out on the rocks. He tells them about a sword that was lost years ago that will help them fight the Oni that guard the island.
- 移動 (Move) Down
- 移動 (Move) Right
- 移動 (Move) Right
- 移動 (Move) Down
- 話す (Talk) りんご (Ringo)
- 移動 (Move) Down
Ringo finds the sword and digs it up for Donbe. Now they can fight the Oni that guard the island.

- 移動 (Move) Right
- 移動 (Move) Down
- 移動 (Move) Up
- 戦う (Fight)
- Action Scene: You and the Oni take turns hitting each other. A menu of options appears that auto-scrolls, and you have to time your button press to hit the red options only to attack or defend. If you hit a blue option then you fail and will either miss or take a hit. You can call on your animal friends to perform status changes, and they will also appear at the start of most attacks to help in different ways. The Oni can cause status changes, making the menu options change direction, turn random or making the options invisible for two turns. The Oni will only take two hits.
- 移動 (Move) Left
- 戦う (Fight)
- Action Scene: The same as above, but now you must fight two Oni at the same time. It is worth clearing one Oni at a time to reduce the chances of being hit by status changes.
- 移動 (Move) Up
- 戦う (Fight)
- Action Scene: The same as above, but now you are fighting two regular Oni and a Red Oni. The Red Oni takes more hits than the regular Oni, and it is also able to use a new status change that makes all of your menu options blue (forcing Donbe to take hits for two turns). Try clearing the regular Oni before taking on the Red Oni.
The heroes reach the stone where the souls are being trapped. Donbe decides he is going to create a diversion.
- 話す (Talk) ひかり (Hikari)
- 移動 (Move) Right
- Action Scene: Walk forwards without being seen by the Oni as they turn. Press Down to duck behind the low rocks and Up to hide Donbe's hair for when you are stood behind the narrow rocks.

Donbe reaches the other side of the Oni and calls out. They all start to give chase, led by the baboon Bunkichi. They reach the edge of a cliff where Ohana appears. Bunkichi lunges forward to grab Donbe before he can escape, but misses and falls down the cliff into the ocean.
Final Story: Chapter 2
Hikari, Matsunosuke and Ringo reach the rock where the harvested souls are kept.
- 話す (Talk) りんご (Ringo)
- 聞く (Listen)
- 話す (Talk) りんご (Ringo)
- 話す (Talk) まつのすけ (Matsunosuke)
Thanks to Matsunosuke, the rock breaks open and the trapped souls come streaming out. Two of the souls stop and talk to Hikari. It's the elderly couple that raised them! They are heading back to the village.
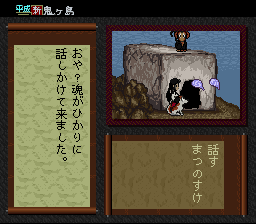
- 移動 (Move) 中へ (Inside)
- 話す (Talk) りんご (Ringo)
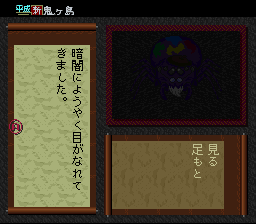
- 話す (Talk) 誰か (Somebody)
- 見る (Look) 足もと (At Own Feet)
- 話す (Talk) クモ (Spider)
- 話す (Talk) クモ (Spider)
- 見る (Look) クモの作品 (Spider's Work)
- 爆発してる (Explosion)
- 美しい (Beautiful)
Inside the rock it is pitch black. A voice calls out and it's a spider. He has been creating some amazing pieces of art using his webs and he asks for your opinion on a picture of a Mountain Witch and a picture of the Dragon Palace. When you say you find the second beautiful he is delighted and opens up a hole in the ground, saying his inspiration is down there.
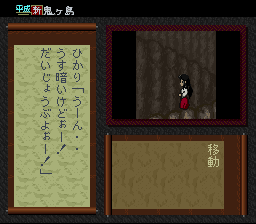
- 移動 (Move) Down
- 移動 (Move) Left
- 移動 (Move) Down
- 移動 (Move) Left
- 移動 (Move) Down
- 移動 (Move) Right
- 移動 (Move) Down
- 移動 (Move) Right
After walking through the underground maze, Hikari reaches the Dragon Palace. Inside there is a door on the right, a broken mirror on the left and the Mountain Witch sits at the other end of the room.
- 見る (Look) 竜宮城 (Dragon Palace)
- 移動 (Move) Up
- 移動 (Move) Right
- 見る (Look) トビラ (Door)
- 移動 (Move) Left
- 移動 (Move) Left
- 見る (Look) まわり (Surroundings)
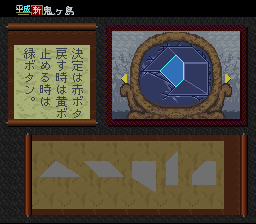
- 見る (Look) 鏡 (Mirror)
- はい (Yes)
- Action Scene: Place the pieces of the mirror back into the hole in the right place to mend it (solution is in the screenshots to the right).
The mirror is magical, and answers Hikari's questions about the palace. She can use the necklace to open the room on the right, and the Mountain Witch is currently in possession of the treasure box.
- 話す (Talk) 鏡 (Mirror) 右の部屋 (Room on the Right)
- 移動 (Move) Right
- 移動 (Move) Right
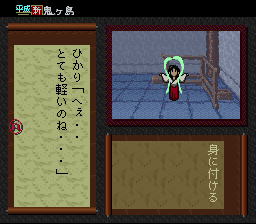
- 使う (Use) 首飾り (Necklace)
- 身に付ける (Wear)
Hikari puts on the Plumage of Defense, which she wore as Princess Oto. It is a lot lighter than she thought it would be.
- 移動 (Move) Left
- 移動 (Move) Up
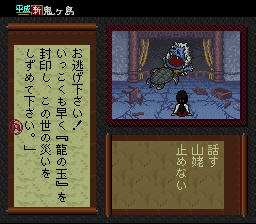
- 話す (Talk) 山姥 (Mountain Witch)
- 止めない (Stop)
The Plumage of Defense wraps around the Mountain Witch and squeezes, forcing her to spit out Shinnosuke the turtle. He quickly hands Hikari the box that will seal the Avatar of Darkness once again, but the witch breaks out of her bonds and begins to chase.
- Timed Action: 逃げる (Escape) Down
- Timed Action: 逃げる (Escape) Right
- Timed Action: 逃げる (Escape) Up
- Timed Action: 逃げる (Escape) Right
- Timed Action: 逃げる (Escape) Up
- Timed Action: 逃げる (Escape) Right
- Timed Action: 逃げる (Escape) Up
- Timed Action: 逃げる (Escape) Right
- Timed Action: 逃げる (Escape) Up
- Timed Action: 逃げる (Escape) Up
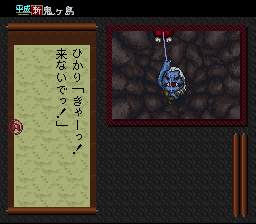
Hikari climbs the spider silk rope back out of the cave, but the Mountain Witch grabs on as well and begins to climb after her. Hikari just managed to pull herself to safety when a terrible earthquake strikes the island. The rope snaps and the Mountain Witch plummets back down the hole.
They all rush outside in time to see a giant shadow looming over Donbe and Ohana.
Final Story: Chapter 3
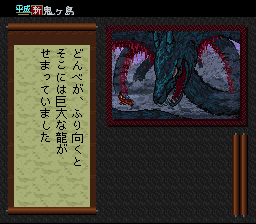
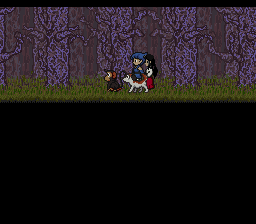
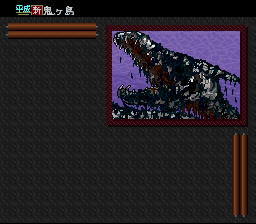
Behind Donbe and Ohana, a huge cloud of smoke appears and clears, revealing the giant dragon, the Avatar of Darkness. They have no time to escape.
- Timed Action: 移動 (Move) Up into the dragon's mouth when it is open.
Donbe successfully makes it inside the dragon without being harmed. He has to remove the Dragon Ball that keeps this terrible beast alive.
- 話す (Talk) 腕輪 (Bracelet)
- 見る (Look) まわり (Surroundings)
- 見る (Look) まわり (Surroundings)
- 移動 (Move) any direction
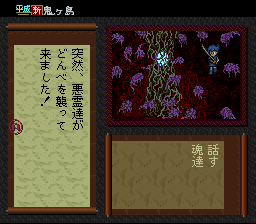
As soon as Donbe tries to move inside the dragon, he is attacked by an evil spirit.
- Action Scene: You fight this spirit the same way as you fought the Oni in Chapter 1, only you are unable to use any of your animal friends. The spirit can also create a status change that makes your responses time limited. It will take 8 hits before being defeated.
- 話す (Talk) 腕輪 (Bracelet)
- 話す (Talk) 腕輪 (Bracelet)
- 移動 (Move) Left
- 話す (Talk) 腕輪 (Bracelet)
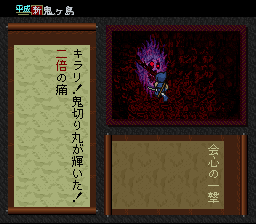
- 取る (Take) 何か (Something)
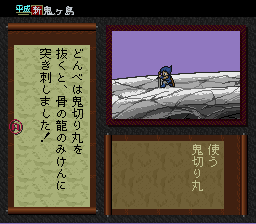
- 使う (Use) 鬼切り丸 (Onigirimaru)
- 話す (Talk) 魂達 (Spirits)
The Dragon Ball is encased in something, so Donbe draws his sword and cuts into it. Evil spirits come flying out of it, each having sold their souls to the dragon and are ready to stop Donbe from taking the Dragon Ball.
- Action Scene: Pres A, B, X or Y when prompted to defeat each of the evil spirits. They appear in increasing numbers.
With the spirits defeated, Donbe takes the Dragon Ball and everything starts to shake. The dragon is dying, his flesh falling from his bones. Donbe watches as the ground opens up beneath him and falls.
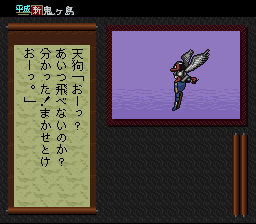
The others watch the dragon crumbling in the sky, and then they see Donbe falling. Ohana is unable to fly after hurting her wings in the clash with the dragon. At that moment, the Tengu appears and flies off to rescue Donbe.
They all stand on top of the cliff and watch as the skeleton of the Avatar of Darkness falls into the pit below them.
- 話す (Talk) ひかり (Hikari)
- 話す (Talk) りんご (Ringo)
- 話す (Talk) まつのすけ (Matsunosuke)
- 話す (Talk) おはな (Ohana)
- 話す (Talk) 天狗 (Tengu)
- 移動 (Move) Right
- 話す (Talk) ひかり (Hikari)
- 見る (Look) 谷底 (Bottom of Ravine)
- 話す (Talk) ひかり (Hikari)
- 移動 (Move) Right
Just as they were about to leave, the skeleton of the Avatar of Darkness rises up again. Hikari and the animal friends manage to escape, but Donbe is trapped on the cliff as it crumbles.
- Timed Action: 移動 (Move) Left (Choose Quickly)
- Timed Action: 移動 (Move) Left (Choose Quickly)
- Timed Action: とぶ! (Jump) (Choose Quickly)
- Action Scene: Press A with good timing to jump over the holes in the ground, and then on to the dragon's bone tail.
Donbe runs across the back of the dragon. When he reaches the skull, the dragon calls out "Why am I not accepted? If all humans became Oni, then there will be no more confusion or hardship, they will be liberated from anger, sadness and envy, and that will mean an end to all war!"
Donbe replies "Be silent! I will not be talked around. That is the kind of selfish lie that only someone who can live on human souls would think up. Now return to the world where you belong!"
- 歩く (Walk) Left
- 使う (Use) 鬼切り丸 (Onigirimaru)
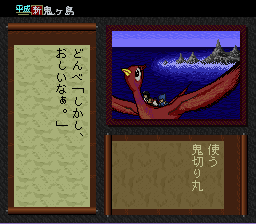
Donbe pushes the sword into the dragon's head and the skeleton crumbles into nothing. Donbe is thrown into the air and lands on Ohana, who has strength in her wings again. On her back is Hikari, Ringo and Matsunosuke, while the Tengu follows behind.
- 見る (Look) まわり (Surroundings)
- 見る (Look) まわり (Surroundings)
- 見る (Look) まわり (Surroundings)
The heroes all escape. Hikari announces that she will return to the Dragon Palace where she belongs. Donbe is also invited, but he declines, saying he was happy for 8 years, and he wishes to return to the village and live with their parents. They realise that their time together is now over.
- Timed Action: The Tengu will appear, and give you a long quiz about the game. If you get all of the questions right then you will be crowned "King of Heisei: Shin Onigashima" and unlock the final part of the Famicom Disk System game.
There is a rumble and they look behind them. Onigashima crumbles into the ocean forever and the staff credits roll.
The End
Congratulations! You have completed Heisei: New Onigashima.